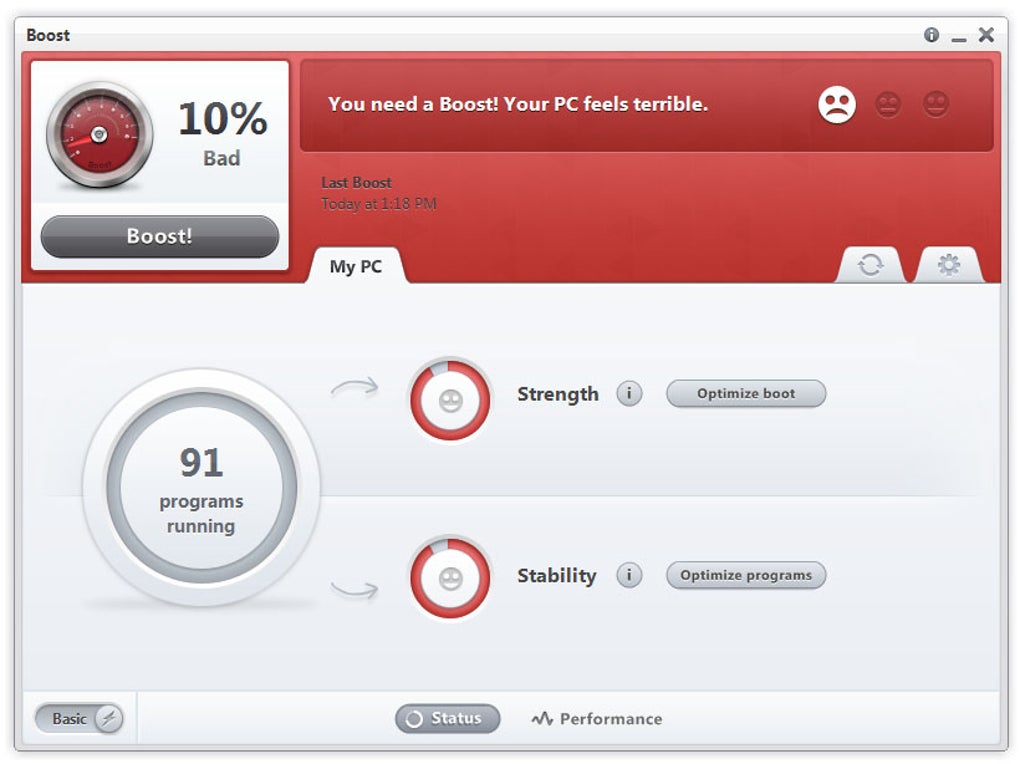
Computer running slow? If you’re noticing a significant drop in processing speed and startup time, it’s time to take some actions to help out your poor PC. Except for hardware issues like failed drivers or a broken power supply, there’s no reason that an up-to-date computer should ever get slower than it was right out of the gate. The slow-down occurs as a result of bloating startup menus, abundant downloads and unnecessary programs, and a handful of frustrating default settings you’ll need to fine-tune.
This is not a list about how to fix these problems specifically on Windows 10, but is rather an overall list of functions you can cull or engage on any OS. For ways to speed up Windows 10 specifically, check out our articles here and here. For simplicity’s sake, however, we will be navigating with Windows 10 in our examples.

Each of our solutions in this guide will require minimal-to-zero background knowledge, so don’t worry if you’re not a computer geek. Everything we’re about to list is readily accessible right after booting up your PC. Let’s get started.
5 ways to make your computer run faster
1. Disk check, disk cleanup
Running a Disk Check will scan a specific drive for unused space or corrupt files. While a virus scan will eliminate malware (which could very well also be slowing down your PC!), the Disk Check goes further by also purging that unused space that could be bogging down your processing speed.
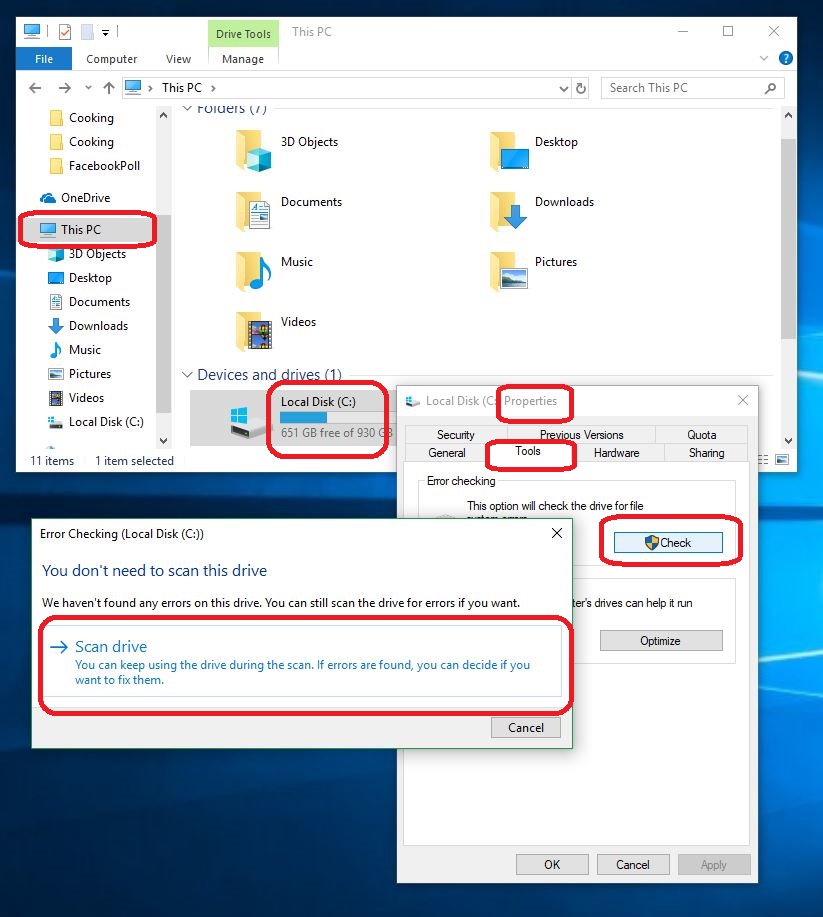
To initiate a Disk Check, open your File Explorer and navigate to This PC. You should see your drives listed under Drives and Devices.
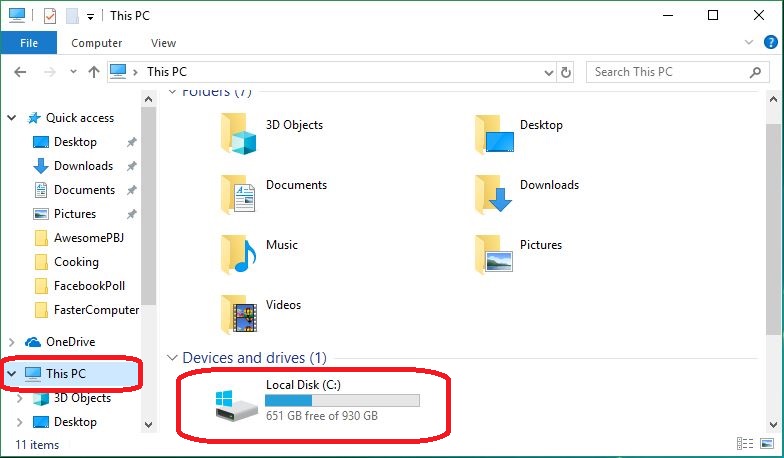
By the way, this is a handy way to tell how much space you have left on your particular drive. If it’s full to the brim, that might help explain why things are running so slowly! Right-click on a disk (like your C: drive) and select Properties. This will open up a menu with seven different tabs up top. Click the one that says Tools. Inside the Tools tab, click Check, then say Scan drive.
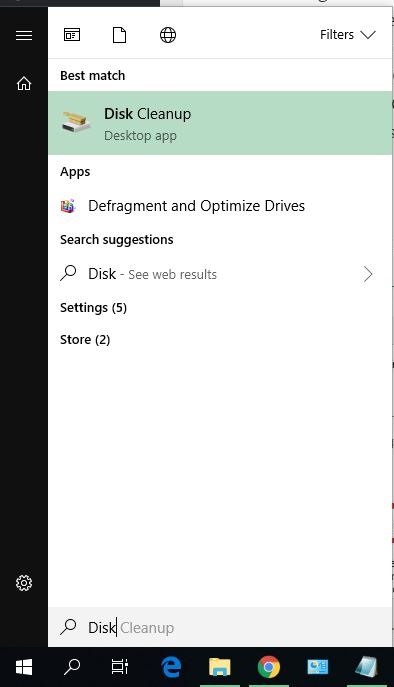
The scan might take a little while (upwards of 30 minutes if you haven’t performed this before), but it’ll be worth it. Depending on how cramped your drives were, you may even notice an improvement immediately. If not, then you should try a Disk Cleanup. This is as easy as pressing the Win key and typing Disk Cleanup. Click the top option (should be a desktop app). This will scan your PC for systems and files that can be safely removed.
Let your PC complete its scan, then you’ll be transported to this window:
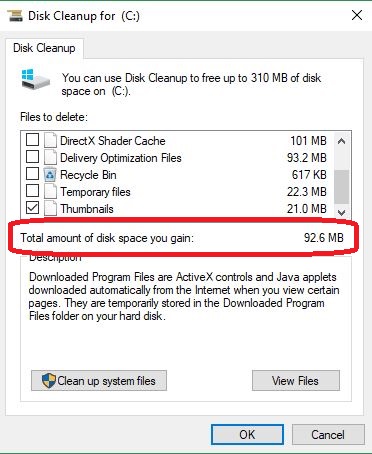
Click OK, or select more files if you feel comfortable removing them. As you can see, our Disk Cleanup eliminated over 90 MB of junk!
Windows Defender: Can it protect your PC?
Find out now2. Defrag your drives
While we’re specifically working on cleaning the drives of your PC, you can also go ahead and defrag them. What this will do is reorganize the files on your hard disk so they can be accessed faster by your PC’s subsystems. To defrag, go back to your File Explorer (Win+E for a shortcut) and right-click again on your drive (C:). Open the Properties menu and go to the Tools tab. Instead of hitting Check this time, though, hit Optimize.
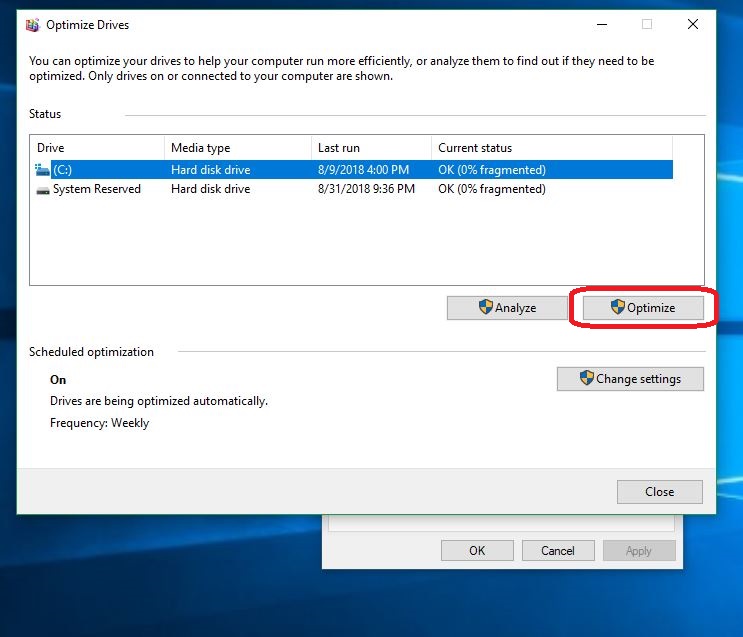
It will open a window that looks similar to the picture above. Click the Optimize button and let your computer work its magic. You’ll notice that towards the bottom of the window it says that your PC is scheduled by default to optimize every week. This means that you shouldn’t need to run a defrag unless you’re specifically hit by a sudden slow-down. If you wish, you can also adjust the frequency at which your computer defrags: Daily, weekly, or monthly. We recommend keeping it on default, but if you want to adjust it just click Change Settings.
You can check out this video here for a more complete defragging walkthrough:
Be warned that the defrag will make about seven-ten passes, so this could take 30-60 minutes.
3. Remove Startup programs and services
This is a big one. As you download and install more programs, some will default to be activated upon booting up your computer, and then will continue to run in the background as you carry on your tasks. Obviously, if those are big programs they’ll eat up a lot of your PC’s processing power, slowing you down. The best bet is to keep your startup programs to a minimum, if you keep any at all.
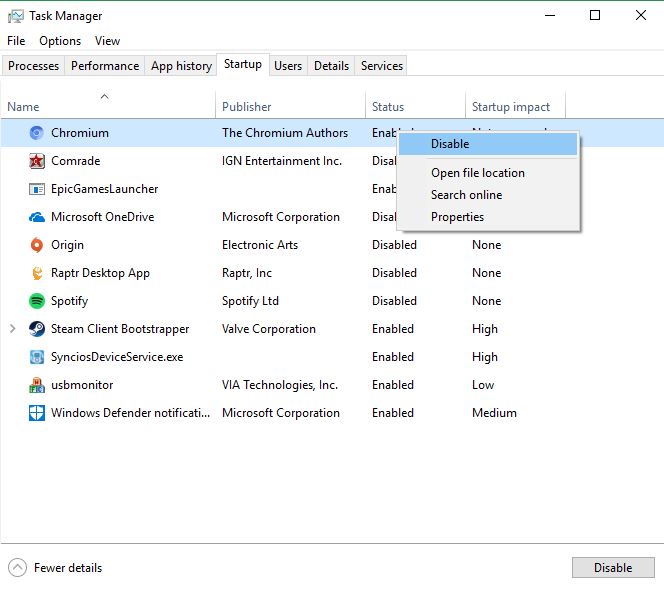
To find out which programs are engaging from booting up, open your Task Manager (Ctrl+Shift+Esc) and navigate over to the Startup tab. Anything here that’s listed as Enabled means your computer is running the program as soon as you log in. To disable them, right-click and select Disable. You should notice your booting times are dramatically faster.
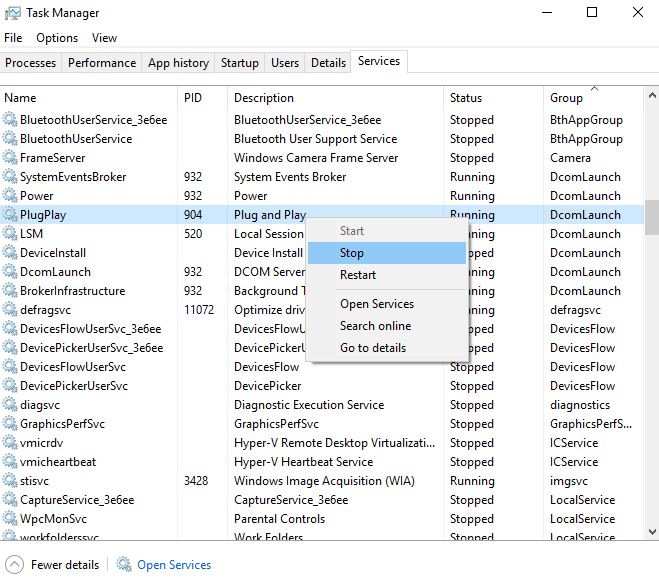
If you found you had a lot of programs you didn’t even know were in the Startup menu, it’s likely your Startup Services are affected as well. Still under your Task Manager, open the Services tab. Scroll down here and if anything comes up as Automatic it’s still running at Startup, even if you Disabled it from the previous menu. Nasty. Right-click on the task and say Stop and it should put it down for good.
4. Power Settings
This one’s pretty easy, but the setting can be particularly sneaky if you’re working on a laptop. All computers have a default Power Setting – either Power Saver, Balanced, or High Performance. Laptops are known for switching to Power Saver when they’re not plugged into a direct power source to make them last longer on battery, so be sure to check this one if your laptop is suddenly running slower than you remember.

The Power Settings can be found by navigating to your Control Panel > Hardware and Sound > Power Options. If you can’t find Control Panel, just type it in after pressing the Win key. If you want your computer to be running as fast and as smoothly as possible, keep it set on High Performance. Alternatively, if you want your computer to run less hot, it’ll be happier on Power Saver. Just be sure to turn it off if you’re doing a more taxing process like playing a video game or watching a bunch of 4k videos.
You can also click on Change plan settings if you want to specify aspects of your PC’s performance economy such as screensavers, turning off your display, or sleep mode.
5. Performance Options
Keeping in line with adjusting power settings, you can also fine-tune your computer performance from this menu:
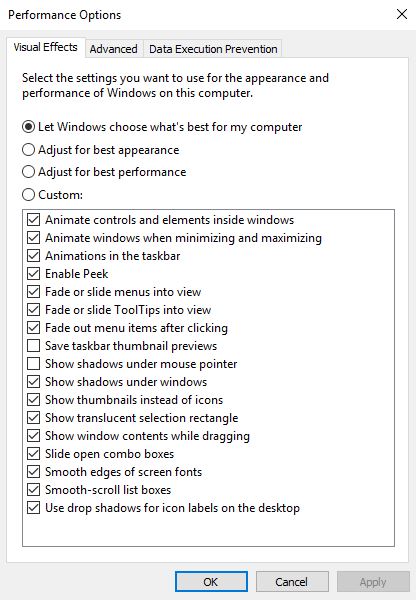
This menu can be found under your System tab via Control Panel, or can simply be opened by pressing Win and typing ‘performance.’ Click the top option, which will say something like “adjust the appearance and performance of Windows.” From here you can customize your options, or you can quick-fix by selecting “Adjust for best performance.” Unless you’re running an older computer you’re probably not going to see a massive difference from toggling this function, but we wanted to include it nonetheless just so you can maximize your PC’s performance.
There are more advanced options for speeding up your PC that you can initiate through the Command Prompt, such as checking your drivers’ health and memory, but we wanted to give you a quick guide of easy first steps. For more ideas and strategies, or for detailed walkthroughs of the processes we mentioned here, check out these videos: