Green screen technology has had a major impact on the movie and television industry. However, these days you don’t have to work at a large production company to work with green screens. These screens are now available in handy sizes for personal use, and you can even make them yourself with a bit of know-how.
That popular YouTuber you watch playing video games probably has a green screen setup that he uses while filming. So, here’s what Green Screen is and how to use it.
What Is a Green Screen?
Green screen, or chroma key compositing, is a visual effect and post-production tool that allows you to replace certain aspects of the video. The most well-known use is to replace the background behind the actors and foreground with another background. This is how you can make it look like superheroes are on other planets or flying through the sky without shooting the film in these impossible locations.
The green screen procedure is not only limited to the background, although this is the most popular use. You can also use green screens to hide certain parts of an actor, such as an arm or leg, if they need to portray a disabled individual. Or you can use a green screen on an actor if you need to change how the actor looks.
For example, green screen masks were used in the movie ‘The Hobbit so that the post-production crew could alter how the faces of some of the humanoid creatures looked.
How to Buy a Green Screen?
If you’re wondering how to buy a green screen, you’re in luck. While it is possible to make your own green screen if you truly want perfect results, we suggest spending some money on a good quality screen.
These useful videography tools are now widely available, and just a quick search on Amazon or similar sites will yield a wide range of results for you to choose from. This might make choosing a green screen challenging. However, here is how to buy a green screen that meets your needs.
What to buy
Step one: get a green screen (also known as a chroma key)
The most direct way to accomplish this task is by purchasing a green screen yourself. There are a few good options from our old pal, Amazon. (If you can’t see these suggestions, please turn off your adblocker for a sec.)
When looking at these products, or others, you want to keep the following factors in mind:
1. What is the material? Much of using a green screen comes down to wrinkles and washing. A few video editing programs can improve the green screen quality in post-production, but many free applications – like iMovie – have more difficulty working through those defects. You can make your life easier by finding material that washes easily and remains smooth.
2. What size? Bigger isn’t always better: the larger the screen, the harder to work with. Of course, the smaller a screen, the harder it is to frame your camera shot. If you’re buying a green screen “just in case,” consider the average sizes available: 6×9 or 6×15 feet (these are often used for photoshoots). If you’re completing a specific project, measure the area in need of coverage and choose based on that information.
3. How’s it hangin’? Some green screens come with a setup frame. Some come as a collapsible backdrop. Others are simply the screen itself. We included examples of each from Amazon, above. What do you need?
4. Logistics. What’s the price, how’s it being shipped to you, and when will you need it? These are just the normal considerations when ordering/buying a product.

How to film yourself for a YouTube gaming channel
Read Now ►Finding a green screen
Remember, there are other options: our local library provides a “studio” with excellent lighting and a back wall that is painted vibrant green. If you look around your area, you never know where a usable screen will appear! Of course, there is a slight downside: you can’t alter someone else’s screen or studio without asking, and it may not fit the specifications of your project. But then again, it might!

How to edit and share video game footage on Youtube
Read now ►How to Use a Green Screen?
Now that we’ve shared what a green screen is and how to buy one, let’s look at how to start using a green screen.

Step 1: Set up Your Screen
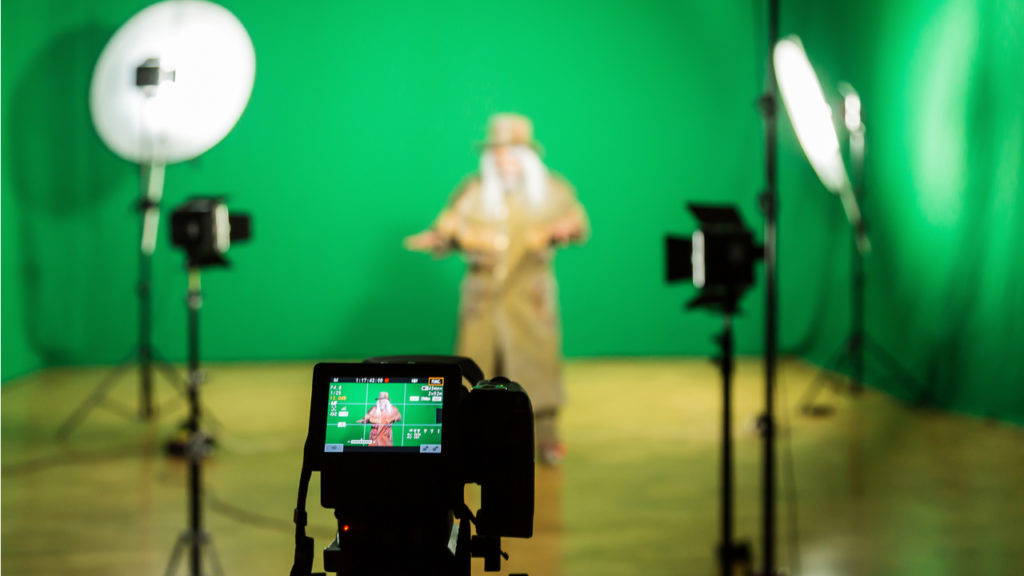
First, you need to set up your green screen. If you have one with an attached frame, use this to support the screen. Otherwise, you’ll need to attach it to some sort of frame or hang it from the wall. There should be no wrinkles, folds, or tears on your screen. Also, the screen has to take up the entire background of your shot.
Step 2: Use Appropriate Lighting
Lighting is equally important, and not just on the subject you are shooting, but the screen itself. The best type of lighting will come from above to avoid making any shadows, and it will be diffused so that it doesn’t cause any glares. Test the lighting with a moving subject before starting to film to ensure there are no patches or shadows.
Step 3: Place Your Subject in Front but Away from the Screen
Your subject or actor has to be in front of the screen, but more forward. You don’t want your subject or actor to be right up against the screen, as this could cause a reflective green glare onto your subject, which will alter the colors in post-production.
Step 4: Film Your Video
Now that everything has been set up, you can finally start filming. Depending on the project, you might want to take a few takes to ensure you get enough footage to work with.
Step 5: Edit Entire Video
Before altering the green screen, first, edit the entire video. This is an important step as you want to save yourself time by only adjusting the green screen that will be used in the final cut. You don’t want to waste time editing green screens that you won’t even be using.
Step 6: Edit the Green Screen and Replace the Background
Now that you have a rough cut of your final video, you can start editing the green screen and replacing the background.
How to Edit With Green Screen?
Now that you’ve filmed your video using the green screen and you’ve gotten the basic editing done, let’s look at how to edit with the green screen.

Step 1: Use Your Preferred Editing Software
Upload your video to your preferred video editing tool. You can use Adobe Premiere or any other video editor you prefer. Once you’ve imported your video, use the timeline to navigate to the part in the video where you want to change the green screen.
Step 2: Use an Ultra-Key Tool (or Similar) to Remove the Green Screen
Depending on your video editing program, you should find the ultra-key tool under your chosen program’s ‘Effects’ tab. With the ultra-key tool selected, your mouse pointer should look like an eye-dropper. Now click on the green color that you want to remove. This should remove all the green of the same hue from the video.
Step 3: Add a New Background
Now you can create a new layer beneath the subject and add your new background to this layer. By doing this, your video will now have a completely different background. It’s a good idea to make any alterations or adjustments to the background before adding it to the layer, and then you can make any minor changes later.
How to Use Green Screen on iMovie
iMovie makes it very easy to edit out a green screen. Let’s take a look at how to use green screen on iMovie.

Step 1: Add the New Background Clip
This process works a bit in reverse. You first need to add the clip of the new background that you want for your video. Move the playhead over the background clip.
Step 2: Add the Green Screen Clip
Now you can click on the ‘+’ button and locate your green screen clip.
Step 3: Select ‘Green/Blue Screen’
With your green screen clip selected, click on the more options button represented by three dots. In the menu that appears, tap on ‘Green/Blue Screen.’ Your clip will now be added to the timeline in a new layer on top of the background layer.
Step 4: Remove Background
To remove the green screen, you can tap on ‘Auto’ in the viewer to automatically remove the background of the top layer. Alternatively, you can also tap on the color (in this case, green) to remove that specific color.
Last Rites
We covered a few simple concepts. To better learn, remember, and understand these ideas and more, create a few videos yourself with green screen! You may be surprised by the level of variability and personality that can be achieved: every user applies green screens differently, but the tool itself leads to interesting results across the board.
We hope this helps you get started, have a blast!


