Capture the Magic: Create Your Perfect Family Album with Adobe InDesign This Holiday Season!
Create and export a photo album easily with Adobe InDesign

- November 29, 2024
- Updated: November 29, 2024 at 11:43 AM
Facing the task of designing an album can seem complicated, especially if you have never used professional design software. This is where Adobe InDesign could be of great help. Although it may sound somewhat intimidating at first, InDesign is more accessible than it seems, even for beginners.
With some basic concepts and a bit of creativity, you’ll see how InDesign will help you shape a charming album that also looks professional.
First step: create your document
Before opening InDesign, come prepared. Organize which photos you want to include and their orientation, and also think about the style it will have: minimalist, traditional, loaded with details… In short, think about how it will be. This will help you save a lot of time and avoid so much trial and error. Once we have our material organized, we can get to work.
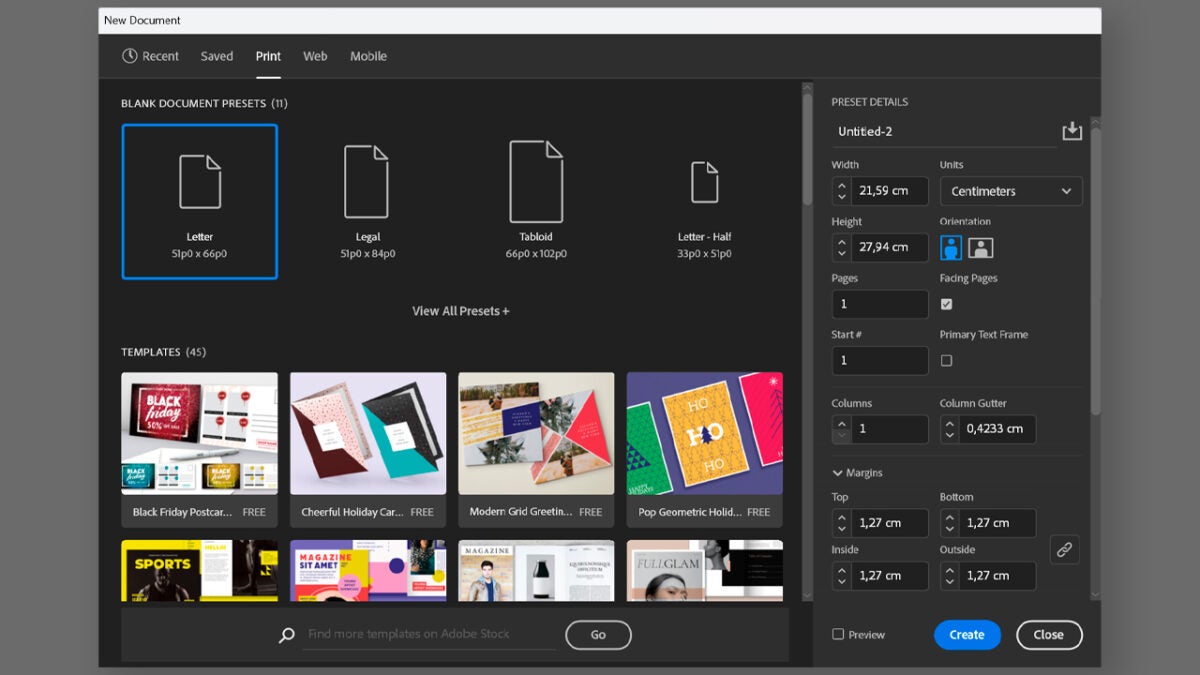
- Open InDesign and select New File. On the start screen, you will also have several presets at your disposal to start with specific sizes and resolutions. If you want, you can start directly by selecting one of these presets.
- On the New Document screen, you will need to set the album size, the number of pages, the margins, and the bleed. Sections like the number of pages can be modified later without any issues.
- The bleed is important to consider if you are going to print your album. It is an extra margin that extends beyond the final edge and ensures that images and text remain intact when trimmed. Adding a few extra millimeters (3 to 5 mm) would be enough to ensure everything goes well.
- If you want to add or delete pages, go to Window and click on Pages (F12). This will appear in the properties panel, which you will usually see on the right. Then, click on Create new page (+). From Pages, you can navigate through the file and quickly jump between spreads. You can also go to a specific page by typing its number from the status panel located at the bottom left.
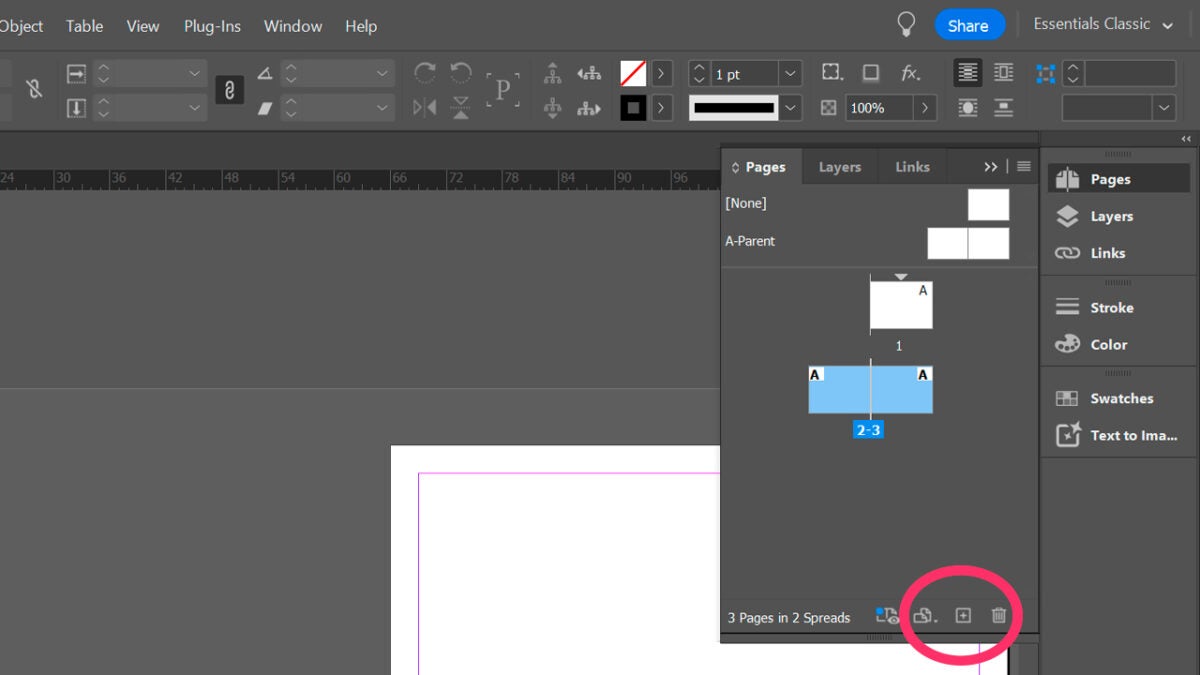
- It is important that you also know what a master page (parent page) is and how they work within InDesign. In summary, we could describe it as a template that is applied to multiple pages to maintain a consistent design. If you have elements that are constantly repeated in your document, setting up master pages will help you avoid placing each item manually.
- You will find the master pages at the top of the Pages panel. To create a master page, go to the Pages panel, right-click on the A-Parent page, and select New Parent. Now, you will need to set up some essential aspects, such as the prefix that identifies the page, the name, its size, and its orientation. To edit the master page, simply double-click on it from Pages.
Second step: add photos and text to your album
We already have our document created; it’s time to add the text and the images:
- To add text, use the Type (T) tool and click and drag over the area of the page where you want to write. You can also double-click on an existing text frame.
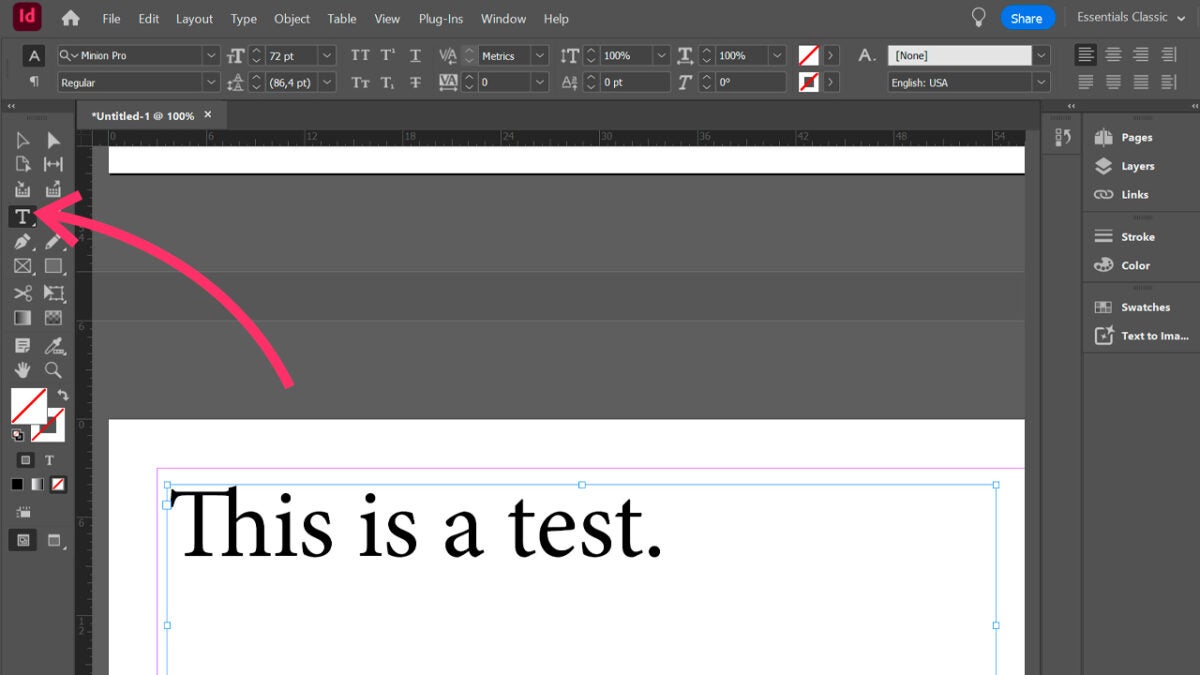
InDesign allows you to add placeholder text to see how your final document would look when placing real texts. Right-click on the text box and select Fill with Placeholder Text.
Now, it’s time to add the images. After all, what would an album be without its photos?
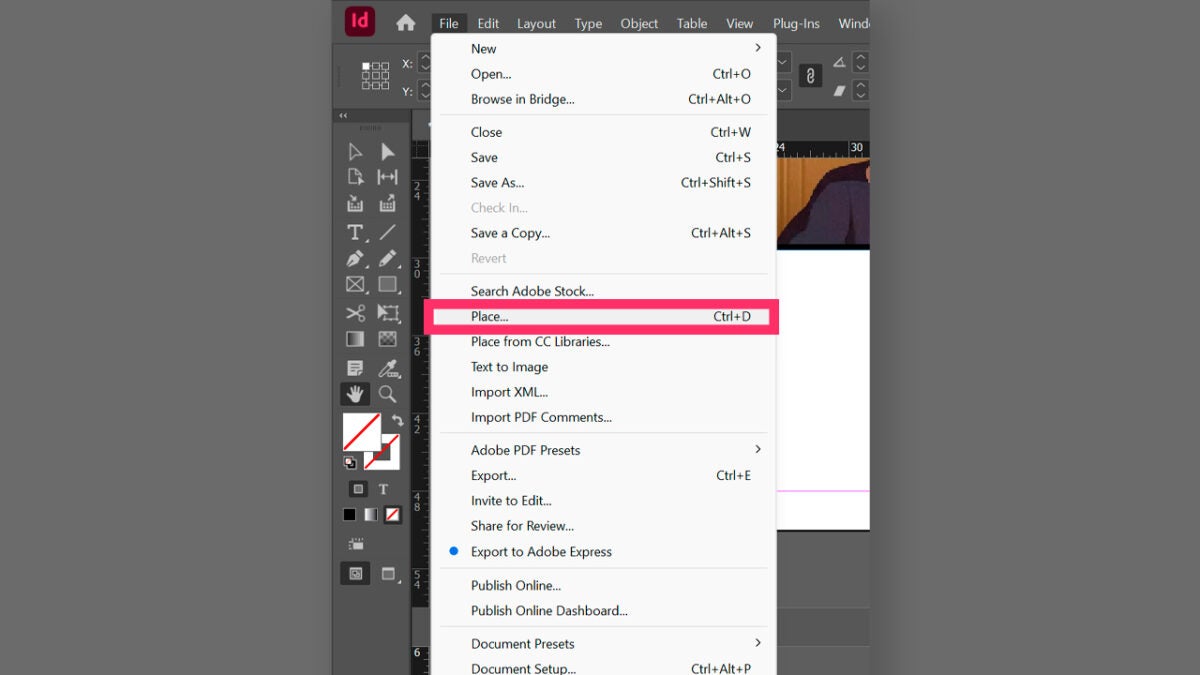
- Go to File and then, Place. Choose from your computer the image or images you want to insert. You can also import files with the extension PSD, PDF in layers, AI or INDD. Before adding the images, check the option Image Import Options and then, select OK. This will help you, among other things, to preview a page before placing it.
Import your photo album
Once you have your album, it will be time to import it. In this case, we will prepare the document as if we were going to take it to print. Before exporting, check that everything is in place, that the images have the correct resolution (300 dpi or more), and that the margins and bleeds are properly set.
The best option will be to export it to PDF and use the high-quality Print settings. Go to File and then, Export. Choose a name and where the file will be located. The extension will be Adobe PDF (Print).
In Windows, you will need to select Save As and in macOS, Format. In the panel that appears, you can use options already predefined by Adobe from the PDF Preset Menu, such as [High Quality Print]. You can also customize it to your liking and modify the sections you need. To finish, select Export.
Artist by vocation and technology lover. I have liked to tinker with all kinds of gadgets for as long as I can remember.
Latest from María López
You may also like

Apple La Vaguada: this is how its inauguration went
Read more

The game that has been accused of plagiarizing Horizon Zero Dawn… But it is more similar to Palworld
Read more
The new 3D Tools in Adobe Illustrator are revolutionary
Read more

Inside YouTube’s 2024 Spotlight: Top Creators, Surprising Stats, and Record-Breaking Videos
Read more

Our Mac can freely convert any photo into text
Read more

Palworld will change next December: its new island will be six times the size of the previous one
Read more