The new 3D Tools in Adobe Illustrator are revolutionary
- November 29, 2024
- Updated: November 29, 2024 at 11:15 AM
Until very recently, incorporating 3D objects into your illustrations required at least switching between applications or dealing with very complex programs. But now, with the new 3D features of Adobe Illustrator, the process is not only possible but also much more accessible.
From Illustrator, you can convert flat designs into 3D objects and even manipulate perspectives and materials. If you want to know how you can incorporate 3D into your designs, stay with us a little longer.
This is how you can transform your designs with 3D effects
Transforming your drawings into three-dimensional objects is a process we can do from Illustrator, without the need to combine it with other programs. Here, our starting point will be a vector drawing. If yours is flat, you will need to convert it to vectors. You can do it in the following ways:
- By hand: Import your drawing into Illustrator from File> Place. Now, use the Pen (P) tool to draw over your sketch and create the vectors. If you want to make curved strokes, hold down the left mouse button and move it over the canvas.
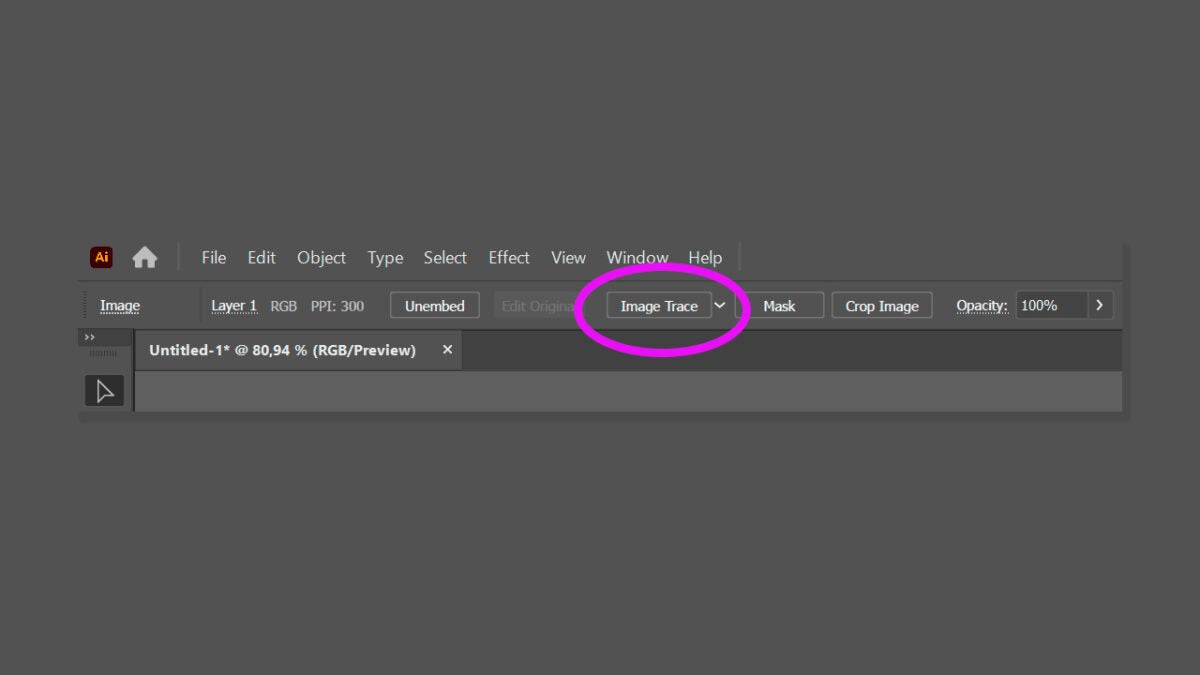
- Image Trace: To make this option appear, select your drawing with Selection (V) and click on the Image Trace option you will see in the top bar, as shown in the image. If you don’t see this bar, go to Windows and click on Control.
These are just some of the ways we propose for vectorizing images. The vast number of options and tools that Illustrator offers will allow you to reach the same goal in different ways.
To start applying 3D effects to our vectors, we need to access the 3D and Materials panel, which you will find in Windows > 3D and Materials. From here you can make use of options like Extrude and Rotation, Lighting, Shadows and much more. Once again, remember that effects cannot be applied to flat objects.
- Select your vector design with the Selection (V) tool.
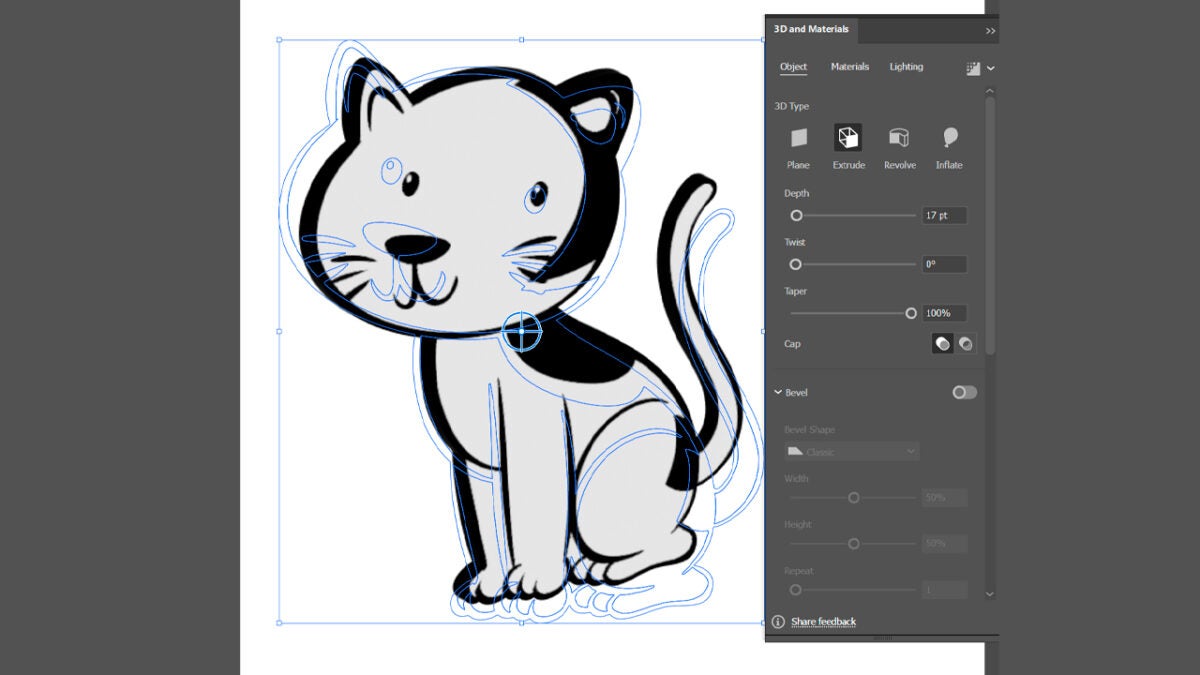
- From the 3D and Materials panel, choose the effect you want to apply. In our case, we have chosen Extrude.
- Adjust the Depth, Twist, and Taper fields according to your preferences. You can also rotate the object and change its perspective with the Rotation and Perspective options.
Now that our design has depth, we can add materials. In the Materials section, you will find many belonging to Adobe Substance 3D, although you can also add your own materials by clicking on the “+” icon. After applying a material, experiment with lights and shadows from Lighting:
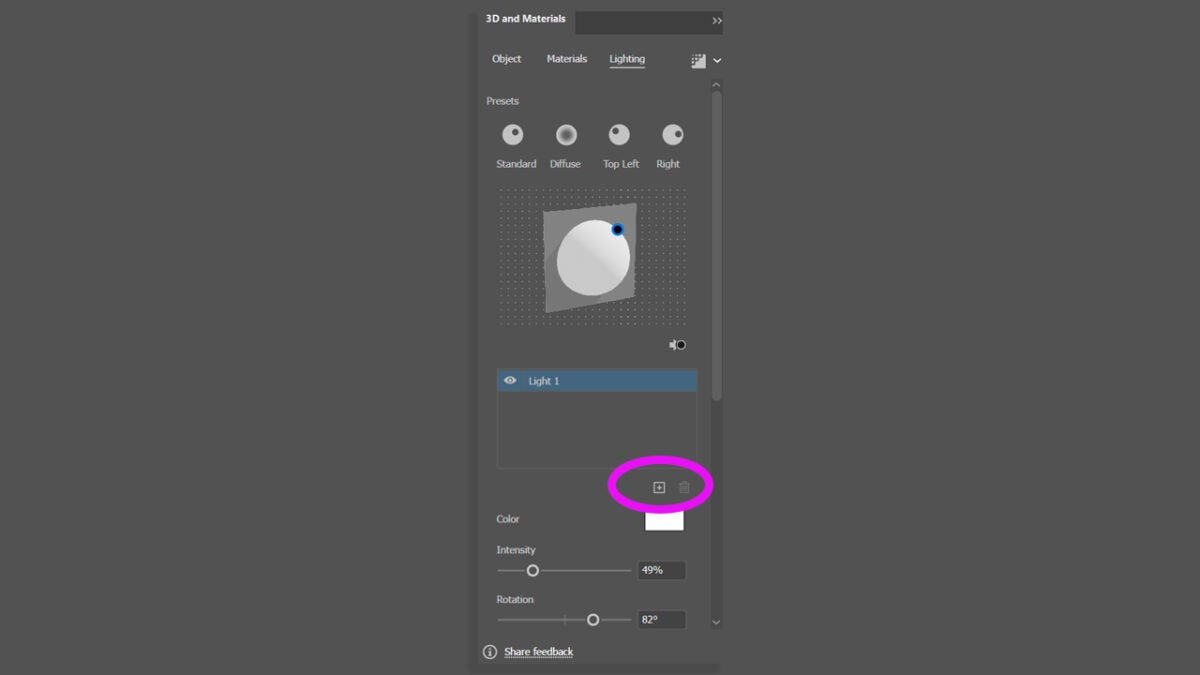
- Single light: Choose one of the default settings like Standard, Diffuse, Top Left or Right. To adjust its position, play with the Rotation and Height sliders.
- Multiple lights: Illustrator allows you to add up to 10 lights in total. To add a new one, select the “+” button.
Create 3D objects within Illustrator
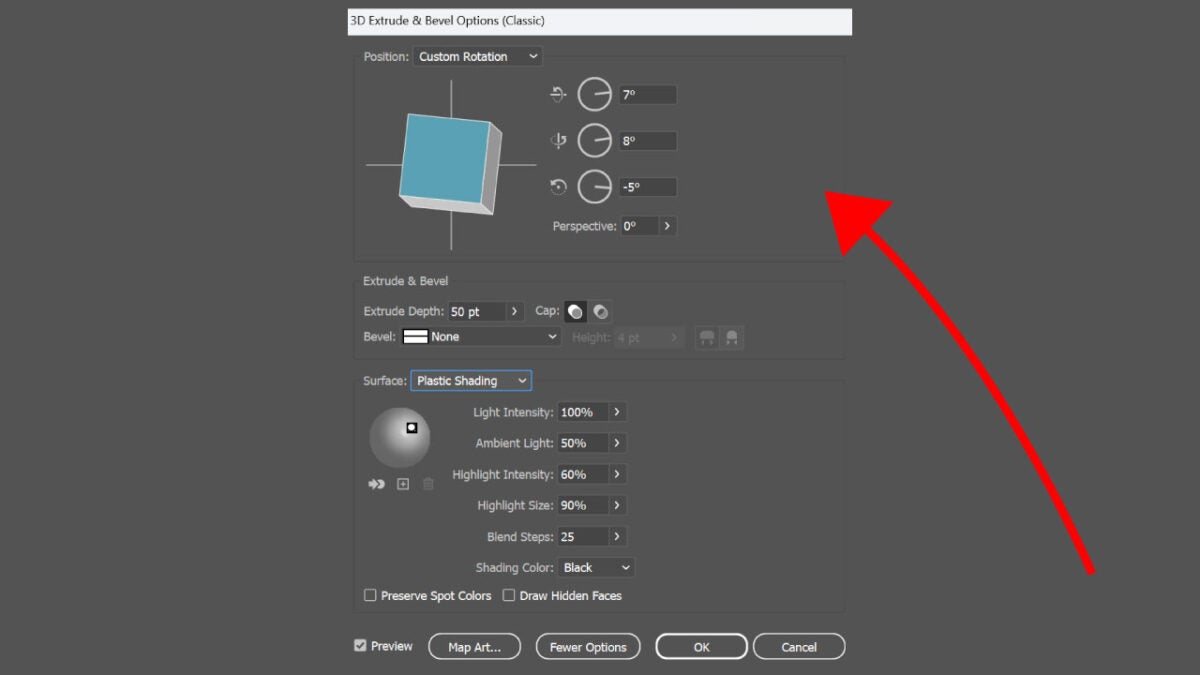
Illustrator allows us to create 3D objects from flat illustrations. One of the ways we can do this is through extrusion. To start, select the flat shape you want to transform. Select Effect, 3D Materials, then 3D (Classic) and then, Extrude & Bevel.
Then, click on More Options so you can see the number of options available to you. You will see that you can adjust some options such as the position, surface, or lights of the 3D object. Once you have achieved the desired result, click on Ok.
Artist by vocation and technology lover. I have liked to tinker with all kinds of gadgets for as long as I can remember.
Latest from María López
You may also like

Inside YouTube’s 2024 Spotlight: Top Creators, Surprising Stats, and Record-Breaking Videos
Read more

Our Mac can freely convert any photo into text
Read more

How to use Apple's Writing Tools on the Mac and what we can do with them
Read more

Protect Your PC Against Advanced Malware with AVG AntiVirus Free
Read more

Prepare Your Computer for Black Friday: How to Optimize Performance with CCleaner Free
Read more

The end of support for Windows 10 could increase PC sales
Read more