How To
Masters guide to creating iTunes playlists
- November 17, 2018
- Updated: July 2, 2025 at 5:43 AM

We love iTunes and enjoy creating new playlists but it took years to realize the full potential of iTunes’s options! Rather than going through a long journey of technological discovery, enjoy this short guide to Apple music mastery. Prepare yourself for the…
Master’s guide to creating iTunes playlists
Creating a Playlist
Hop into iTunes!
To create a playlist (a grouping of songs) there are two simple paths:
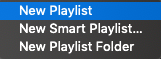
1. Easy Mode: right click the left bar, hit “New Playlist”. You’ll be given the option to name your new playlist!
![]()
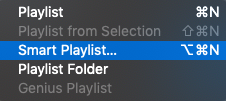
2. Thorough Mode (for Mac users): open iTunes, and visit “File” in the top bar:
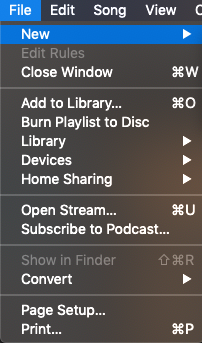
Within the “New” section, you’ll see the same three choices available.
Creating a Smart Playlist
Smart Playlists bundles music, videos, and more based on preset conditions: date added, title, year composed, etc. If you know how to shape the playlist, it can become whatever you like!
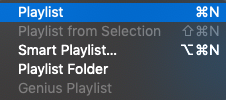
Starting a Smart Playlist begins much the same as a normal playlist. Double click the left bar or hit “File” and “New” in the top bar to arrive at the playlist menus:
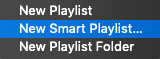
For smart playlists, you have another step! The “Smart Playlist” window:
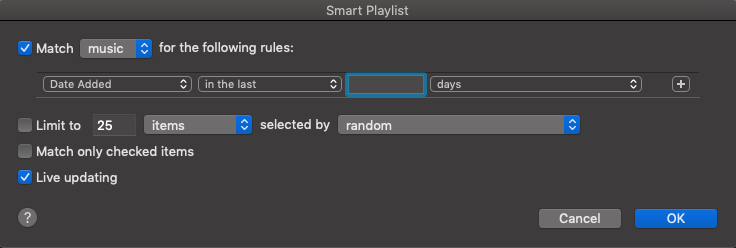
The magic happens here. In general, smart playlists gather songs with a similar characteristic. Right now, the targeted characteristic is “Date Added”, but there are a number of other parameters available:

Recently, iTunes randomly deleted our “Recently Added” section, so we made our own smart playlist that compiles all songs added within the last month. Play around and see what you could make!
(NOTE: in the smart playlist window, make sure to select “Live Update”. This keeps the folder updated without requiring extra effort.)
Developing Your Playlist
Guess what? Now that you have a playlist, it’s time for customization!
ADDING SONGS
Want to add a song? Select one and drag it over your playlist name, in the left column. Easy as that!
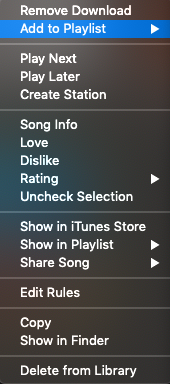
On the other hand, if you aren’t using MacOS, right click the song in question. Select “Add to Playlist” in the dropdown menu. Then, choose your playlist from the options given:

How to transition from PC to Mac
READ NOW ►CHANGING PLAYLIST ARTWORK
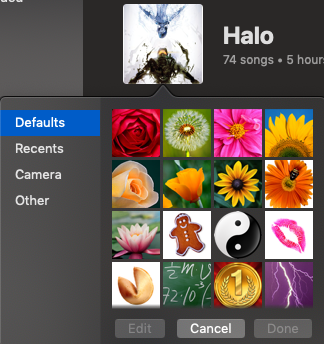
To change the playlist artwork, simply click the current artwork directly, at the top left. A new window will appear, from which you can search for another graphic file:
ALTERING PLAYLIST DETAILS
Select the “View” tab, at the top of your screen:
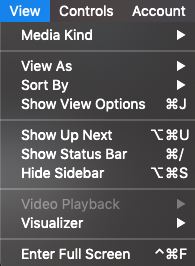
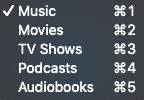
The three most important options are: Media Kind, View As, and Sort By. The first, Media Kind, simply tells iTunes whether its dealing with music, movies, or something else:
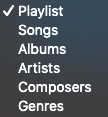
“View As” determines how you will see your song. Currently, the default goes to Playlist, which shows each individual song with artwork. Songs creates a list of songs; compact, better for ordering, but less visually appealing. The last four sections – Albums, Artists, Composers, and Genres – lump songs back into those categories.
Sort By arranges music by either user arrangement, alphabetical order, genre, year, artist, album title, and song length. Within those categories, you can choose ascending or descending order.
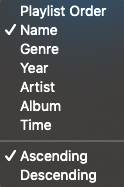
Keep all these options in mind when making your playlist. There’s no right answer except what works for you!
How to use Garageband to edit songs
Read Now ►Bonus: Changing Album/Song Information
Songs make playlists. Therefore, a thorough playlist guide deserves guidelines on how to work with songs and albums, right?
Of course!
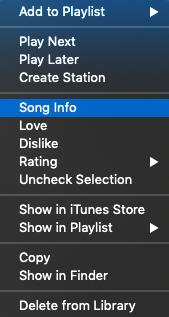
Right-click your song or album. The dropdown menus look slightly different, but both have an all-important “Info” button:

 As an example, here’s the window for the song “Hooked on a Feeling” by Blue Swede, from the “Guardians of the Galaxy: Awesome Mix Vol. 1” album:
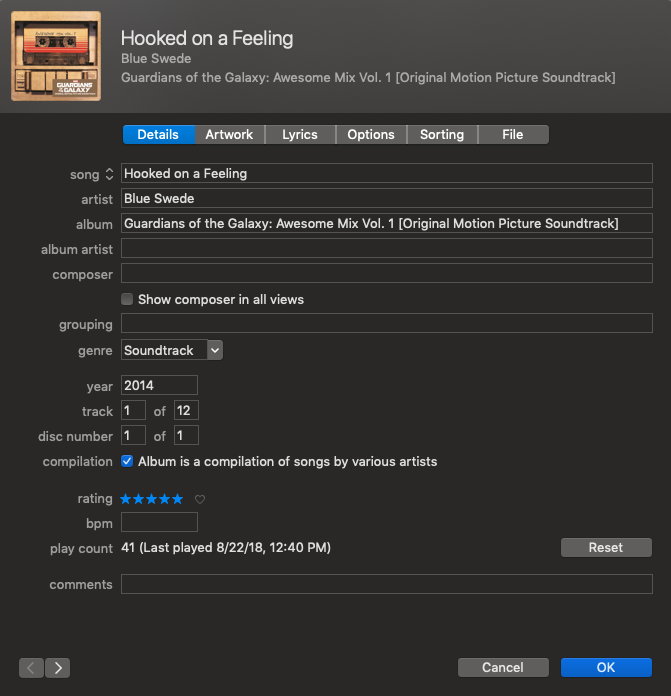
Let’s talk about the three most important tabs: Details, Artwork, and Lyrics. In the Details tab above, you may notice every piece of information from the title to ratings to BPM (Beats Per Minute). Many of these items can be adjusted right here! If you really want, “Hooked on a Feeling” can appear in your playlist as “Wizzle Wozzle,” composed in 1872 by John Williams.
It’s your playlist, we won’t judge.
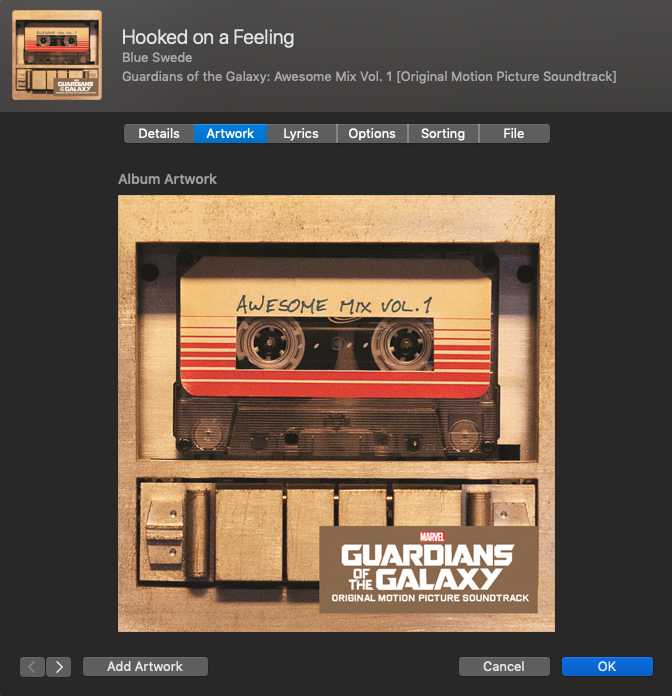
Next up is Artwork! Why change the image for a song or album? Two reasons come to mind: CD’s often don’t load with the graphics, and more exciting artwork can be found elsewhere.
Whatever the case, click “Add Artwork” at the bottom left to choose a new image. Consider deleting old artwork if you’re using a new one instead!
Next section: options.
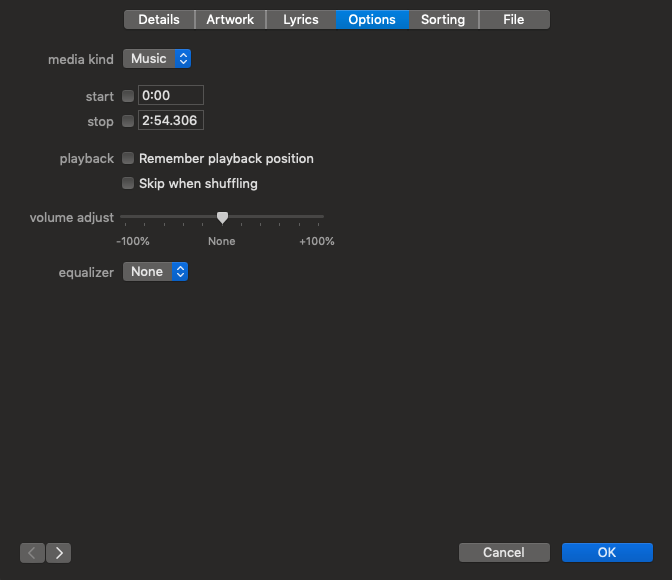
Want a song to start or stop at a certain time? You can control that here! Want the song to be skipped while you’re shuffling? Done! Is the song or album at a strange volume compared to others in the playlist? Adjust the level!
Conclusion
John Wooden said, “Small things make big things happen”. With a few easy clicks, you can set new and inspiring artwork for an album or fix offset volume levels within individual songs.
Thanks for reading, enjoy the tunes, and stay fresh!

Trevor Hutchins writes screenplays, novels, and articles from his home in La Mirada, California. He self-published hist first novel, 'Wynden's Legacy,' on Amazon in May of 2017 and hasn't stopped writing since.
Latest from Trevor Hutchins
You may also like
 News
NewsProSpy and ToSpy: the latest spyware threats disguised as messaging applications
Read more
 News
NewsPersonalized ads are coming to Facebook and Instagram thanks to conversations with AI
Read more
 News
NewsThese are the new releases coming to Crunchyroll this fall
Read more
 News
NewsElon Musk asks followers to cancel their Netflix subscriptions
Read more
 News
NewsThe Russos share an image that could provide clues about the upcoming Avengers movie
Read more
 News
NewsThe queer dating reality show on Netflix has come to an end and will not have a third season
Read more