Article
Discover the Secrets of Mac Customization: Learn How to Change Your Default Apps for Opening Files in Just a Few Clicks!

- February 9, 2023
- Updated: July 2, 2025 at 3:02 AM
Do you want to change the default applications used by your Mac? Although Apple computers have an excellent ecosystem of their own apps such as Safari, iTunes or Pages, it is common that if we are former Windows users we want to change them. Something as basic as checking our email or surfing the Internet can be a real nightmare if we don’t use the program we’ve been used to for years.
In today’s article we are going to show you how to change the default apps used by your Mac. The process is very simple but not very intuitive, but don’t worry. With our step-by-step guide you will be able to set the default app you like and associate it with the type of files you want. Here we go!
How to change the default browser on your Mac
Surfing the Internet is, nowadays, an essential activity in the work environment, education or simply to enjoy an idle afternoon in front of your Mac. If you are a regular user of Chrome, Firefox or any other browser, you are probably looking for a way to change Safari. To do so, just follow these steps:
1. Download and install your browser
In order to change the default Mac browser, you first need to download and install the one you want to use. There are very good options to replace Safari, such as Firefox, Opera, Duck Duck Go or even Edge (formerly Internet Explorer). But among all of them the most popular is Google’s browser, Chrome. You can download it quickly and safely below these lines.
2. Access your Mac’s System Preferences
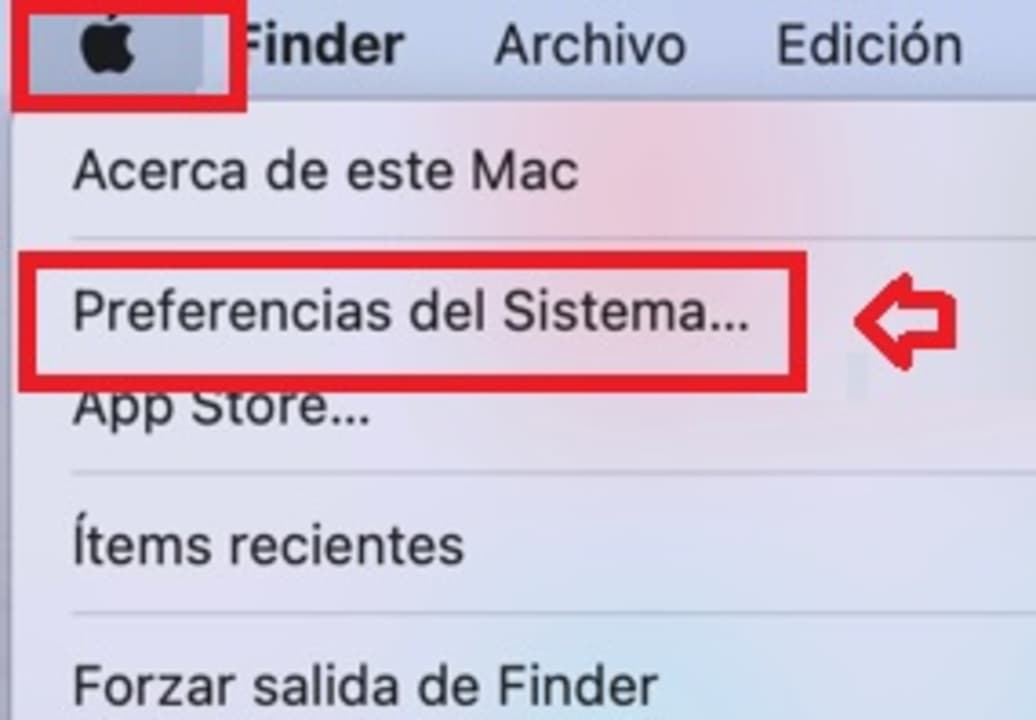
Now that you have your browser installed, simply click on the Apple menu. Once the drop-down menu opens, click on the “System Preferences” option.
3. Enter the “General” option
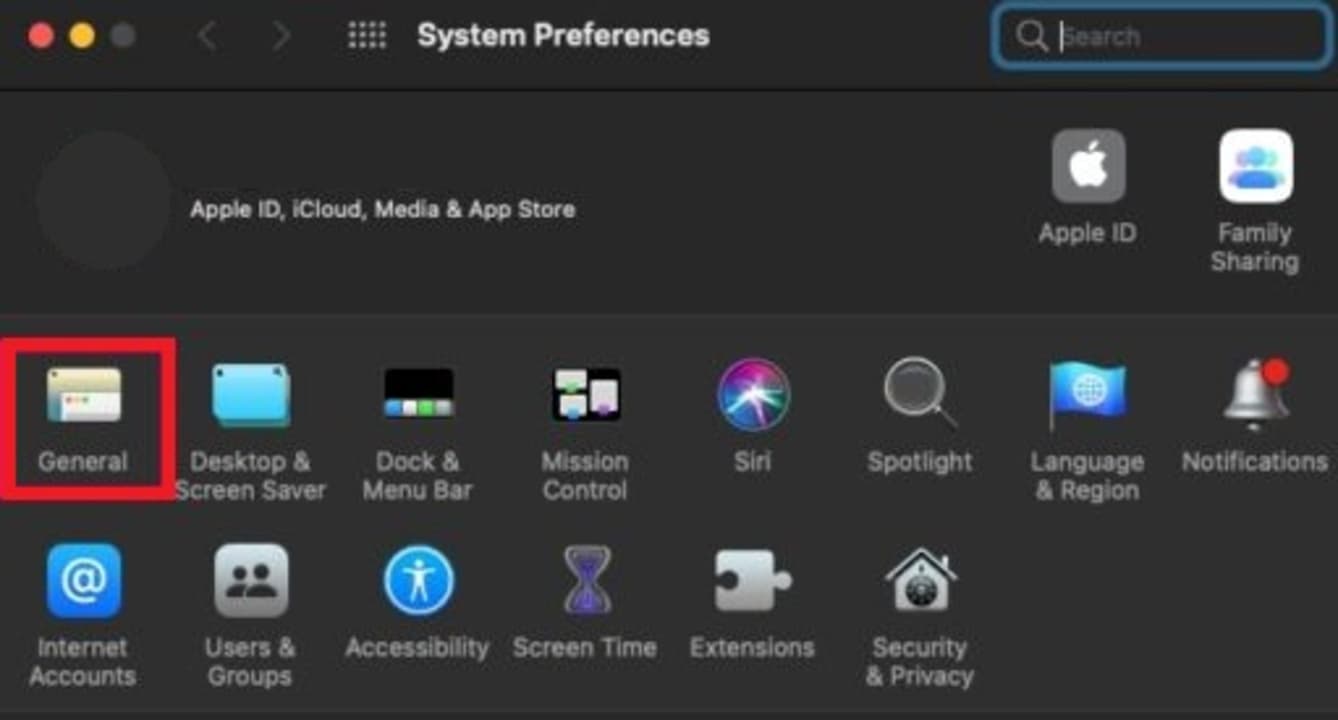
Once in the system preferences window, click on the “General” option. You will find it just below your Apple ID profile picture.
4. Change your default browser on your Mac
In the new window, look for the “Default Web Browser” entry among the options. You will see that Safari appears by default, but by clicking on it you can set the one you like (Chrome, Firefox, Opera, etc.). Once you have done this, when you click on any link, it will open with the selected browser. It’s that simple!

How to change the default email app on your Mac
Although Mail is an excellent app to have your mailboxes always at hand, many do not find it convenient or simply prefer not to have to synchronize their accounts with Apple’s application. If you are looking for a quick and easy method to change the email app on your Mac, simply follow these steps.
Step 1. Download and install your mail app
Before you can change the email app on your Mac, you will first need to download the one you want to use by default. One of the most versatile and popular is Outlook for macOS. You can download it quickly and safely below.
Step 2. Access Mail preferences
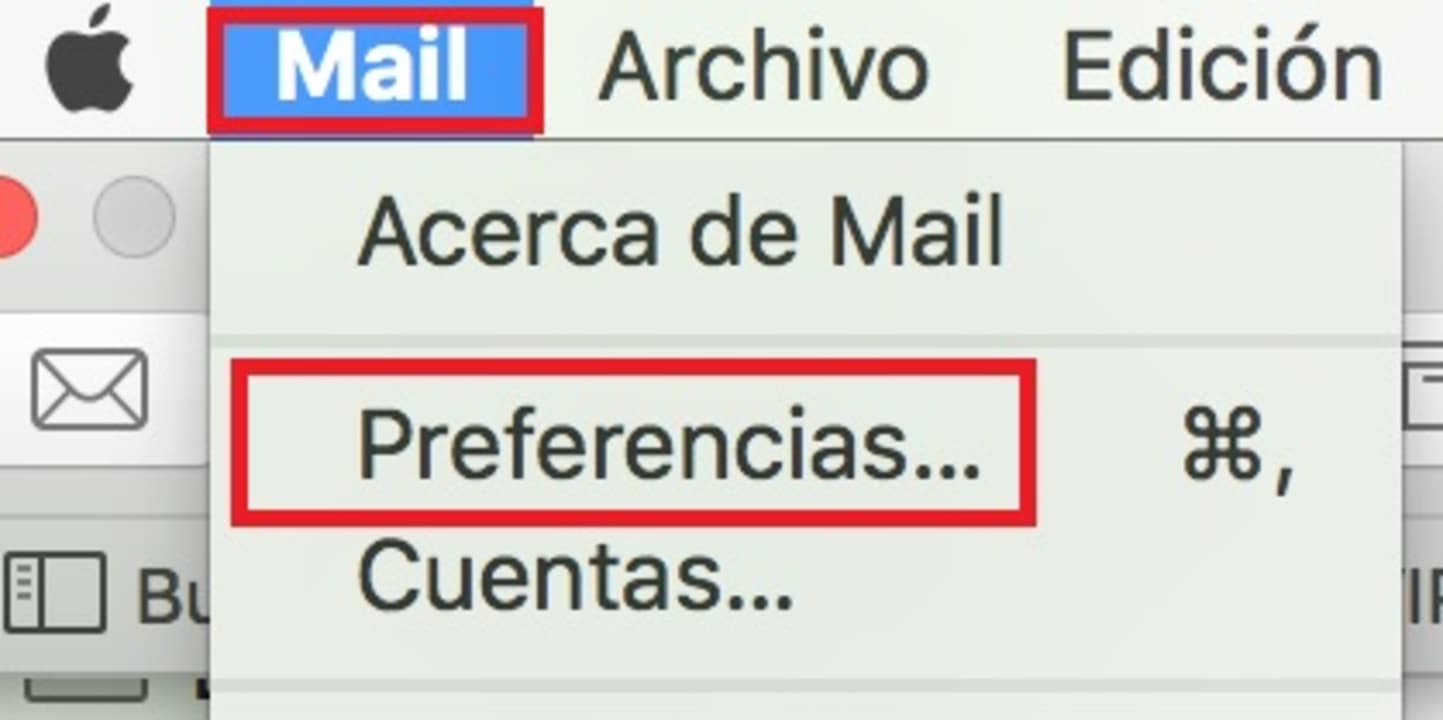
Once you have the app installed, click on the Mail tab next to the Apple button. Then click on the “Preferences” option.
Step 3. Change your Mac’s default mail program
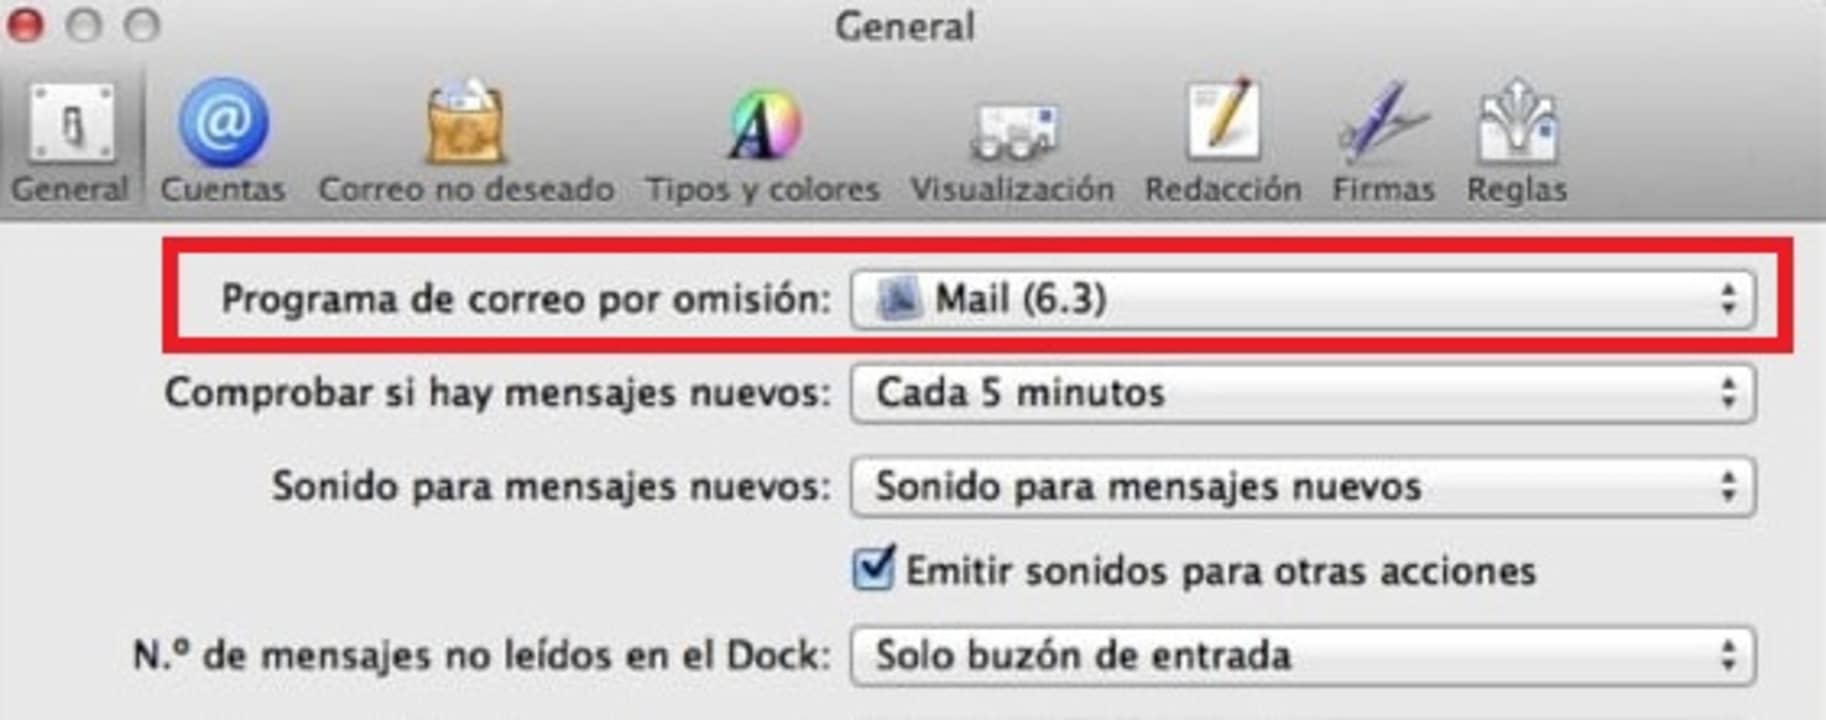
Once in the Mail preferences, you will see that in the “General” tab there is the option “Default mail program”. Click on the drop-down menu and select the app that you want to take care of sending and receiving your mail from now on.
How to change the default app for opening files on your Mac
Apple uses by default its own programs, such as Preview or iTunes, to open images, PDF files or music tracks, for example. Would you like to change this file association and use your favorite apps and programs by default? Just follow these steps.
Step 1. Find the type of file you want to associate with a program
The first step to follow is very simple. All you have to do is open Finder and, once in the Apple search engine, find the type of file you want to change its association.

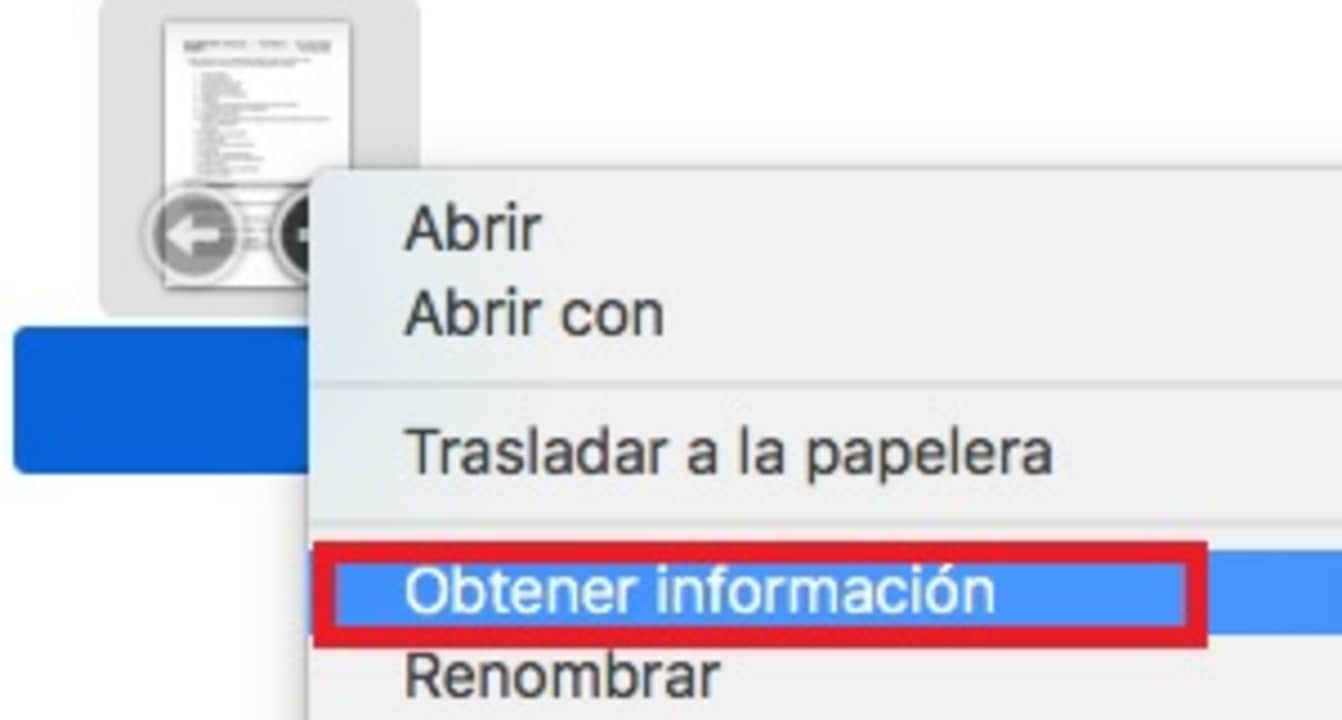
Step 2. Access to file information
Once you have located the file, right-click on it and select the “Get Info” option. Alternatively you can use the keyboard shortcut Cmd+I.
Step 3. Select the app you want to associate to a file
After opening the file information a new window will appear where you will find the “Open with” option. Click on it and select the app you want to associate with the file. Once you have done this, click on the “Change all” option. Now all the files of this class will be opened with the program you have selected!

Customize your Mac apps to the maximum
We hope we have been able to help you to change the default apps that your Mac uses. As you can see, the process is very simple and in a few minutes your Mac will finally associate all your files with the programs you want. And remember, if you liked this article, do not forget to share it with your friends on social networks.

Mireia Fernández is passionate about the world of video games and new technologies, a hobby that dates back to her childhood with the MSX HB 501p. Born and residing in Barcelona, Mireia has been working as an editor for over 10 years and specializes in writing reviews, tutorials, and software guides, as well as doing everything possible to publish news before anyone else. Her hobbies include spending hours playing on her console, walking her golden retriever, and keeping up with the latest SEO developments.
Latest from Mireia Fernández
- AI Auto-Cut Deep Dive: Transform Long Videos into Engaging Shorts with Premiere Pro
- From Chaos to Collaboration: How to Streamline Your Agency Workflow with Photoshop Projects
- Reimagine Your Design Workflow with Adobe Illustrator’s Generative Expand
- Pirated Premiere? AGS Can Now Lock You Out After 10 Days
You may also like
 News
News1 in 3 Android apps have serious API leakage issues, according to a recent study
Read more
 News
NewsThe rise of fake captchas: a new weapon for cybercriminals
Read more
 News
NewsGoogle disables the 100 results per page feature and leaves users stunned
Read more
 News
NewsThe second season hasn't even premiered yet, and Disney+ has already renewed this superhero series for a third one
Read more
 News
NewsIs Hollow Knight: Silksong too difficult? Its creators defend that it is not
Read more
 News
NewsMicrosoft teams up with ASUS to launch ROG Xbox Ally and compete with Steam Deck
Read more