News
4 tricks when installing Windows 11 that will make your life easier
Make use of these tricks to greatly improve your experience with Windows 11

- November 10, 2024
- Updated: July 1, 2025 at 10:45 PM
Have you already left Windows 10 behind? Although upgrading to Windows 11 represents a more than notable improvement, there are less obvious settings that further optimize the user experience. With very versatile features that facilitate everything from account management and the removal of unnecessary software, to network installation and improved data access, Windows 11 allows you to do almost anything when installing it, benefiting you whether you are a casual user or a more advanced one.

Subscribe to the Softonic newsletter and get the latest in tech, gaming, entertainment and deals right in your inbox.
Subscribe (it's FREE) ►Below, we share with you four impressive tricks when installing or updating Windows 11 that can make your day-to-day easier.
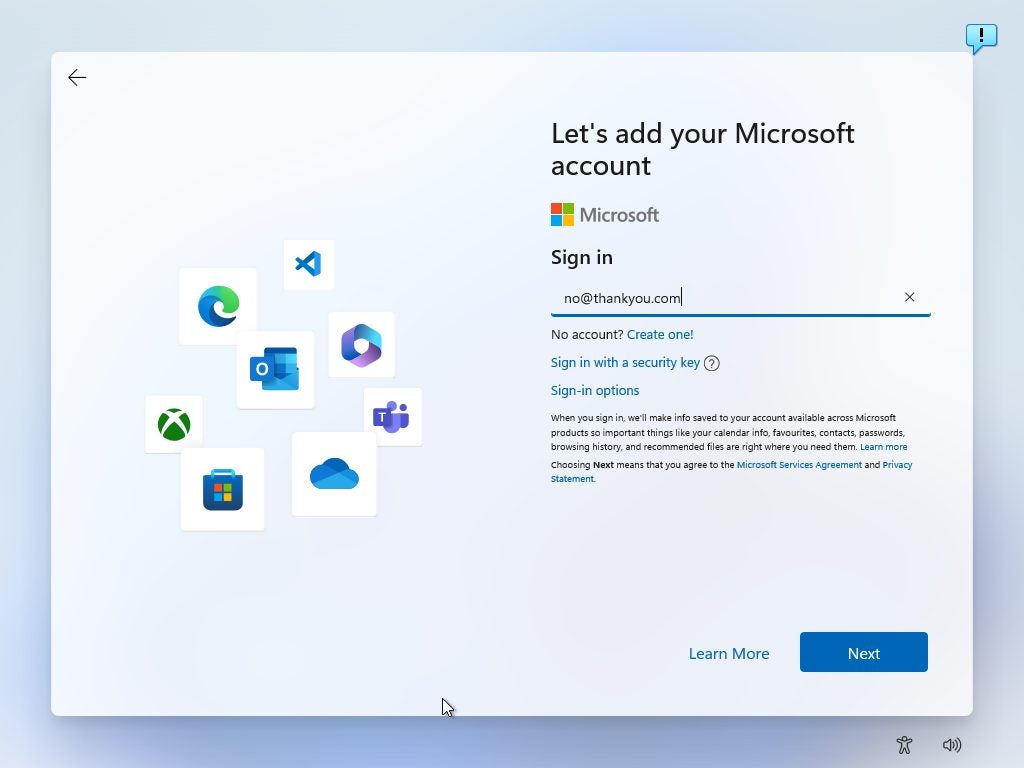
Install Windows 11 without a Microsoft account
Microsoft increasingly promotes the use of online accounts in Windows 11, especially in the Home version, where users are required to sign in with a Microsoft account. However, if you prefer not to create one just to use your PC, you can skip this step and use a local account. To do this, start the command console with Shift + F10 during installation and type the command oobebypassnro, which allows you to restart the installation and bypass the need for a Microsoft account.
Another option is to use the Rufus tool to create an installation USB that allows local accounts from the start. In the case of Windows 11 Pro and Enterprise, the installation allows you to choose an offline account by selecting the setup for “work or school” and then choosing “join a domain instead.” With these alternatives, you can install Windows 11 without relying on Microsoft credentials, thus giving you greater privacy.
Perform network installations with PXE and iVentoy
If you need to install Windows 11 on multiple computers, the PXE (Preboot Execution Environment) method along with the free tool iVentoy allows you to perform network installation quickly and easily, without the need for USB drives or DVDs. PXE sets up a local server on the network, from which any compatible computer can download the Windows 11 installation image and execute it. With iVentoy, you only need to configure one PC as a server on the network; when it boots in network mode, any other computer will be able to locate the Windows 11 image and start the installation automatically.
This method can be very convenient for small offices or in environments where multiple devices require the same operating system. Additionally, it allows installing Linux systems via PXE, making iVentoy a versatile tool for managing multiple installations centrally, saving time and resources.
Avoid bloatware in Windows 11 installations
“Bloatware,” or pre-installed software, is a problem that Microsoft (like other companies) introduces in Windows 11, filling devices with applications and programs that consume resources without always being useful for the user. This can reduce system speed and performance, taking up space and running unnecessary background processes.
To avoid the automatic installation of this software, it is recommended to select the “English (World)” option in the time and currency format during the initial installation process. This setting prevents the system from including unwanted applications, resulting in a cleaner and more efficient system. Although some pre-installed programs may be useful, most users quickly find that removing them helps optimize the overall performance of their computer and improve their experience in Windows 11.
Improve access to units with a developer unit
For experienced users who want to maximize data access speed, Windows 11 offers the option to configure a developer drive with the ReFS file system, designed for environments that handle large amounts of data. This setting significantly improves performance in file management, which is ideal for those who need quick and smooth access to their storage drives. To enable this option, a computer with at least 8 GB of RAM is required, although 16 GB is recommended, along with 50 GB of free space.
Once it is verified that the version of Windows 11 is compatible, you can enable this setting in System > Storage > Advanced storage settings and select “Create a developer drive” in the disks and volumes section. Although it is aimed at developers, this setting benefits any user who wants to optimize the performance of their drives in Windows 11.

Publicist and audiovisual producer in love with social networks. I spend more time thinking about which videogames I will play than playing them.
Latest from Pedro Domínguez
You may also like
 News
News"A dream come true". 'Spaceballs 2' already has a new nostalgic return, and it's not exactly what you imagine
Read more
 News
News'Avatar: Fire and Ash' has been a box office success… but at the same time a great disappointment
Read more
 News
NewsJames Ransone, one of the most remembered actors from 'It' and 'Tangerine', has died
Read more
 News
NewsThe protagonist of 'Eternals' doesn't care what you think about his movie: he is still proud
Read more
 News
News'Bridgerton' will return full of "juicy conflicts," according to its showrunner, and we can't wait
Read more
 News
NewsYou can now get this incredible RPG with a 75% discount
Read more