How To
How to: Create a Da Vinci drawing in Photoshop
- March 17, 2009
- Updated: July 2, 2025 at 9:24 AM
Last week I went on a short holiday trip to Rome. I enjoyed it a lot and I had the chance to see some of the most beautiful works of art in the world, such as the Sistine Chapel, Michelangelo’s Pietà or the School of Athens by Rafael . I guess some of that art must have inspired me to try to create something different this week, and not just the standard photo effect Photoshop tutorial. Luckily I found this original Da Vinci drawing effect, with which you can also become a Renaissance artist – even if you don’t know a brush from a chisel.
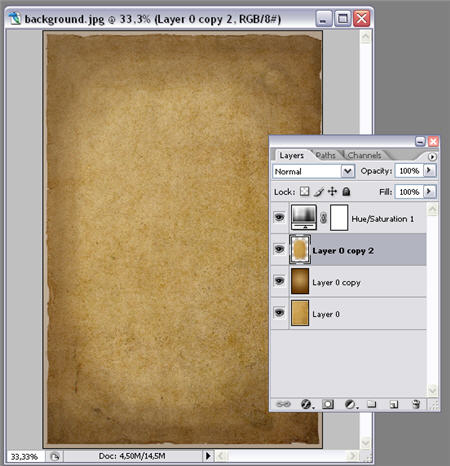
1. First of all we must create the right background for our Da Vinci effect. I downloaded this aged paper from Stock.xchng and then worked on it in the following way: create a new layer on top of the background, apply a radial gradient effect with two sepia tones and change this layer’s blending mode to Multiply at 50%. Then copy the background image onto a new layer and apply a Hue/Saturation effect at -25%. Finally, erase the margins of this layer so that we create a lightning effect in the center.
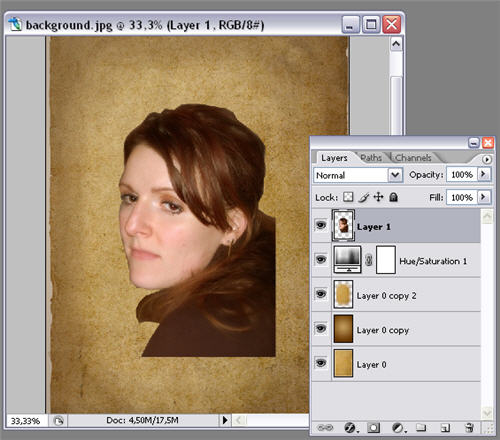
2. Crop the subject of your drawing from its original photo and paste it on a new layer. Remove any background left from the original picture.
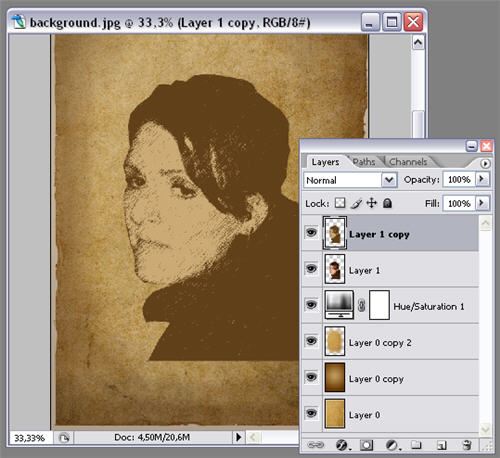
3. Duplicate the subject layer and apply a Graphic Pen effect (Filter > Sketch > Graphic Pen) so that it seems that the image has been drawn by hand.
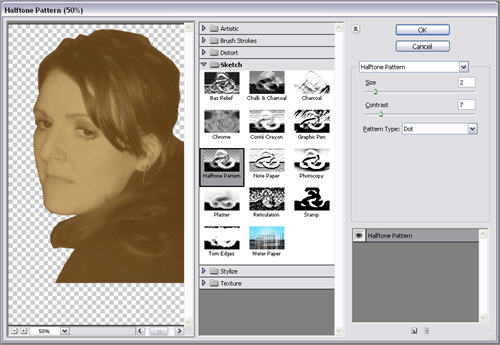
4. Now duplicate the subject layer again and apply a new effect: Filter > Sketch > Halftone Pattern. Set the Pattern type to “Dot” and fiddle around with the sliders until you obtain a subtle shade of dots over the image.
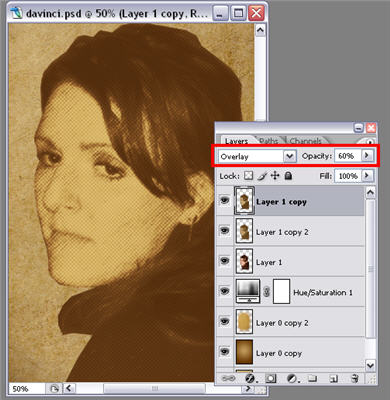
5. Make sure the first background duplicate you created on step 3 is on top of the second one, changing the layer order if necessary. Then select that first background copy and change its blending mode to Overlay. Lower the opacity until both effects (Graphic pen and Halftone pattern) blend together.
6. Merge the two subject layers and erase the lower part of the body (you can either paint it with a soft brush or delete it with the eraser tool at a low opacity level). Then select the hair – I used the Magnetic lasso tool – and press Ctrl+L to adjust the lightness levels and make it look softer.

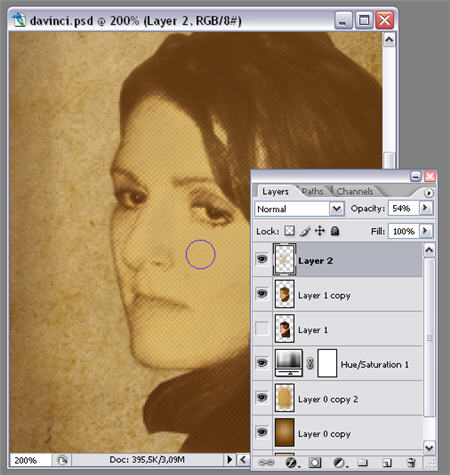
7. Create a new layer on top of the others and grab the Brush tool. Using similar colors to the ones you find on the image background, paint over the face of your subject to make it softer. If you use Photoshop’s hotkeys (B for the brush, I for the color picker) you’ll get the job done in no time.
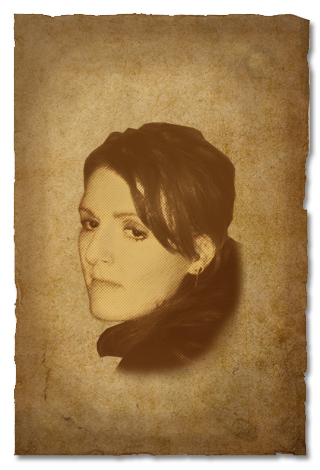
8. Finally, your Da Vinci portrait is done!

You may also like
 News
NewsIt returns to Netflix with a fourth season the most iconic series of the platform with a new actor for its main character and many surprises
Read more
 News
NewsIf you like Bully, the juvenile delinquency game from the creators of GTA, some modders are creating its definitive version
Read more
 Article
This iconic animated series has just been renewed for two more seasons
Read more
 News
NewsThe game we all were waiting for will be released on Switch 2 with graphical improvements and more news
Read more
 News
NewsAn analysis of the black market reveals that more than 300 million records have been compromised so far in 2025
Read more
 News
NewsAmazon is making an MMO of The Lord of the Rings, but its future looks very bleak
Read more