How To
How to: create a quick vignetting effect in Photoshop
- January 20, 2011
- Updated: July 2, 2025 at 9:05 AM
Sometimes a simple effect can spice up a picture more efficiently than a complicated one. This is the case with vignettes – images in which the center is clear, while the edges fade off. There must be dozens of ways to achieve this effect, but I’ve come up with a quick Photoshop trick that lets you apply a nice vignetting to your images in no time. Here’s how I do it:
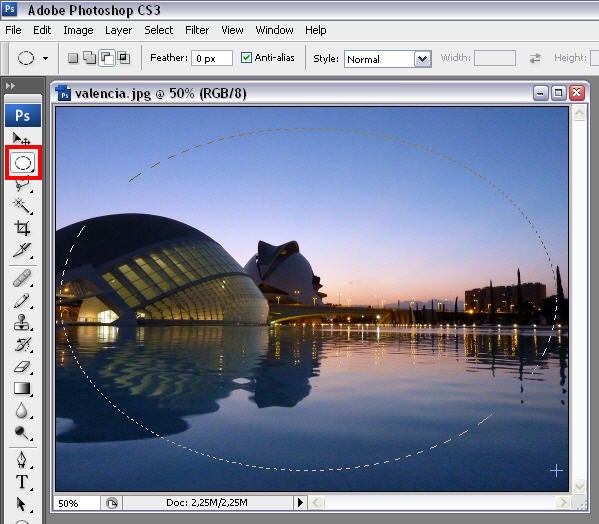
1. Open your picture in Photoshop and grab the Marquee tool (M). Change it to elliptical and draw a shape on your picture to set the limit between the part you want to keep clear – the center – and the part you want to fade off – the corners and edges.
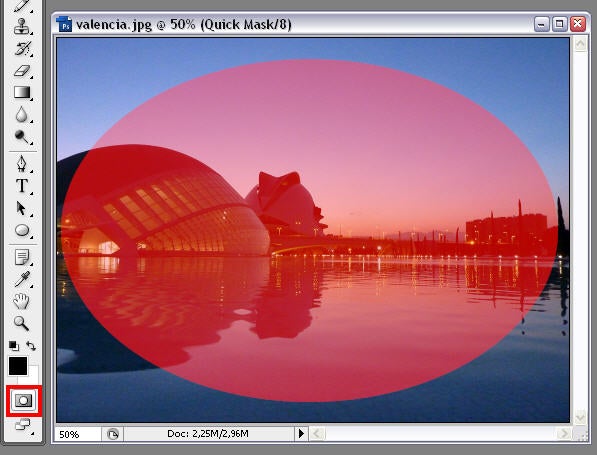
2. Go to Select > Inverse to invert the selection and then press Q (or hit the button highlighted in the screenshot) to enter Quick Mask mode. The part with a pink layer over will be the one that remains perfectly visible in the vignette.
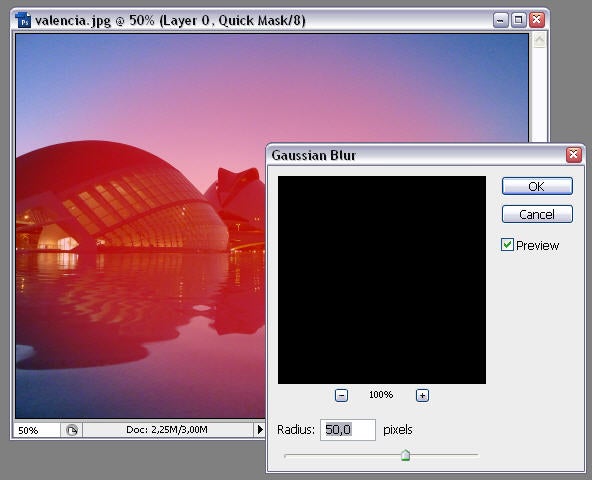
3. Now go to Filter > Blur > Gaussian blur and apply a strong blurring effect to the image. This will help smooth the transition from dark edges to a clear center.
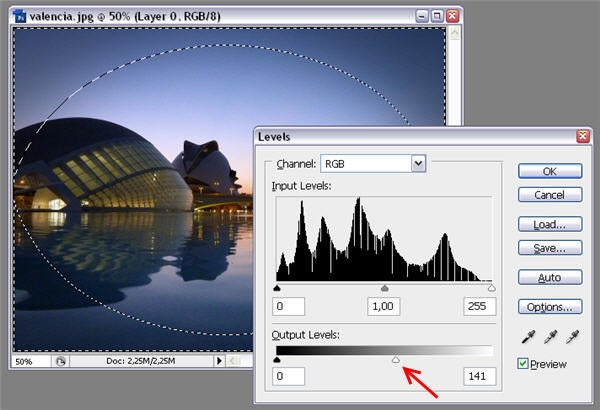
4. Press Q (or click the same button as in step 2 again to go back to Normal mode. The selection will be visible again. Now press Ctrl+L to open the Levels window, and reduce brightness by moving the white arrow to the center of the slider.
5. Done! Press Ctrl+D to remove the selection and your vignetting effect is finished.

You may also like
 News
NewsDo you play 'Final Fantasy XIV' on your PS4? You might be running out of time
Read more
 News
NewsThe spin-off of 'The Office' received unexpected support from the biggest star of the original series
Read more
 News
NewsNintendo is selling the Switch 2 much faster than the first console, but they don't know how long it will last
Read more
 Article
Kevin Spacey can't stop causing trouble: in his next movie, he has teamed up with a crypto scammer
Read more
 News
NewsThe world has asked the president of the jury of the Venice Film Festival to condemn the massacre in Gaza. He has not been able to
Read more
 News
NewsAfter Jeffrey Dahmer, 'Monster' will tell the life of Ed Gein, and it already has a release date and first images on Netflix
Read more