How To
Best Apps to Unblur Pictures on iPhone & Android
- October 20, 2020
- Updated: March 8, 2024 at 2:13 AM
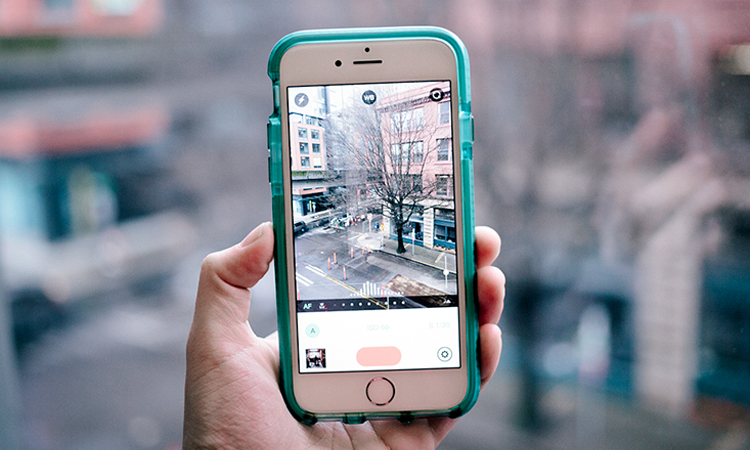
Smartphone cameras keep getting better, which is causing the change that analysts have been predicting: traditional cameras are becoming less important to consumers, and nowadays, anyone can be a photographer because we always have a camera on us.
But that’s not to say that all our photos come out well, and people often take pictures that fail to impress. If this happens to you frequently, keep reading for some tips on how to fix blurry photos on iPhone and Android, and for recommendations on the best photo editing software available for each platform.
Why are my photos blurry?
Before we get down to business and explain how to fix a blurry photo, there’s an important question we must answer, one that might keep us from having to fix our pictures in the first place: why are my photos blurry?
There are many factors that can make a photo blurry, so it’s best to address them before you tap the shoot button. The first and perhaps most common issue is a dirty smartphone lens. Yes, you read that correctly. Having your camera lens covered in dust, dirt, etc. is enough to make a photo come out blurry. It’s that simple. To fix it, just clean the lens of your Android device or iPhone before you take a picture. But be careful: make sure to use a chamois cloth (like the kind you use to clean glasses) or a microfiber towel. Camera lenses can also be cleaned with other materials, but take care not to scratch the surface!
Another frequent mistake that leads to blurry photos is shaking the camera. The shakier your hands, the blurrier your images will be. It’s an equation that never fails. To remedy this, use a tripod when taking pictures. If you don’t have one, here’s an easy tip: hold your breath just before you snap your pic.
Finally, there is a series of other photography-related parameters to keep in mind. For example, when objects are in motion (a bird, a car, etc.), it’s harder to capture a still image of them (unless you adjust the camera settings). Likewise, lighting plays an important role: the dimmer the lighting, the likelier that your photo will come out fuzzy. So consider all these factors to determine if there’s a chance you might take blurry photos!

How to sharpen photos
To fix a blurry photo, you don’t need a magic class at Hogwarts School of Witchcraft and Wizardry, but a good image editor. These tools, available on PCs for years, didn’t become popular on phones until recently, amid the rise of social media platforms like Instagram and Tik Tok.
Before trying to fix a blurry photo, there’s one truth to keep in mind: if a photo is extremely out of focus, no program in the world can sharpen it. There’s a saying in the audiovisual world that “you can’t polish a turd,” meaning that something inherently bad can’t be fixed. Therefore, if your photo is really blurry… it’s going to be hard to solve the problem. Now that we’ve explained this, let’s get down to brass tacks!
How to Make a Blurry Picture Clear on iPhone and iPad
While you can use iOS’s native photo correctors, the best way to make the picture clear is to use an image editing tool. These have been around for a long time on PC, for example, if you think about Photoshop. However, sometimes you need a quick and easy way to fix blurry photos on your iPhone or iPad. Enter image editing mobile apps. Although these may not be as full-featured as their PC counterparts, they are ideal for those quick fixes and touch-ups.
Before we get into the apps and how to fix blurry pictures, it is good to remember that the less there is to fix, the easier it will be. Try to keep this in mind while taking photos and take photos that don’t need any fixing.
Best Apps That Make Pictures Clear for iOS
If you want to learn how to unblur a photo on iPhone, this section is for you. We will be looking at a few of the best apps to unblur photos on your iPhone. We will also be sharing how to use these apps step by step so that you can start to fix blurry photos.
Adobe Lightroom
If you like Photoshop, be sure to check out Adobe Lightroom. This “first cousin” of the Adobe suite can also be used to retouch and edit photos. What makes it unique is the fact that it’s oriented towards photography and newbies in the field.
In terms of sharpening photos, Lightroom gets the job done, but we prefer Photoshop. Again, it’s an incredibly competent photo editor, especially since you can apply “filter” packs that make everything easier.
Step 1: Launch Lightroom and Open Your Image
Launch Adobe Lightroom on your iPhone and choose the image you want to sharpen/unblur from the Library Module.
Step 2: Go to the Develop Module
Next, click on ‘Develop’ in the module picker to start editing your photo.
Step 3: Adjust the Amount/Intensity Slider
With the first available slider, you will be adjusting the intensity of the sharpening. Moving the slider to the left makes it less intense, whereas adjusting to the right increases the sharpness. The easiest way to adjust this is by keeping one finger on the photo and using another finger to adjust the slider. By doing this, you can see a black and white version of your photo that will clearly show the changes made as you drag the slider. The app will also warn you if you over-sharpen your photo by displaying red in the slider. A value around 30 is usually sufficient here, but adjust it to what works best for you. You can always come back and re-adjust if needed.

Step 4: Adjust the Radius Slider
By adjusting the second slider, known as the radius slider, you will be defining how strong (in terms of pixels) the sharpness is applied to the edges. A high value will show thicker edges, whereas a lower value will show finer, more subtle lines. Again, keep one finger on the image while the other toggles the slider to see the details of the changes in black and white.
Step 5: Adjust the Detail Slider
With the details slider, as the name suggests, you control how many details are sharpened. Keep one finger on the screen and drag the slider left and right until you get the needed detail.
Step 6: Adjust the Masking Slider
The masking slider determines if sharpness will be added to your entire photo or just the subject. The lower the sharpness mask, the more of your image will be sharpened. The higher you go, the more specific the program will get and focus more on the subject of your photo instead of the background. Hold your one finger on the image and use another finger to drag the slider left and right.
Canva
If you’ve been on social media for a while, the name Canva will surely ring a bell. This app –or web service– stands out for its easy photo editing features. You can also create graphics, prints, presentations, layouts, backgrounds, and a long list of features.
One of the main characteristics of Canva is that it’s designed for infographics. So, if you want to create a spectacular design without using a more complicated photo editing tool (recommendable if you want a more professional result), this application will surely get you out of a pinch.
Step 1: Open Canva
Open the Canva app on your iPhone.
Step 2: Upload Image
Upload your image to Canva by tapping on the ‘Uploads’ tab and choosing the photo from your device. Once the image has been uploaded, drag it into the blank canvas.
Step 3: Adjust Image
Now, tap on the image and in the top menu, tap on ‘Adjust’. Once you do this, you will see a ‘Blur’ slider appear. By dragging this slider to the left, you will increase the sharpness of your image and lessen the blur.
How to Make a Blurry Picture Clear on Android
Android also has a native photo corrector that can often be enough to fix minor issues with photos. Most newer Android devices have AI-based editing features in the form of skins and features that can make minor corrections. You might have to use another third-party app with more robust features for photos that cannot be fixed with the native editing tools.
Best Apps That Make Pictures Clear for Android
This section will cover how to fix a blurry picture on Android devices using third-party apps.
Enhance Photo Quality
Enhance Photo Quality is beneficial if you’re looking for a decent free image editing app that works well on fixing blurry photos.
Step 1: Open the App
Open the app on your Android phone by tapping on the app icon.
Step 2: Open the Image You Want to Edit
Import the image you want to correct into the app.
Step 3: Tap on ‘Sharpness’
Tap on the ‘Sharpness’ tab at the bottom of the screen.

Step 4: Adjust the Dial
This app doesn’t have the traditional slider. Instead, it has a dial complete with sound effects and vibrations to imitate a real camera. To increase the sharpness, you turn the dial towards the ‘+’. However, we recommend you do this very slowly as this app has a powerful sharpening effect, and if you move too fast, you may miss the perfect spot.
PIXLR
PIXLR is another excellent free photo editing tool that enables users to make various editing changes to their photos. This app comes complete with effects, overlays, filters, collages and even double exposure.
Step 1: Open the App
Open the PIXLR app by tapping on the app icon in your menu.
Step 2: Open Your Photo
On the app’s main menu, choose ‘Photo’ and upload the photo you want to edit from the gallery.
Step 3: Select the Editing Tools
Now, click on the ‘Editing Tools’ represented by a bag icon at the bottom left of your screen.
Step 4: Tap on ‘Sharpen Tool’
With the editing tools open, look for ‘Sharpen’ and tap on it.
Step 5: Adjust the Amount
The first adjustment you can make is the amount of sharpness. Adjust the slider until you reach the ideal sharpness for your image.
Get more clarity!!
Now that you know the best apps to unblur pictures on iPhone & Android, you can make your images clearer. Your followers on Facebook and Instagram will appreciate the effort! We hope these techniques have helped you.

Journalist specialized in videogames and technology. Almost two decades dedicated to it.
Latest from Nacho Requena Molina
- X includes Twitch in its lawsuit for "advertising boycott"
- The fight between Jake Paul and Mike Tyson becomes the most-watched sporting event on Netflix
- Dragon Quest III HD-2D Remake, everything you need to know about a classic
- GTA Online has many rewards this week: bunker series, new clothes, and more
You may also like
How to add effects to our photos on the iPhone without third-party apps
Read more

Editing video is no longer a problem thanks to the simple and powerful Adobe Premiere Rush
Read more

While the second season of Arcane is incredible, we have bad news from Netflix
Read more

Niantic has been using Pokémon Go player data to train its AI
Read more

Five years later, a key piece of Star Wars is finally published
Read more

The streamer who performed the hardest combo in Kingdom Hearts 2 and didn't win anything in return at all
Read more