A GIF is an image file, similar to files like a JPEG, PNG, or BMP. They are essentially highly compressed image files. GIF stands for ‘Graphics Interchange Format’. GIFs are firstly graphics, which makes them visual by nature.
When you want to create them, you need the best image-editing software for top results. Here’s how to make a GIF in Photoshop.
How to make a GIF in Photoshop
Load your images into Photoshop
Collect a group of images that have a connection you can convert into a flow that you can animate. In File > Scripts > Load Files Into Stack, you can open a range of images simultaneously so that you don’t have to drag them into your document one by one.
Then select the Browse option and find each file you want to place in the document. Press OK, and Photoshop will create a layer for every image you want to include.
Open the Timeline Window
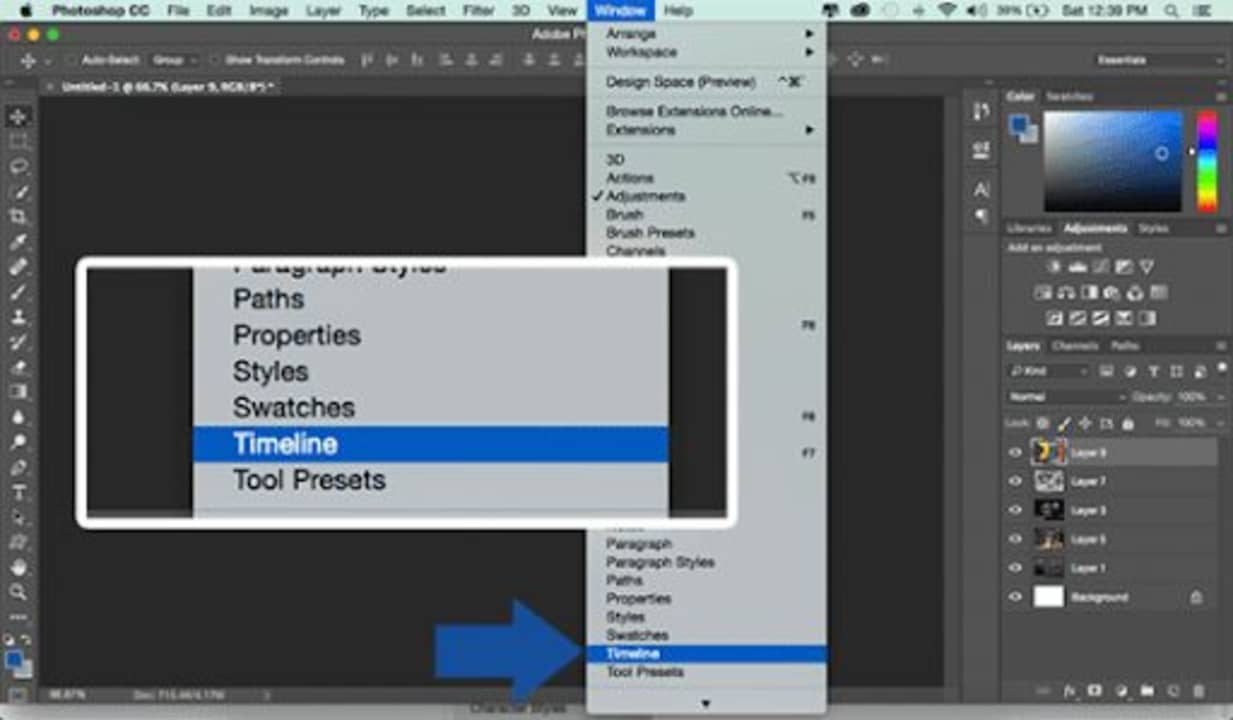
Before you can animate your GIF, you’re going to have to create Keyframes. Open the Timeline window. Navigate to Window > Timeline and get started. Via Timeline Frames (keyframes), you can apply frame-by-frame edits to our images and create animated effects through layers.
The Timeline window lets you adjust layers, move elements, apply filters, rotate text, and set the length of time for which frames will appear. Once you’ve chosen the Timeline option, the animation window will show at the bottom of your screen.
Create Frame Animation
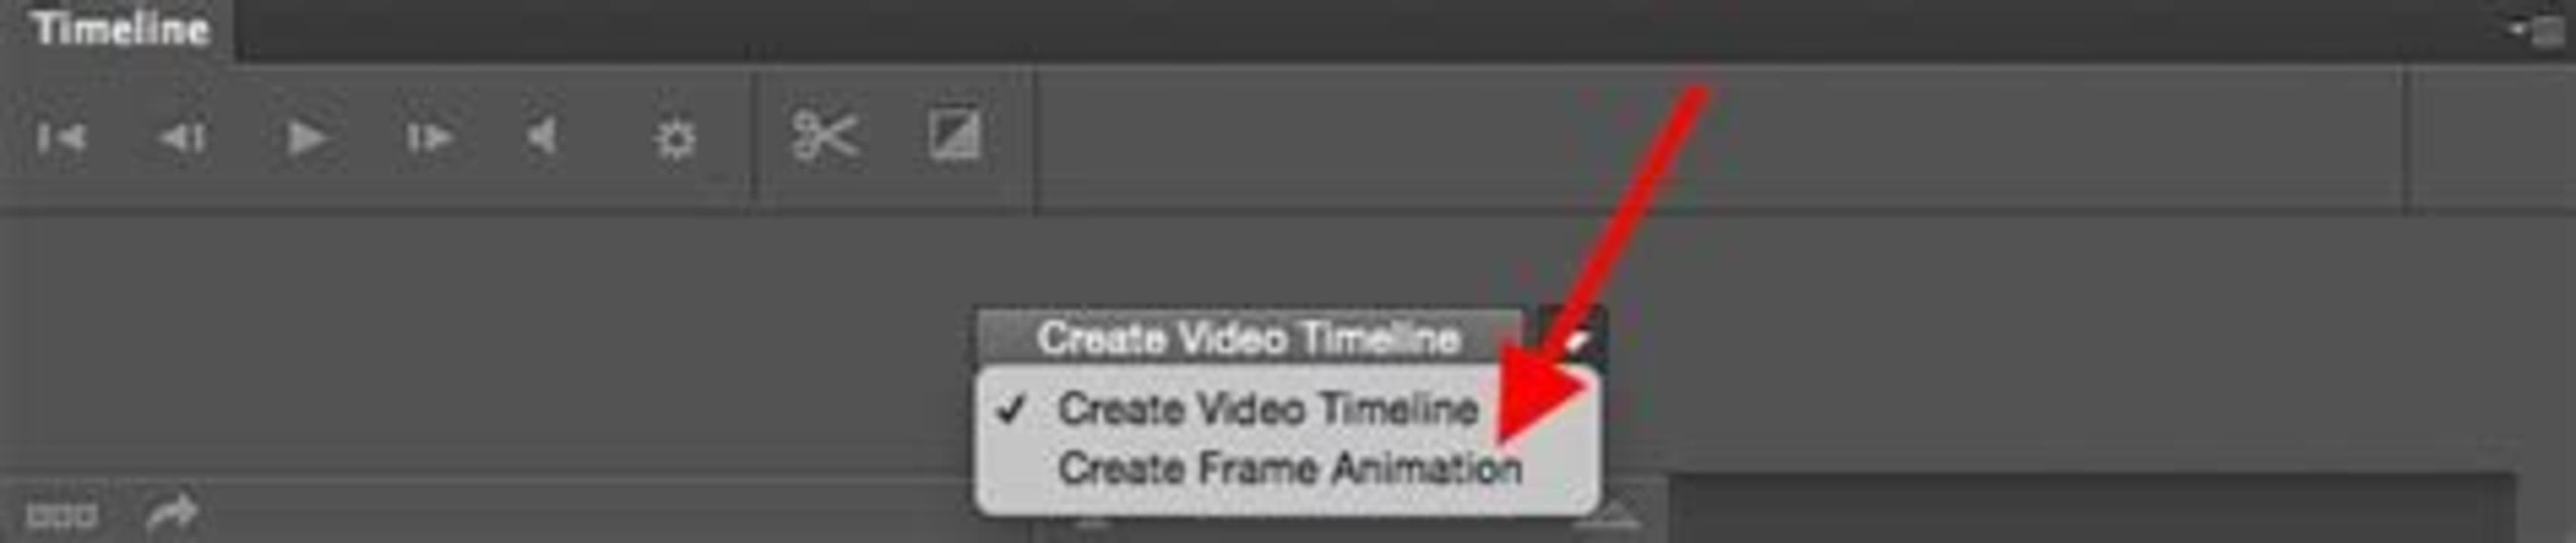
Click on the button, Create Frame Animation, in the Timeline. This will change the Timeline mode to a style for working frame-by-frame. You can apply your animation edits in these frames. You’ll have to make sure each frame has its own layer so that you can edit a frame without affecting any of the others.
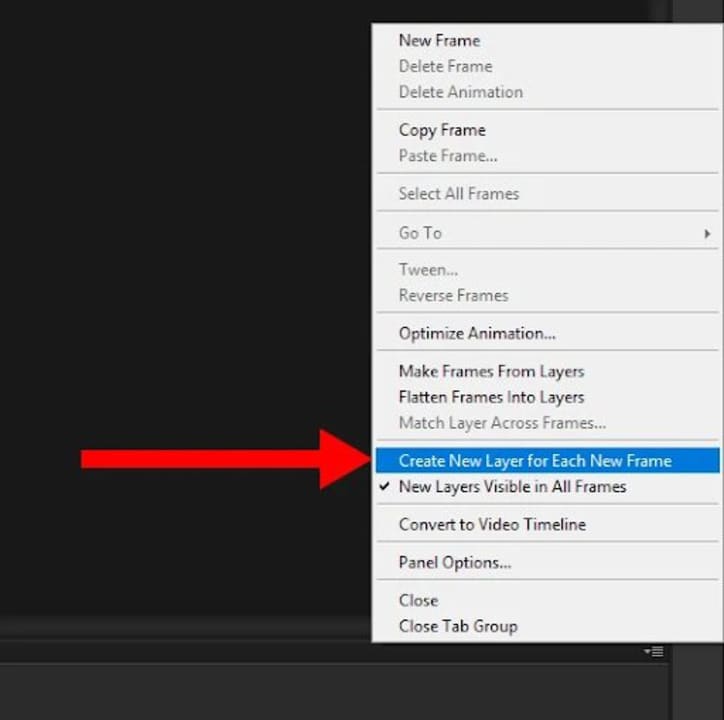
To split your images into layers, choose Select > All Layers and then locate the Timeline menu icon at the top right of the window. Then choose Create New Layer For Each New Frame.
Make frames from layers
Making Frames From Layers will turn each of your layers into a frame in your Timeline.
This means that you’ll be able to edit elements in each frame in your Timeline separately without interfering with any of the others. The more complex you want to make your animations, the more frames you’ll need to be able to set up good transitions between the different frames.Set durations of your frames
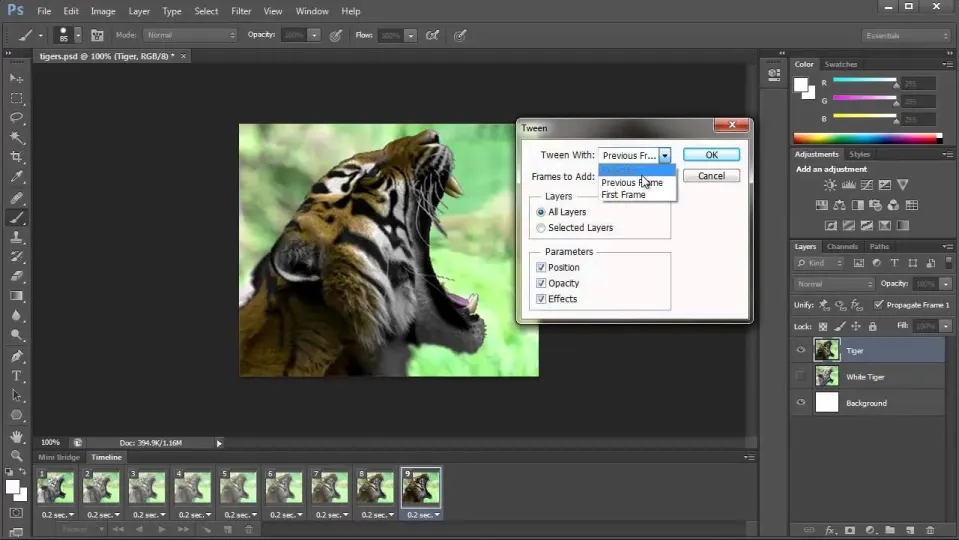
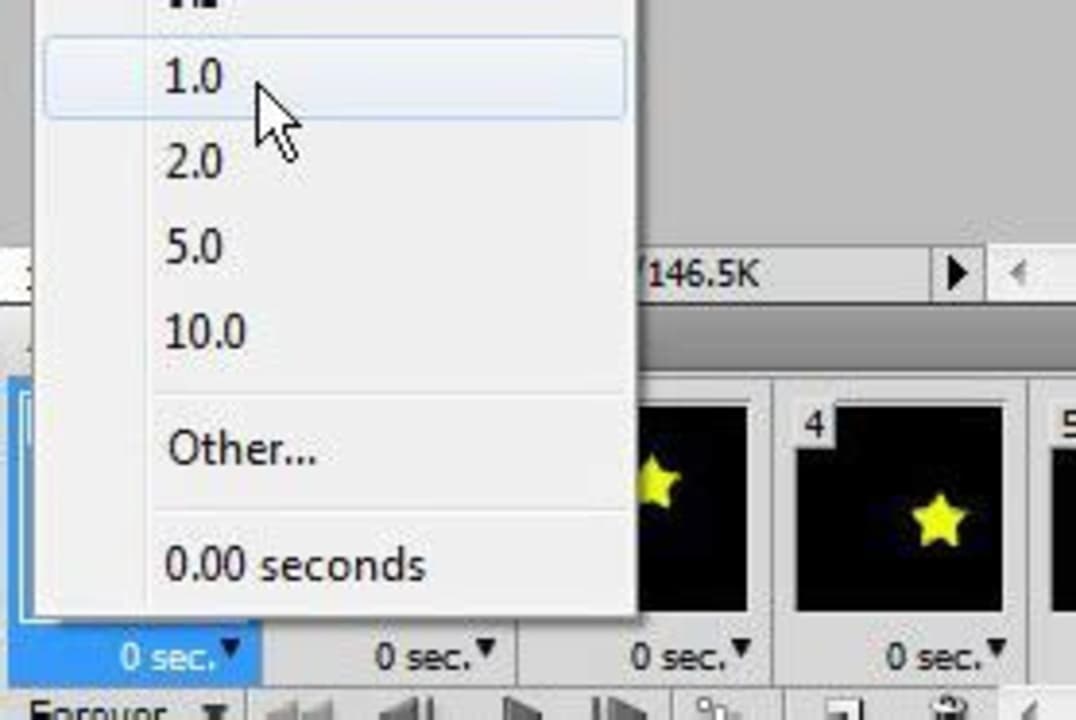
The next step is to decide how long each of your frames will play for. If you don’t, your animation might work. First, choose the frame you want to edit. Click the arrow and select the time you want the frame to run from the dropdown menu that appears. The default for each frame duration is 0 seconds. You can change it to, say, 0.2 or 0.5 seconds to start with and change it to a different time later.
Looping options
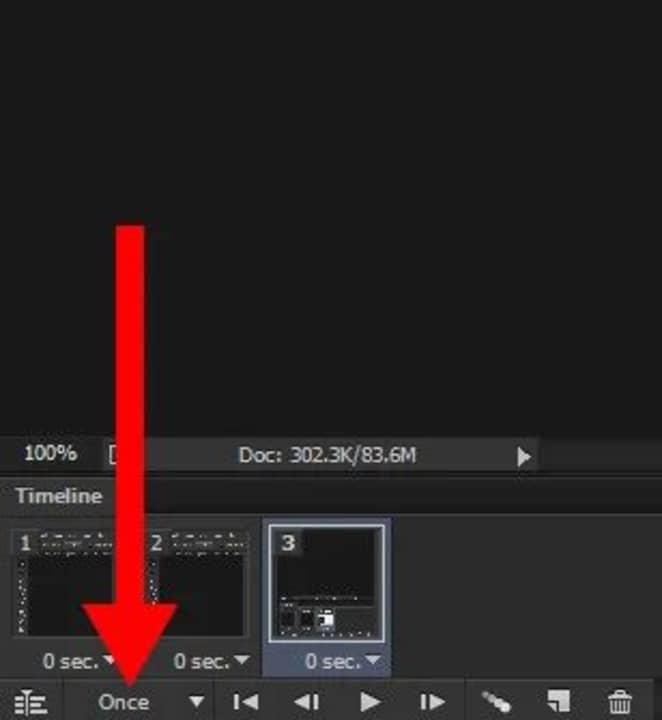
If you want your image to repeat more than once, you’ll have to set up looping options. Below the Timeline, select the Once option, which will open a dropdown menu. You’ll be able to choose from preset options or set up your own. Choose whatever suits you. The most common choice is Forever since most animated GIFs are designed to play repeatedly as long as they stay open.
Preview and export
To make sure your GIF looks and plays the way you want it to, you can preview it by simply pressing the Play button on the Timeline.
If you’re happy, you can save your GIF in Photoshop. You can’t use the usual Save command. You’ll have to go to File > Export > Save for Web (Legacy) instead. Name your file and save it as a Photoshop (PSD). You might want to edit it later. You can now export your GIF to whoever you like and await the reaction.
Why GIFs are so popular
GIFs are used on blogs, instant messaging applications, and social media, often conveying humor and a wide range of emotions. They are used extensively for animated memes. Use is so widespread that the word GIF was named the Oxford Dictionary word of the year in 2012. A GIF search engine called GIPHY has 500 million users, more than Pinterest and Twitter. They send out over seven billion GIFs every day!
Guides to Photoshop
Here are some sites to visit that have excellent guides to learn about Photoshop.
- How to merge layers in 3 easy methods
- How to add an image to a layer in Adobe Photoshop in 3 Steps
- How to blur the background in Adobe Photoshop in 4 steps
- How to add text in Adobe Photoshop
- How to fix Adobe Photoshop Error 16 in 2 easy ways
- How to get Adobe Photoshop for free in 3 different ways
- Photoshop Tips on Editing the Background
- Top 3 Photoshop Tips to Resize Images
- Crop image tips for Adobe Photoshop
- Best free online tutorial course for Photoshop
- Adobe Photoshop 7 free full version
- How to add fonts to Photoshop
- A beginner’s guide to Photoshop
- Pro Photoshop tips everyone can use working with adjustment layers
- How to add snow to your photos using Photoshop
- Adobe Photoshop CS5 free full version
- How to install a plugin in Photoshop 3
- How to create panoramic photos in Adobe Photoshop 2
- How to apply a color cut out effect in Photoshop
Conclusion
There’s a reason GIFs are so popular. You can use them to good advantage in your work or just have fun communicating with friends and associates on social media. The creative possibilities are limitless. Follow our step-by-step guide to create your GIFs quickly and easily.