How To
How to: send images with Outlook.com
- June 7, 2013
- Updated: July 2, 2025 at 8:23 AM
If you’re still struggling to come to terms with the intricacies of Outlook.com, then you’re in luck. Today we’re taking a look at how to send images with the redesigned Microsoft email app. It’s very simple: you just need a few hints, and we’ve got them! 25
Firstly, open up your email inbox, and compose an email by hitting the New button. Then fill in the recipient and write the email. If you need help doing this, look here.
Now, let’s get on with adding the images.
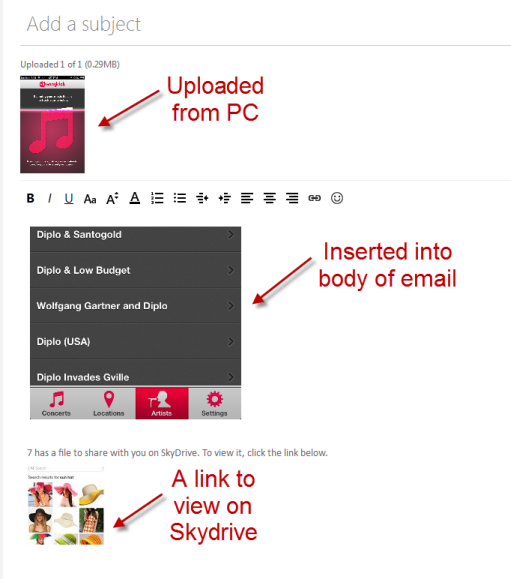
Click on Insert. Once you do this, you’ll see 3 options for adding photos (or other types of files, like documents). You can choose File as attachments, Pictures inline, or Share from SkyDrive.
1. Add Files as attachments
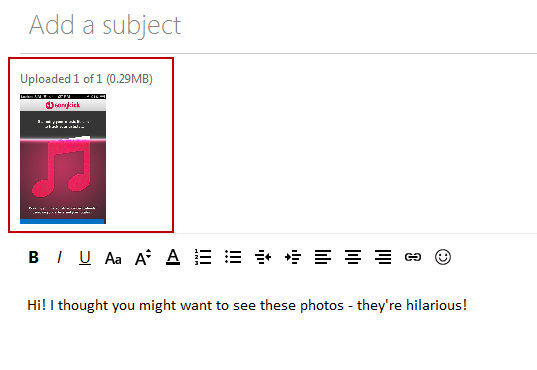
This is the most traditional way of attaching photos. You’d use it when you have images stored on your computer. It’s very simple – once you click Insert > Files as attachments, the file upload window will appear, showing you files on your computer. Browse to the ones you want (hold shift and click to choose more than one), then click Open. The files will be uploaded to your email, and you’ll see miniature versions of them appear just underneath the subject line. Of course, when the recipient opens the files, they’ll be the normal size.
2. Add Picture inline
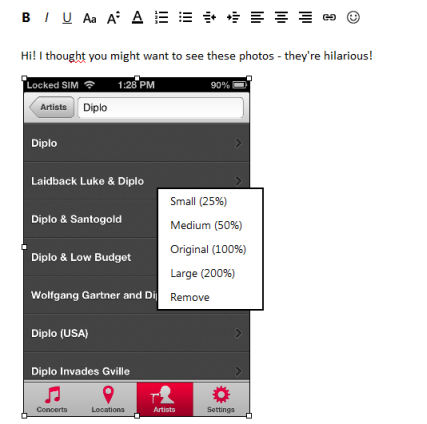
Adding images inline is just another way of saying “paste the pictures into my email”. This is great for smaller images, or when you are trying to illustrate something you’re talking about in the email. If the images are too big though, they’ll mess up your email, so watch the size. Once the images have been added (you do this just as described above), you can right click on the image to get further options, including making it bigger or smaller, or removing it totally.
3. Share from SkyDrive
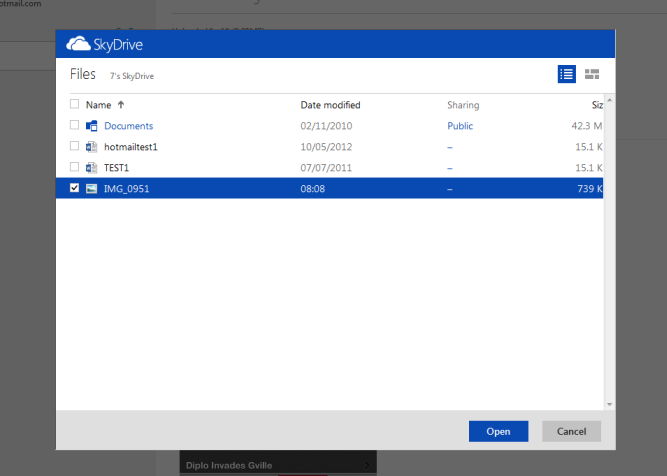
SkyDrive is Microsoft’s online storage service, and if you use it, you might have pictures stored online that you’d like to share. The difference here is that instead of actually sending a copy of the image to your recipient, it just sends a thumbnail of the picture and a link to view it online. This is great for multiple images or very large pictures that might be too big to send.
Hopefully, you can now decide which of the 3 image options is best for you. If you have any more questions about carrying out tasks with Outlook.com, we’d be happy to help – just ask in the comments below!
You may also like
 News
News1 in 3 Android apps have serious API leakage issues, according to a recent study
Read more
 News
NewsThe rise of fake captchas: a new weapon for cybercriminals
Read more
 News
NewsGoogle disables the 100 results per page feature and leaves users stunned
Read more
 News
NewsThe second season hasn't even premiered yet, and Disney+ has already renewed this superhero series for a third one
Read more
 News
NewsIs Hollow Knight: Silksong too difficult? Its creators defend that it is not
Read more
 News
NewsMicrosoft teams up with ASUS to launch ROG Xbox Ally and compete with Steam Deck
Read more


