How To
How to setup a VPN for Minecraft with Hamachi

- April 11, 2012
- Updated: July 2, 2025 at 8:50 AM

 Playing Minecraft with friends is great, but playing with people you don’t know can ruin the fun. A solution is to create your own VPN server that only you and your friends can access. Theoretically, when creating a VPN network everyone will be able to play Minecraft in a server, hidden from the lurking eyes of other players.
The most common VPN software used is Hamachi. Hamachi is an easy to use VPN client that doesn’t require a lot of work to install and setup, but everyone who is planning on joining your secret match will have to install Hamachi. Just think of it as a rotating server between your friends.

-
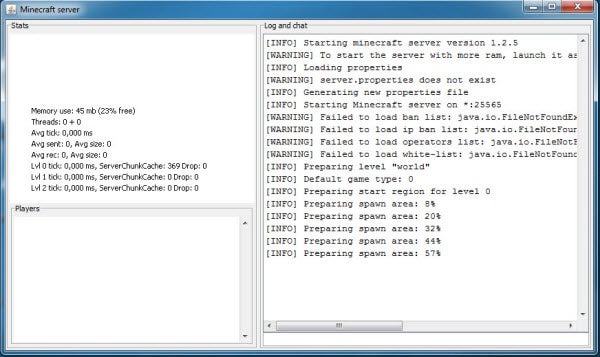
- Download and run the Minecraft Server Installer jar file. Run the program and watch various information load through the console. The purpose of running the server installer is to create a properties file that will need to be edited.
- Download and install Hamachi. Remember that everyone who is going to play on the private server needs to install Hamachi.
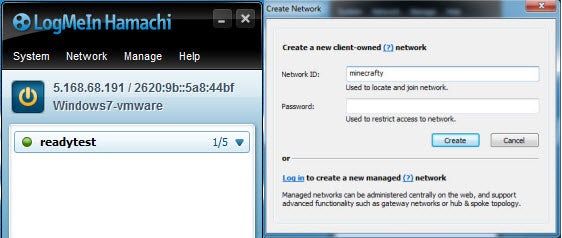
- After registering Hamachi, you will see an IP address assigned by the program. This is the IP that everyone will be using to access the server.

-
- You now need to setup the network in Hamachi. Select “Network” then “Create a new network.” Assign a Network ID and password. You will need to share this information with your friends so they can log-in.

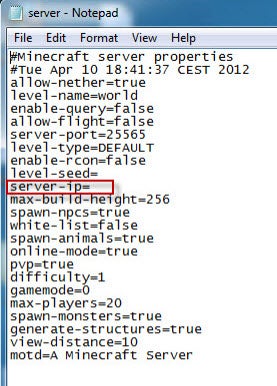
- Find the Minecraft “server.properties” file and open it with Notepad. Find and enter the IP address you got from Hamachi after the “=” (equals sign) to assign the server IP.
- Start the Minecraft server.
- You can now have your friends sign-in with the information you gave them through Hamachi by “joining an existing network.”
Now you can have private Minecraft multiplayer sessions!
You may also like
 News
News'Catwoman' not only killed DC in cinema for years. It also destroyed a legendary video game studio
Read more
 News
NewsDisney stopped this adaptation of one of its best animated films. Now it has restarted it
Read more
 News
NewsGame Pass announces the first batch of games for October, including two classic RPGs and the most anticipated action game of the year
Read more
 News
NewsDwayne Johnson and Emily Blunt have a special chemistry on screen, and this classic available on Disney+ proves it
Read more
 News
NewsEA alienates its community again with an overpriced cosmetic pack, this time in skate
Read more
 News
NewsSigourney Weaver was about to not appear in one of the Alien movies, but her director prevented it
Read more