"Slip" and "Slide" editing: the hidden timeline tools to adjust timing without moving the clip
- November 24, 2025
- Updated: November 24, 2025 at 11:00 AM
When we edit in Premiere Pro, one of the biggest challenges is fine-tuning the rhythm. Sometimes we want to adjust exactly which part of a clip appears on screen or rearrange its content without moving its position. For many users, these tasks seem complicated… until they discover the Slip and Slide tools.
These functions enable you to adjust the content of a clip with great precision, without affecting the overall editing of your project. Here, we will explore what they are, their purpose, and how to use them step by step.
What is Slip and Slide, and what are they for?
The Slip tool, available in Premiere Pro, enables us to modify the content of a clip without affecting its duration or position on the timeline. Essentially, it helps us to display a specific part of a clip without moving it from its original position.
It is tremendously helpful when, for example, you have a well-placed clip in your sequence but the content that appears is not ideal. It also helps us change the initial or final frame without altering the edit.
On the contrary, Slide retains the content of the clip intact but moves it along the timeline. Slide will help you in those occasions when you need a clip to start a little earlier or later without changing what it shows.
And if it still isn’t very clear to you what they do, remember this: Slip changes the content of a clip, but not its position on the timeline. Slide changes the position of the clip, but does not alter its content.
How to Use Slip and Slide in Premiere Pro
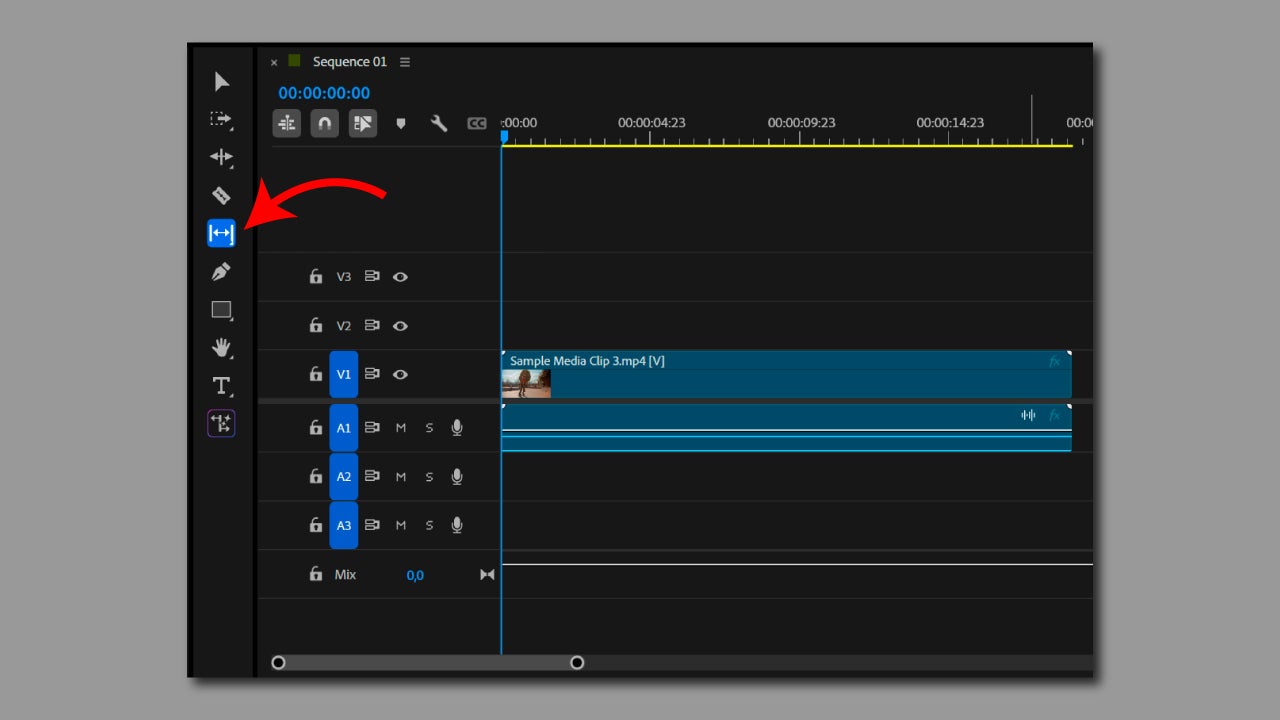
First, we will start with the Slip tool. To master it, follow these steps:
- Click on the clip you want to change in the timeline.
- Select the Slip tool. It is located in the toolbar next to the timeline. You can also use the “Y” key as a shortcut or go to Window > Tools to display the toolbar if it is not visible.
- Drag the clip to the left or right, depending on your needs.
- In the Premiere monitor, you will see two comparison windows with the clip where the new start and end points will be displayed. Stop dragging when you reach the desired placement.
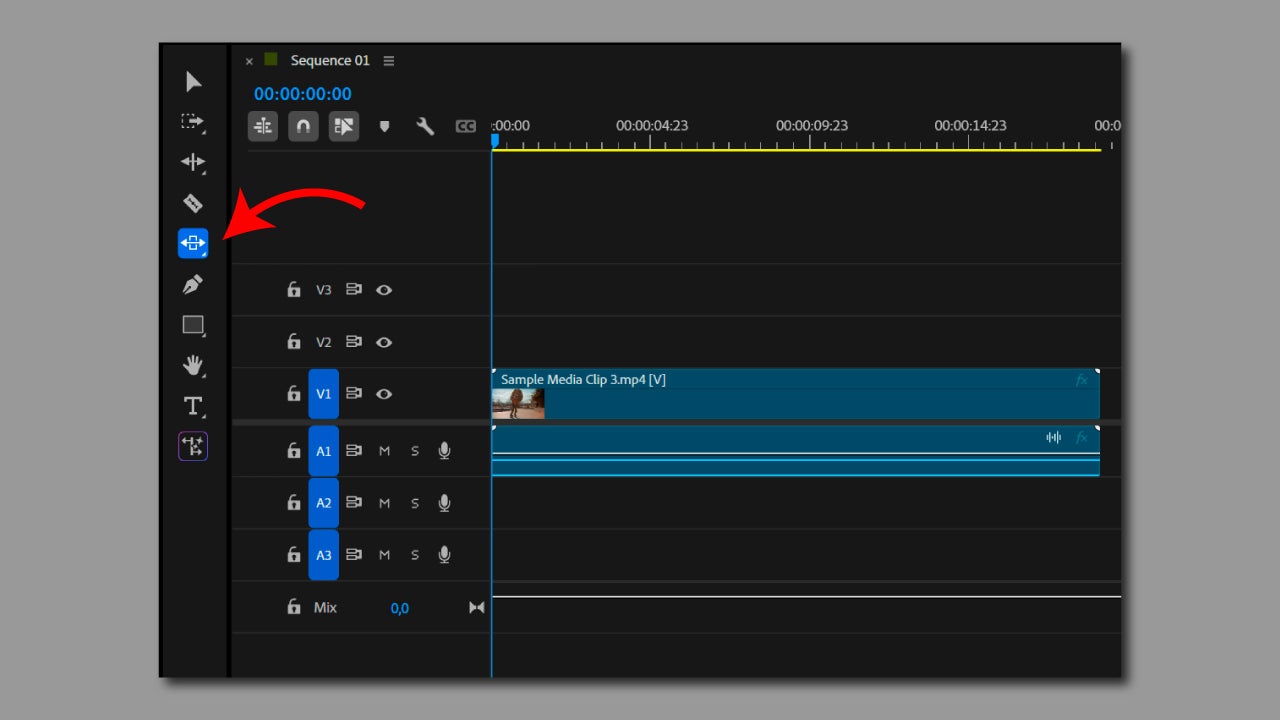
Now it’s Slide‘s turn. This is how it would be used:
- Just like before, select the clip on the timeline.
- Click on the Slide tool. If you don’t see it, you can use the keyboard shortcut “U”.
- Drag the clip to the left or right again.
- You will see how the clips change their duration to fit the new position on the timeline. Stop dragging when you find the ideal gap.
Both tools are handy for editing with great precision and without significantly altering the timeline of your projects. If you start using them in your edits, you’ll notice how you edit faster and more effectively.
Other tricks that will be useful when using Slip and Slide are:
- Activate the monitor preview. In the latest version of Premiere, you have an improved preview that allows you to see at all times what you are changing and what you are not.
- Expand the timeline while editing. The closer you are to the clips, the easier it will be to adjust anything.
- If you need to move large blocks or reorganize clips, it’s better to use the basic move and trim tools.
- Enable Snap and markers. They will help you synchronize your adjustments with key points in both sound and video.
Can I use Premiere Pro 2025 for free?
If you were wondering if Premiere Pro is free, I’m sorry to say it’s not; to use it, you need to be subscribed to one of the Creative Cloud plans. However, you can use it for free for a limited time thanks to Adobe’s official trial version.
Adobe offers a 7-day free trial of Premiere Pro. During those seven days, you have access to all the program’s features, with no watermarks or usage limits. Additionally, Adobe offers up to 14 additional days to request a full refund, which means you can use the application for a little longer if you cancel on time.

Artist by vocation and technology lover. I have liked to tinker with all kinds of gadgets for as long as I can remember.
Latest from María López
You may also like
 News
NewsThe Stormtroopers have terrible aim, but Mark Hamill has an explanation for it
Read more
 News
NewsValve confirms that the Steam Machine will be worth as a computer with its specifications
Read more
 News
NewsVoice actress Jennifer English, known for her work in Baldur's Gate 3 and Expedition 33, says her best work is in an MMO that has not been released yet
Read more
 News
NewsA specialist in action from Dune and John Wick 4 accuses Star Wars: Vision of plagiarizing one of its choreographies
Read more
 News
NewsThe creators of Silksong want players to discover the game's secrets without consulting the Internet
Read more
 News
NewsWicked 2 has dominated the box office, making 226 million dollars worldwide in its opening weekend
Read more