Smart presets 2.0: adaptable presets that learn from your library
- May 19, 2025
- Updated: July 1, 2025 at 9:36 PM
When it comes to editing an image, it may take you a long time to find the right adjustments. Color changes, brightness, saturation… each image is a world. And we know that finding the right adjustments is a difficult and laborious task. Fortunately, Adobe Photoshop allows us to save these adjustments to apply them at any other time with just one click.
This is how presets work, also known as presets. Fortunately, you don’t need to be an expert Photoshop user to use them in your daily life. It doesn’t matter what you need them for: whether it’s for a professional project or a photo to upload to Instagram, presets will help you gain speed without sacrificing quality.
Next, we will see how to use them in Adobe Photoshop 2025 and also how you can create your own.
What is a preset in Photoshop?
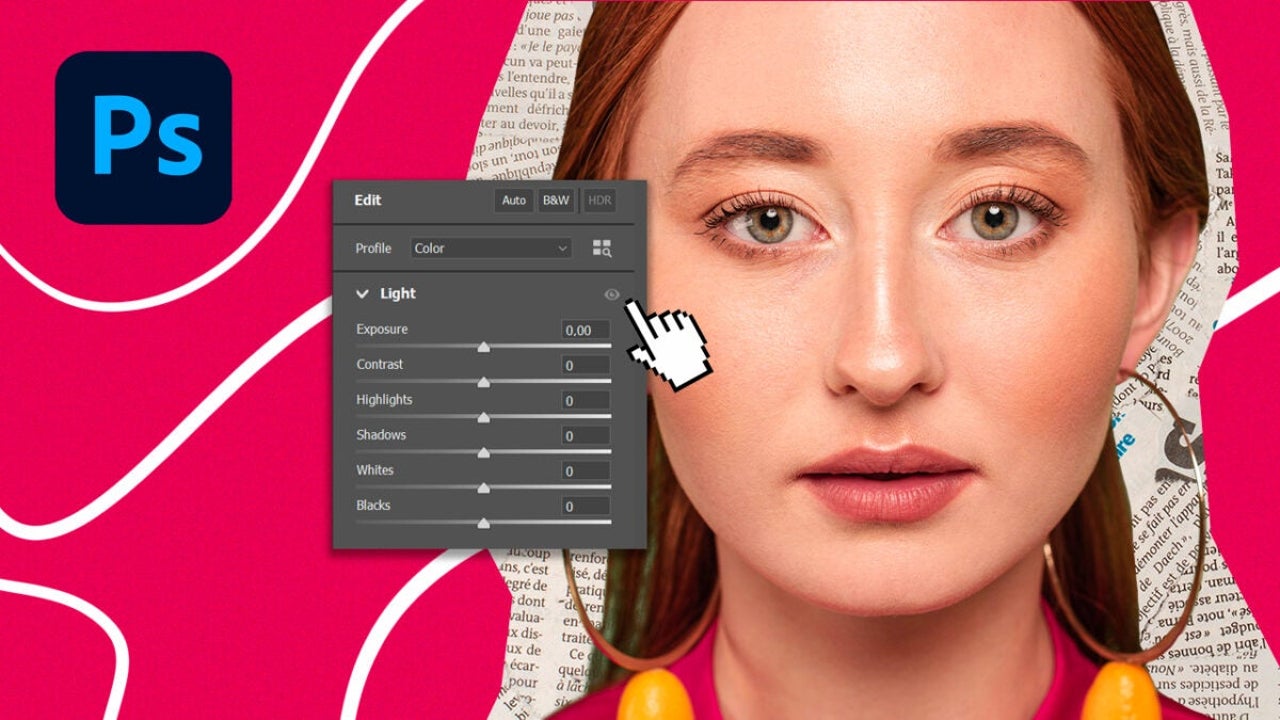
A preset is basically a saved setting of adjustments such as color, exposure, contrast, saturation, or even more complex effects like gradient maps or adding vignettes. Instead of applying each adjustment one by one, you can simply select a preset that combines all the necessary adjustments and that’s it. At that moment, all changes will be made automatically.
How can I access the presets?
You will find it quite easy to locate the presets panel within Adobe Photoshop 2025 if you follow these steps:
- Open an image or photograph in Photoshop. You can drag it into the already open program or go to File > Open.
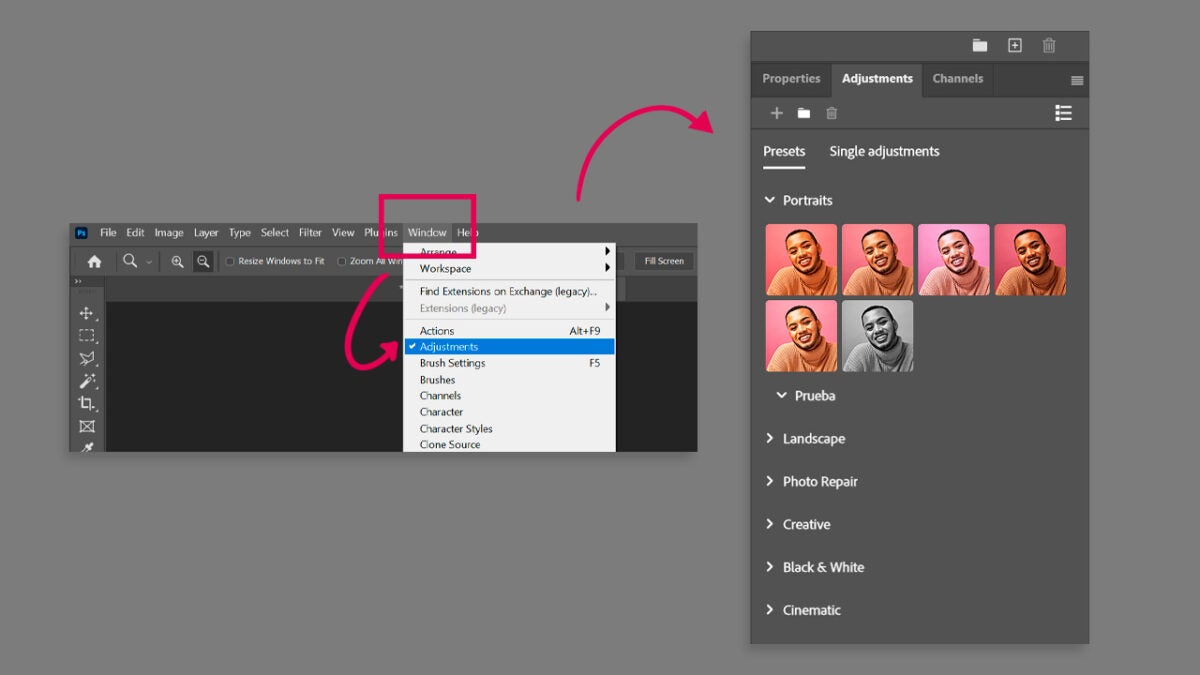
- Go to the Adjustments panel. If you don’t see it, you can open it from the Window > Adjustments menu.
- At the top of the panel, you will see several categories such as Portraits, Landscape, Photo Repair, and many more. Within each of these, you will find several default presets.
You can also access other types of presets using tools like Camera Raw Filter. The latter allows us to apply the same adjustments that would be made in Adobe Camera Raw but on an image within Photoshop. Here’s how you can access it:
- Open an image in Photoshop.
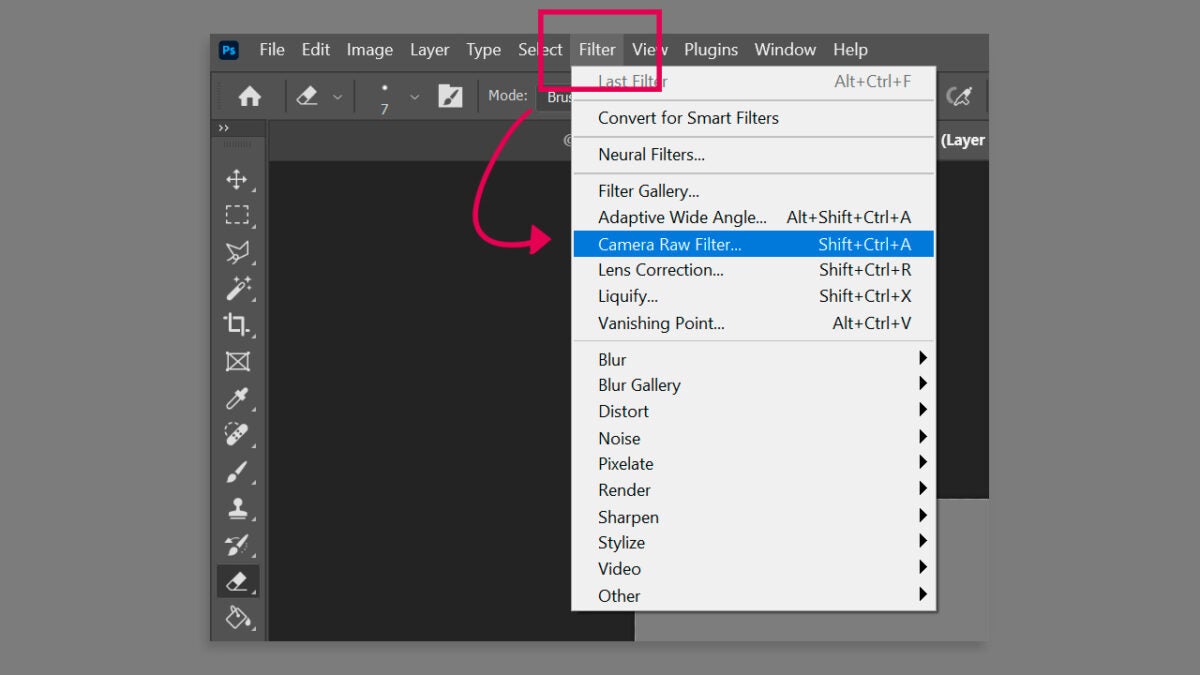
- With the image layer selected, go to Filter > Camera Raw Filter.
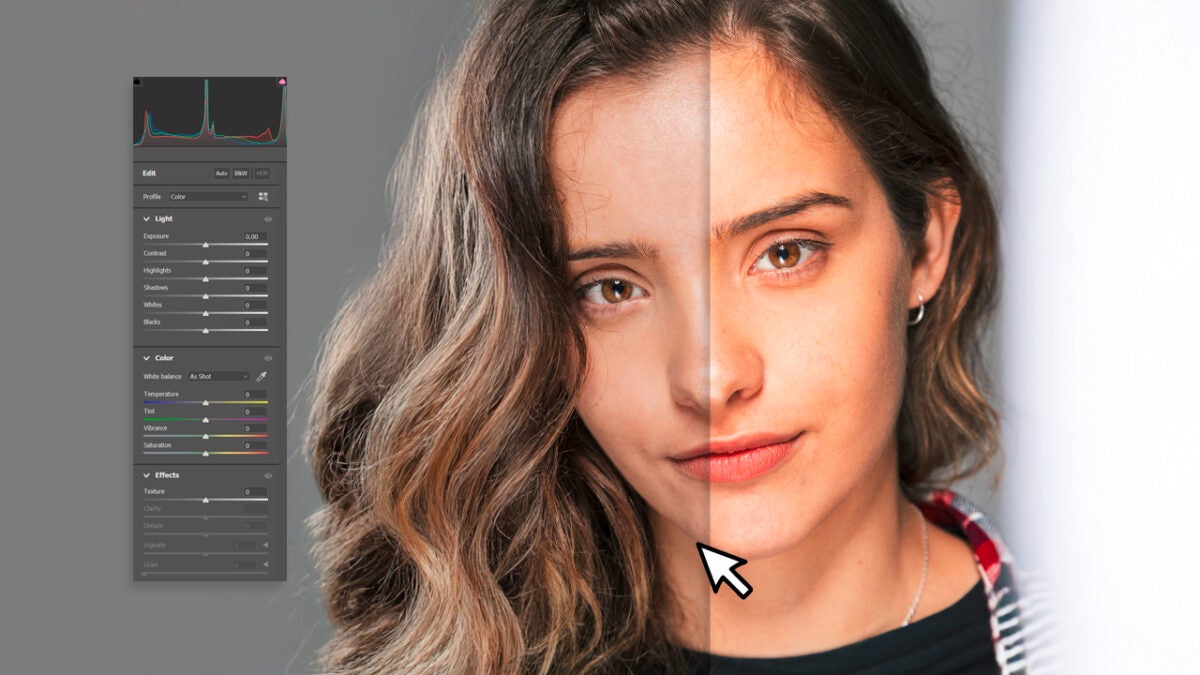
- A new panel will open where you can make all kinds of adjustments: color changes, effects, gradients, etc.
Later on, we will explain to you how to create your own presets using Camera Raw Filter.
How to apply a preset step by step
- Open your image in Photoshop.
- Open the Adjustments panel.
- Click on the preset you want to apply. Immediately, you will see the image change automatically.
- If you want to modify the result, you can manually adjust the sliders (such as exposure, contrast, etc.) right after applying the preset.
If you’re not satisfied with how it looks, you can always undo it with Ctrl + Z or try different adjustments. The process with Camera Raw Filter is even easier: you just need to go to Filter > Camera Raw Filter to “play” with the presets.
How to use external presets within Camera Raw Filter
In addition to the default ones, you can download thousands of free or paid presets created by other users.
- Download the preset file. They usually come in .xmp or .lrtemplate format.
- Go to this path on your computer: C:Usersyour PC nameAppDataRoamingAdobeCameraRawSettings. For Mac, the path is UsersUsernameLibraryApplication SupportAdobeCamera Raw importedSettings.
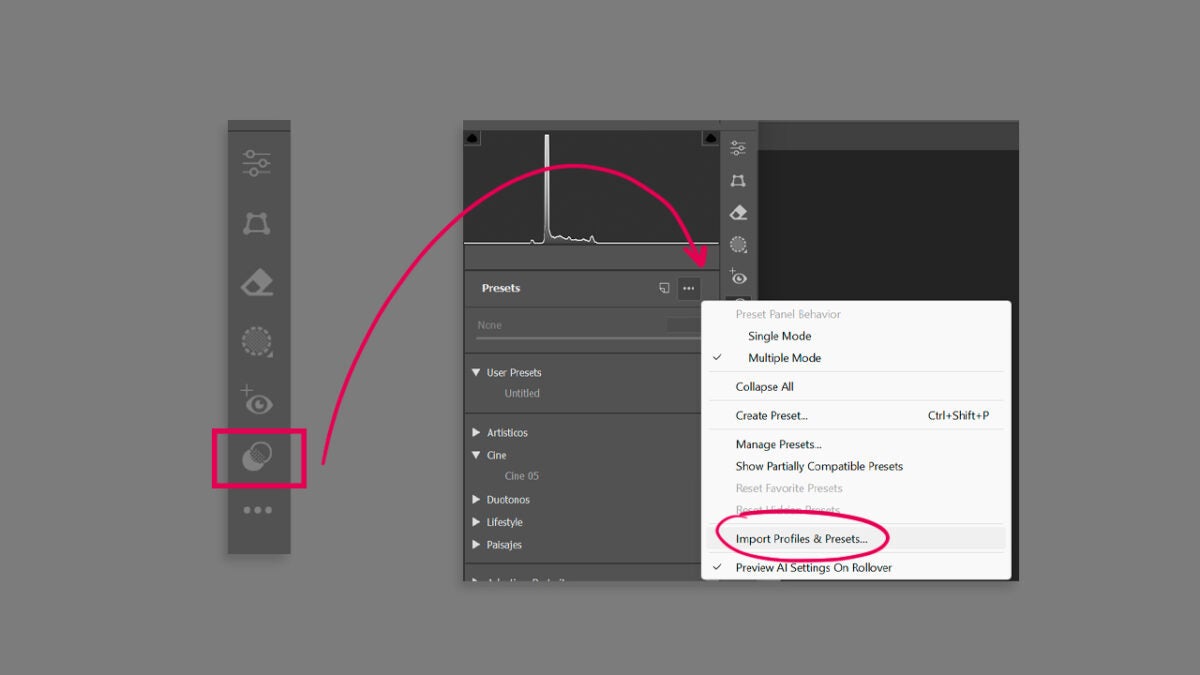
- A simpler method is to open Camera Raw Filter within Photoshop and go to Presets. Then, click on the three dots symbol located to the right of Presets and select Import Profiles & Presets.
- You will find them when you open Camera Raw Filter in the Presets section.
If you can’t find certain folders on your PC, they are most likely hidden. To make them visible, you just need to use the keyboard shortcut Ctrl + H on Windows. Try it with your photos, images, or projects and set them up to your liking.
How to create your own presets
If you have adjusted an image and love the result, you can save those adjustments as a preset to use in the future. This is the most ideal option if you want to maintain visual cohesion or replicate the same effect on other images.
You can do it like this from Photoshop:
- Adjust your image by adding the Adjustment layers you see fit.
- Select all the Adjustment layers you want the new preset to contain.
- Then, go to the Adjustments menu and click on the + icon you will see on the left.
- Give it a name and click on Save. The new preset will appear in the same Adjustments panel but further down.
If what you want is to create a Camera Raw preset, these are the steps to follow:
- Inside Photoshop, go to Filter > Camera Raw Filter.
- Make the adjustments you want. Here you can modify the color, detail level, effects, etc. Combine all the ones you think are necessary to achieve the style you like.
- Once you are satisfied with the results, click on the icon of the three vertical dots and select the option Create Preset.
- Give it a name and choose which folder it will be located in. Also, check which adjustments you want to include in your preset.
- Click OK to finish.
Your new preset will now appear in the Camera Raw preset list and you can apply it to any other image.

Artist by vocation and technology lover. I have liked to tinker with all kinds of gadgets for as long as I can remember.
Latest from María López
- The infinite canvas: use of Generative Expand for print bleeds and concept exploration
- From Prompt to Pattern: Creating Custom Vector Patterns for Fashion and Textiles with AI
- Rescuing lost memories: using Generative Upscale technology to prepare old family photos for printing
- Unlock the Power of Adobe Lightroom: Batch Editing & AI Features Explained
You may also like
 News
NewsThe infinite canvas: use of Generative Expand for print bleeds and concept exploration
Read more
 News
NewsJames Gunn clarifies the future of Harley Quinn after years of being a DC icon
Read more
 News
NewsSouth Korea has grown in streaming much more than expected. They have to thank themselves
Read more
 News
NewsOne of the most controversial (and brave) artists in history will have her own biopic
Read more
 News
NewsWe have been waiting 15 years for the end of one of the best mangas in history. And now, finally, it is going to arrive
Read more
 News
NewsThunderbolts is coming to Disney+ sooner than you thought: This will be the release date on the platform
Read more