How To
How to configure a Cisco VPN client in Snow Leopard
- February 3, 2010
- Updated: July 2, 2025 at 9:16 AM
One of the great things about Snow Leopard is that you no longer need Cisco’s VPN Client to connect over a private network. Snow Leopard has its own Cisco VPN network configuration tool that works within OS X 10.6. Cisco’s VPN client doesn’t even work with Snow Leopard so if you’ve still got it on your system, you can dump it in the Trash. However, setting up a Cisco VPN network might be a little tricky for those doing it for the first time so here is a simple guide.
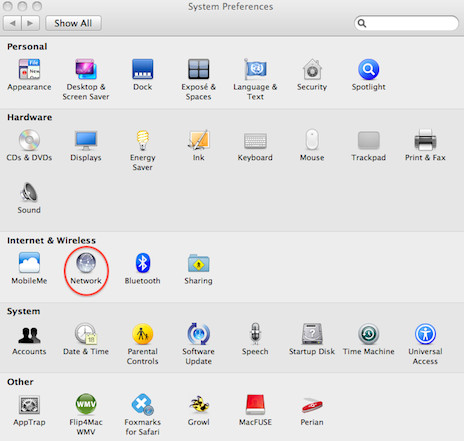
Go to System Preferences and select Network:
Use the “+” symbol at the bottom of the list of network connections on the left-hand side to add a new network.

Next to Interface select VPN and next to VPN Type, select Cisco IPSec:

You then need to configure it. For this you will need the .PCF file that you uploaded to your old Cisco VPN client. Open it with Text Editor. You have to copy some of these details into the configuration boxes.
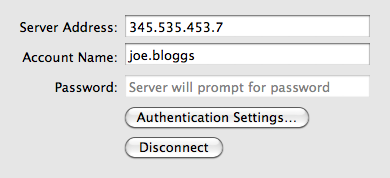
In the .PCF file, you will find your Server Address usually something like Host=345.535.453.7
Account Name is the your personal login name you usually used for your Cisco VPN Connection listed in your PCF file as something like Username=Joe.Bloggs.
Finally Password is your own personal password. It doesn’t matter if you enter this now as you’ll be asked for it again later anyway.
Then you need to setup the Authentication Settings.
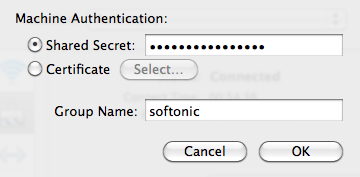
The Shared Secret is an encrypted password you’ll find listed next to enc_GroupPwd= in the .PCF file. You need to decrypt it to Plaintext which you can do by using this decoder to convert it. The result should be displayed something like: Plaintext password: 89fdfsPdfs1D9itr
Finally, Group Name is located in your .PCF file next to GroupName= and is the generic group name that all VPN users on your company network use (such as “Teleworking” or “Softonic”).
And that’s just about it. It’s a good idea to make sure the check box Show VPN status in menu bar is ticked in the network setup dialog box as you can then quickly connect and disconnect your Cisco VPN network and see how long you’ve been connected:

I can’t say I’ve noticed any major speed improvements in the VPN since I switched to Snow Leopard but its nice to know that I need one less application to connect to a private network and thus, one more badly needed space in my Dock.

You may also like
 News
NewsDonald Trump says he was forced to sue the BBC for 1 billion dollars
Read more
 News
News"All video games use AI," say those from ARC Raiders
Read more
 News
NewsThese two legendary Hollywood actors have just sold their voices to AI
Read more
 News
NewsElden Ring: Nightreign has announced its new DLC in which it will include the most iconic boss from the first Dark Souls
Read more
 News
NewsLindsay Lohan and Jamie Lee Curtis are taking Disney+ by storm with this sequel to a cult classic from the company
Read more
 News
NewsTake-Two is facing significant internal pressure due to the firing of 35 developers before the launch of GTA6
Read more