How To
How to create and add your own unique follower to Skyrim

- July 19, 2018
- Updated: July 2, 2025 at 6:16 AM
It’s been eight years since Elder Scrolls V: Skyrim. We completely understand if by now you’re getting a bit tired of Lydia as a follower. While there are a ton of follower mods out there, sometimes if you want something done right it’s best to just do it yourself. So exactly how hard is it to make your own follower in Skyrim? We’ll show you in these 15 steps.
It goes without saying that you’ll need a copy of Skyrim to test this properly, so if you don’t own the game, here it is:
We’ll be using Skyrim’s Creation Kit to make a follower. You can download that here:
Alternatively, if you own Skyrim or Skyrim: Special Edition Steam, you actually already own the Creation Kit. On Steam you can find it in your Tools tab under ‘Library.’ Just scroll down and double-click to install.
Once you have the Creation Kit installed, we’re ready to begin. Please do not forget to save your progress often and be patient when working with this software. There are thousands of assets at work here, so it’s very touchy and crashes quite often.

1. Getting started
Once you’ve opened Creation Kit, you’ll be faced with this screen:
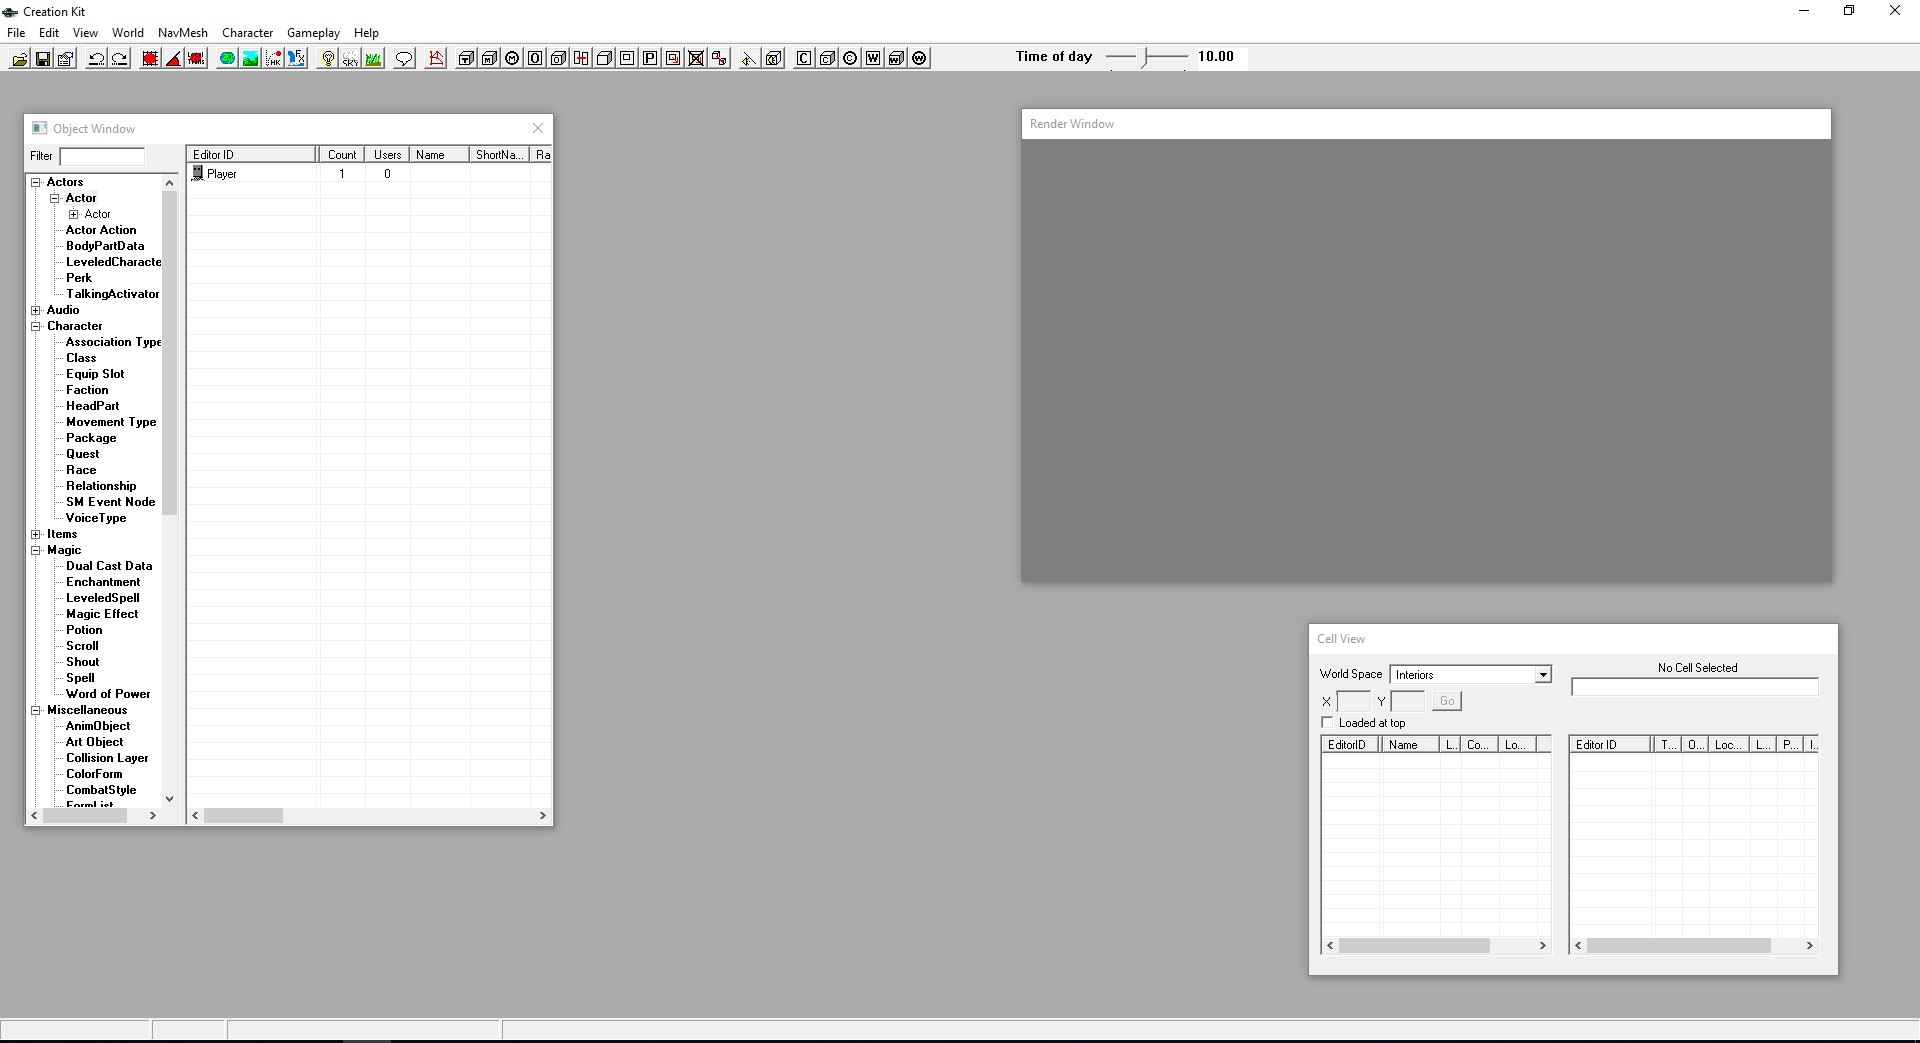
Click File > Open, then double-click ‘Skyrim.esm.’ Open it up. If a prompt comes up saying you haven’t selected an active file, ignore it. Similarly, if you get a message about missing plug-ins, just say ‘yes to all.’
Right-click on the massive list of actor names that appears on the left and say “new.” This will open up the character creation window. Now we’re ready to get working.
2. Name your follower
At the top left of the window that just opened, you’ll be putting in a ref ID. This is the unique tag that the game will identify your new character as. This will not be the character’s visible name! As such try and balance your Ref ID to be both unique and easy to remember, something like “JohnDoe101ActorFollower.”
After, type in your follower’s name. The “short name” afterward is optional. The name will be your character’s label in-game, while the short name is shorthand for quests. For example, “Jane Doe” might be referred to as “Jane” in your quest log.
Don’t touch any of the options below, like Invulnerable or Protected. We’ll do that later.
3. Assign Basic Traits
On the right, you’ll be presented with a handful of checkboxes for your character’s traits. Up top, pick your character’s race and sex. For the sake of this tutorial, we’ll be covering how to make a human follower, not an animal.
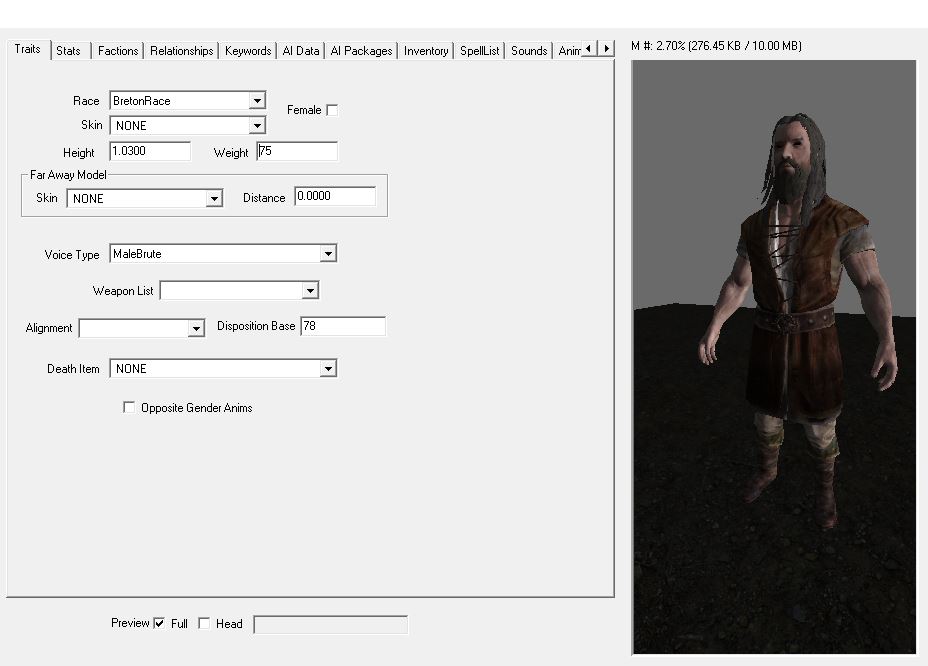
Next, you should tick the “preview” checkbox at the bottom of the window to see the character’s full body. This will help with the adjustments we’re about to make.
A character’s height and weight are very touchy, so if you make adjustments to their default they should be very minimal or they’ll look odd in-game. For reference, check the preview on your right as you go along.
4. Give your follower a voice
This next part is important. Still on the Traits tab, if you go down the Voice Type dropdown it will at first seem like you have a ton of options. This is sadly misleading. Most of these voices will unfortunately not work with follower characters. In order to find the ones that do, you’ll have to dig a bit:
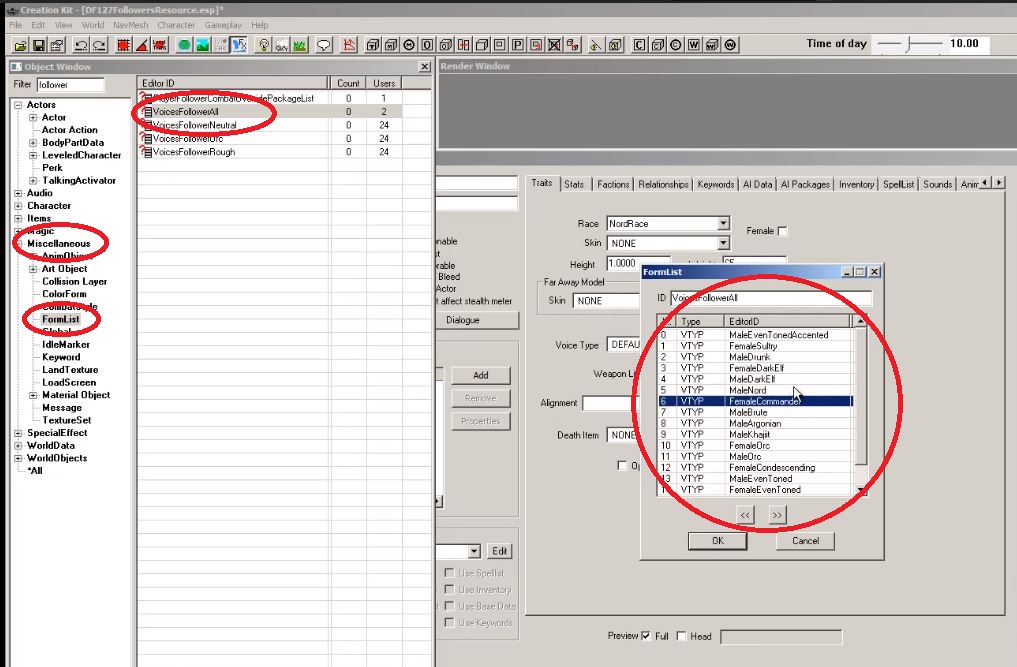
In your object window on the left, expand the Miscellaneous options and click on FormList. In the filter up top, type “follower.” Now double-click the “VoicesFollowerAll” option and scroll through to pick the one you want for your follower. If you don’t know what these voice types sound like, check out this video for samples:
5. Set your follower’s stats
The stats tab is where you pick your follower’s level and how good he/she is with the various skills in-game. You can start by setting a follower’s level by simply typing it in the “Level Mult” portal, but we recommend a different approach:
Tick the checkbox that says “PC Level Mult” and it will unlock the two portals below that say “Calc Min” and “Calc Max.” From here you can put in the follower’s min and max level, so that they will better scale with the player character and the enemies you encounter. For example, our character starts at level 30 lowest, but caps at 55:
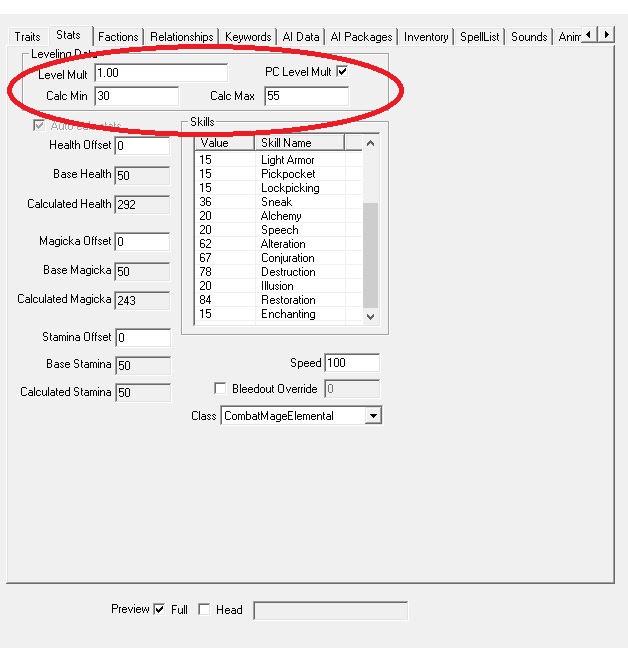
The bottom window has a variety of build options like Blade, Beggar, CombatScout, etc. Clicking through them will change which skills get priority for your follower. How good a follower is at any particular skill is a combination of both their “class” and their level window. Two CombatMonk class characters may have differing levels of Sneak depending on what level they are.
6. Set your faction
This tab and the next don’t have much wiggle room and aren’t as subjective as the past couple, so you’ll need to do the next steps exactly as written. Luckily they’re pretty simple:
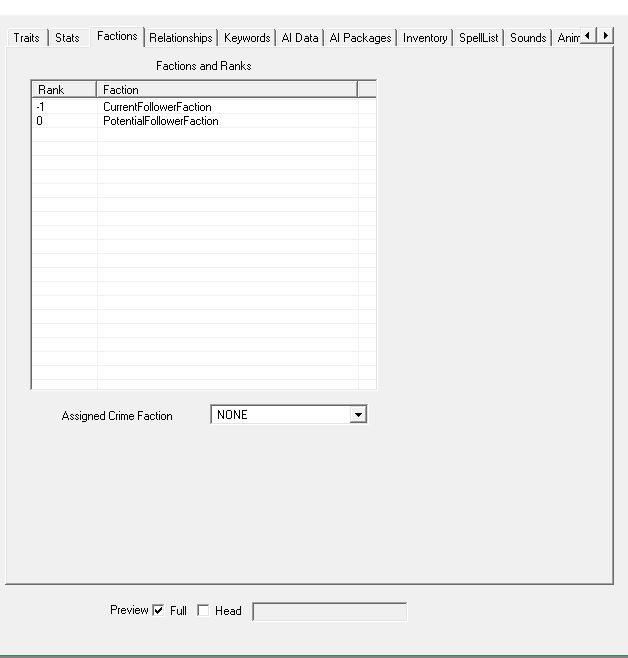
Go to the Faction tab. Now right-click in the empty lined box and say “new.” Then type follower in the filter. Choose “CurrentFollowerFaction” and “PotentialFollowerFaction” options. They should both appear in the window.
Now select the “CurrentFollowerFaction” and press F2. Then type in “-1.” This basically sets your character as unassigned to you from the start, which means they will only join you after you speak with them, as is the default in this game.
Frankly, if you set this value as anything other than -1 it’s unlikely that your follower will work at all. Do it right and your factions screen should end up looking like this:
Before we move any further, NOW is the time to check the boxes under your character’s ref ID and name. A quick runthrough of what these mean:
7. Can your follower be killed?
CharGen Face: Your follower’s face will be in the preset faces at the start of game.
Essential: Your follower cannot die.
Protected: You cannot kill this follower, but enemies and falls can.
Respawn: After this follower dies, it will come back.
Unique: This is only one follower, and there are no duplicates of this character running around the game world.
Summonable: This character can be summoned via conjuration.
Ghost: Weapons and spells will go through this follower.
Invulnerable: Weapons and spells will impact this character, but they will be unaffected.
Doesn’t Bleed: No blood animation when this follower is struck.
Simple Actor: Disables several of the facial animations on this follower.
Doesn’t Affect Stealth Meter: If this follower spots you while you’re crouching, it will not affect your sneak meter.
Pick whatever combination of these you like, but you’ll at least need to check the “Unique” box.
8. What is your follower’s relationship with you?
In the Relationship tab right-click in the window and click ‘new.’ Again make your ID straightforward and official – something like “JohnDoe101FollowerRel.” Your Parent NPC portal should be auto-filled to match your follower’s ID. Keep it that way.
Then simply make the Child NPC “Player” and the relationship level “Ally.” It should similar to this when you’re done:

Skip the Keywords tab and click the one that says “AI Data.”
9. Set your AI Data
This section is a little more up to your discretion. The AI attributes here affect your follower’s expressions and behavior. We do recommend, however, that you at least set the Aggression to “Unagressive” and your Confidence to “Average” just so your follower doesn’t go berserk and start attacking you should you accidentally hit him. The Mood portal determines your follower’s facial expressions, so set that with whatever you think best suits your dude.
Setting the Assistance and Morality will affect whether your follower will perform unsavory actions like attacking or stealing if commanded. Finally, the combat style should more or less mirror the class you picked out back on the Stats page. Again this might take some trial and error to pick out the one best suited for your follower.
Skip the AI Packages tab for now. We’ll come back to it soon.
10. Set your follower’s outfit and inventory
In the Inventory tab you get to pick out your follower’s clothes. Click the dropdown under “Default Outfit” and pick the one you like. What you’re really setting here is what your follower will wear when they’re not in your service. That means when they’re wandering around their starting location and such. Any armor is best given to them by you, in-game.
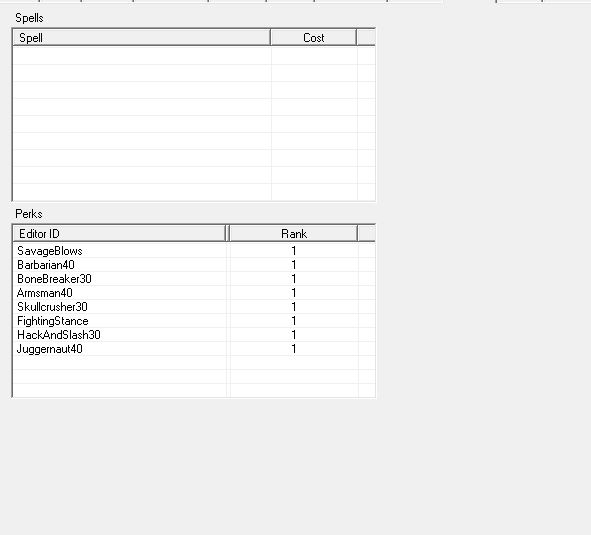
11. Set up your follower’s perks and spells
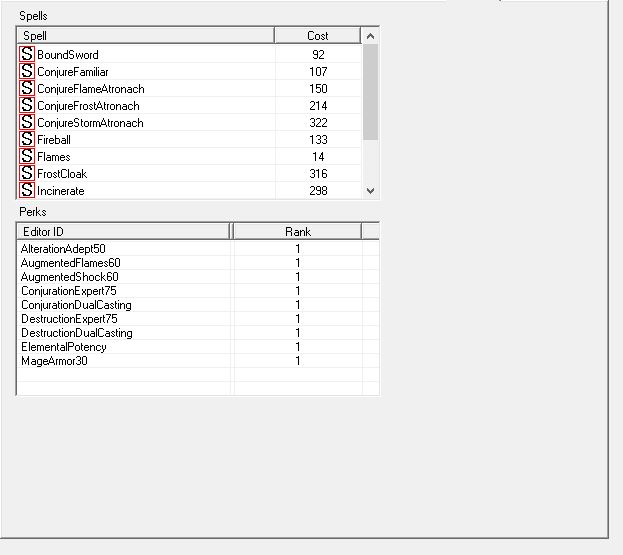
Here’s where you pick your follower’s perks and, if they use magic, their spells. We made our example follower a mage just so you can see what it will look like. If you use magic, right-click in the “Spells” window and pick out any spells you want this follower to use.
Note: Your follower will always use the strongest spells available, and that means he’ll default to using high-cost magic if they have access to something like Incinerate, Icy Spear, or Thunderbolt. If you don’t want him to run out of magicka too fast, don’t give him these spells! You can see how much mana your follower has back on their Stats page.
Next, pick your perks. It might take some guesswork to determine which perk is which, but you can always come back to adjust later. We made our character (above) a destruction conjurer with some points in alteration if you’d like to compare:
If you choose a more warrior build, the page might look something like this:
Now tab over a few to get to the Character Gen Parts
12. Make a face
Now you finally get to the fun stuff – pick what your follower’s face looks like! We recommend you start by clicking the “head” checkbox at the bottom of the window for a zoom-in view to get the best possible accuracy.
Start off with cycling through the presets, then get more in-depth with the options in the Base Head Parts box. If you want to go really crazy click the next tab over, Character Gen Morphs, to fine tune your aesthetic.
13. Where does your follower live?
If you haven’t been saving your progress lately, DO SO NOW. This next part is notoriously finicky, and the kit will often crash here.
Notice the “Cell View” window towards the bottom right of Creation Kit. This is where any and all locations in the game are listed. Click where you want your follower to spawn. (We like Riverwood since it’s easily reached from the start.) If you get any error messages upon loading up your location, again just hit “yes to all.”
Navigating inside the Creation Kit takes some practice, but at it’s most basic, Shift controls the vertical angle while the mouse wheel zooms in and out. Be sure to take into account where everything in the game world was at the start, so you don’t accidentally save with a rooftop missing or something. If you do accidentally delete something, your best bet is probably just to close out and open the kit back up again.
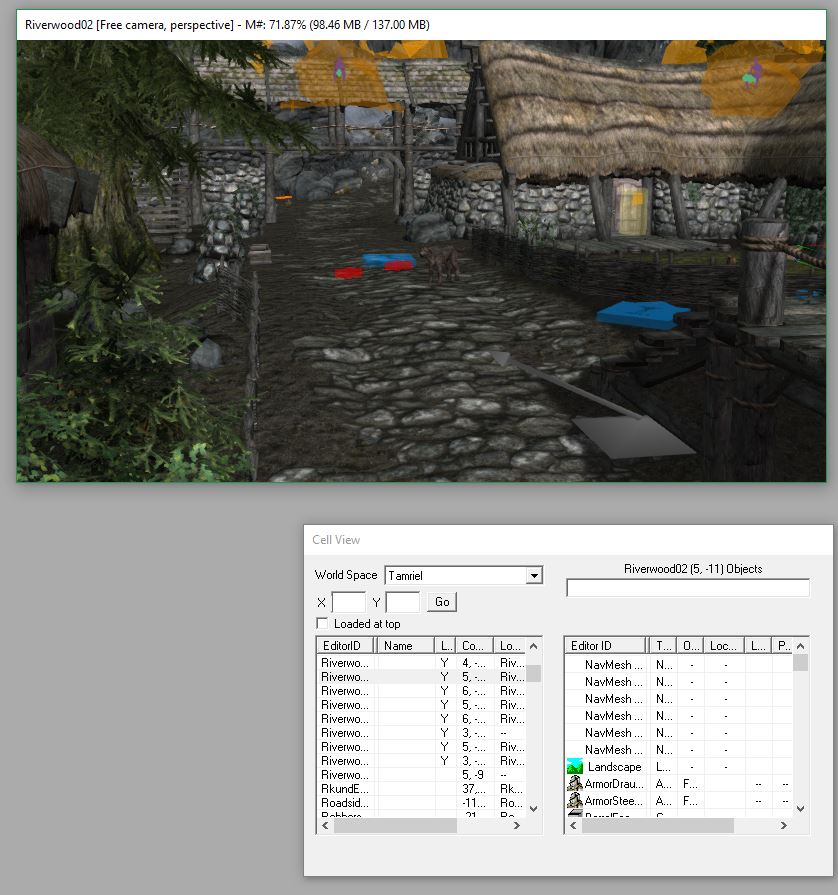
Once you’ve found where you want to place your follower, all you have to do is drag it from the Object Window right into the map. Press ‘F‘ to make sure your follower lands on the floor correctly and doesn’t wind up embedded in the dirt or any similar embarrassment.
14. Nobody just stands still
The icing on the cake is to add an AI package. Tab over to it and right-click in the window. Hit “add” this time, not “new.” “New” is if you want to make a completely new AI package, and we suggest just using one of the defaults, especially if this is your first time making a follower.
In the filter that comes up, type “defaultsandbox” and pick one of the four options that start with “DefaultSandbox.” The number after just refers to the radius in which your follower will wander from where you placed him, so probably the bigger the better.
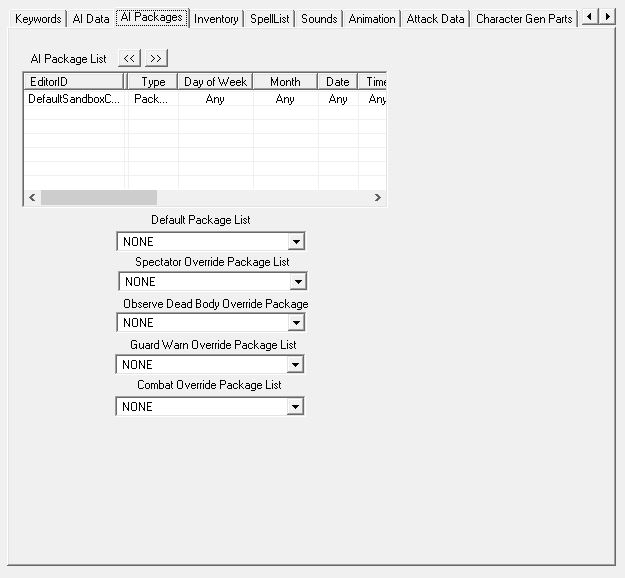
Save your progress once you’ve set this!
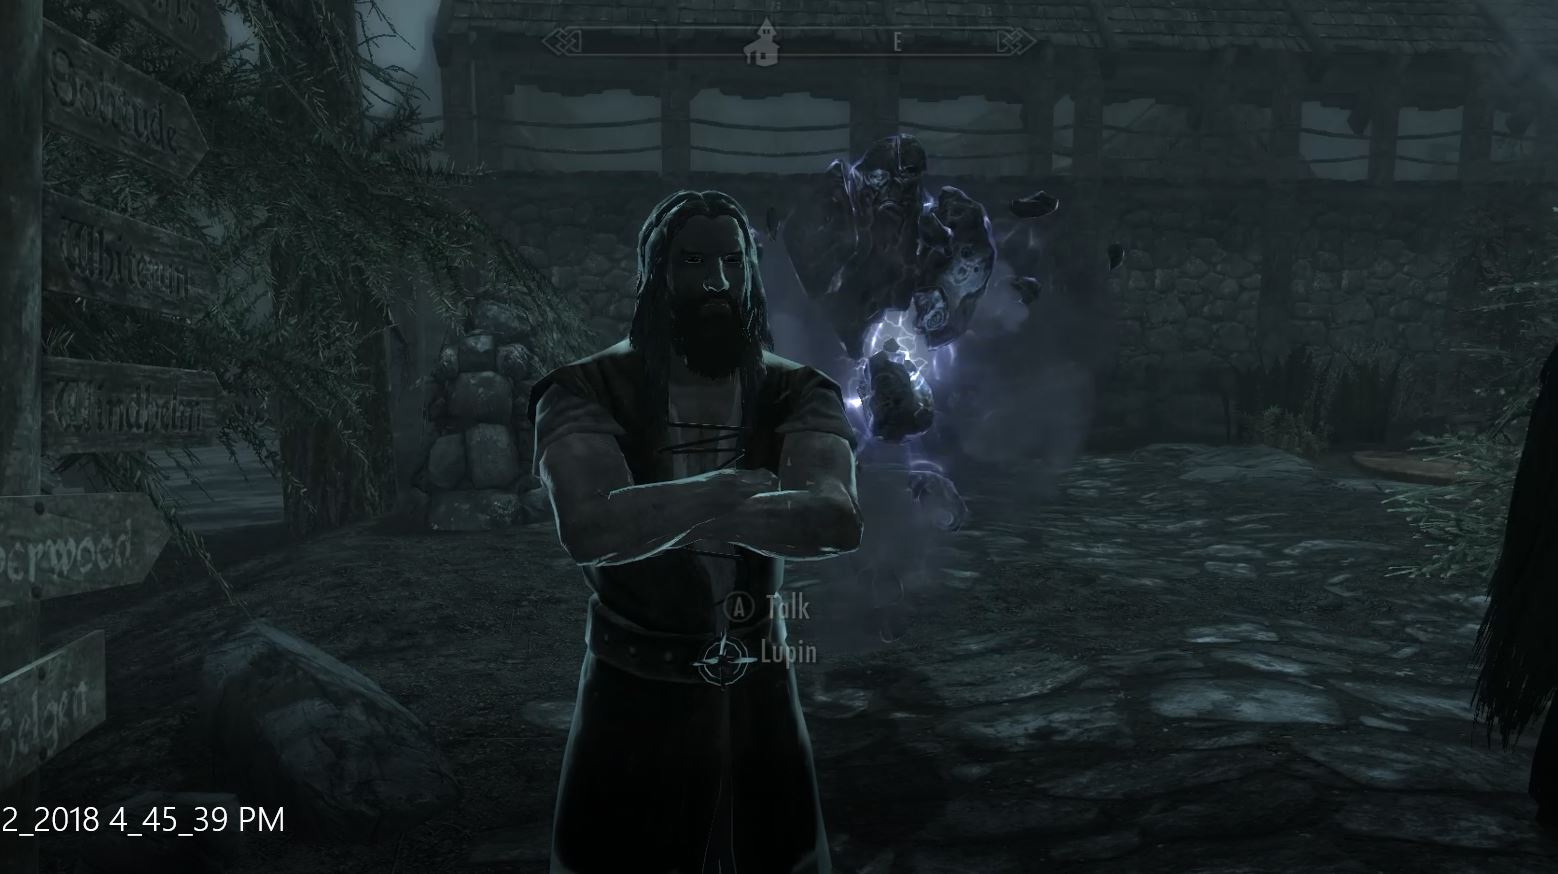
15. Meet your masterpiece
From here all you need to do is boot up Skyrim and go to the location where you placed your follower! Once you meet your creation if anything isn’t working correctly, do not fear; it happens to the best of us. Just back out and re-open the Creation Kit and try and troubleshoot.
It might also help to check out some of Bethesda’s default characters in the Creation Kit to get a better feel for how you might want to base yours. For mages, we recommend checking out Tolfdir or Nirya. Brynwolf or Karliah for thieves, Faendal or Aela for archers, and Lydia or Farkas for warriors.
Don’t beat yourself up if you’re still having trouble with this. The first follower you make is always the hardest one. Follow our guide here as best you can, but you may still find your character isn’t one hundred percent what you want. Trial and error are your best teachers, and all the characters you make afterward can be modeled off your first as a blueprint, saving you a lot of work.
15 free Skyrim mods to satisfy fans until Elder Scrolls 6
Play the game in a whole new way
You may also like
 News
NewsThe movie of one of the most enigmatic characters of Spider-Man is coming to Disney+
Read more
 News
NewsThe CEO of Nexon defends the use of AI in ARC Raiders stating that "all companies are using AI right now"
Read more
 News
NewsAnakin Skywalker was going to be completely different from the way we know him
Read more
 News
NewsThe latest State of Play disappoints and the producer of Octopath Traveler 0, one of the announced games, comes out to apologize
Read more
 News
NewsThis new post-apocalyptic Pokémon game has caught attention for this anemic Pikachu and this bioluminescent Snorlax
Read more
 News
NewsThe actor Ishido Kazunari confirms that he has read a script for the second season of Shogun
Read more