How To
Installing Windows 11 without a Microsoft account
- May 18, 2022
- Updated: July 2, 2025 at 3:45 AM
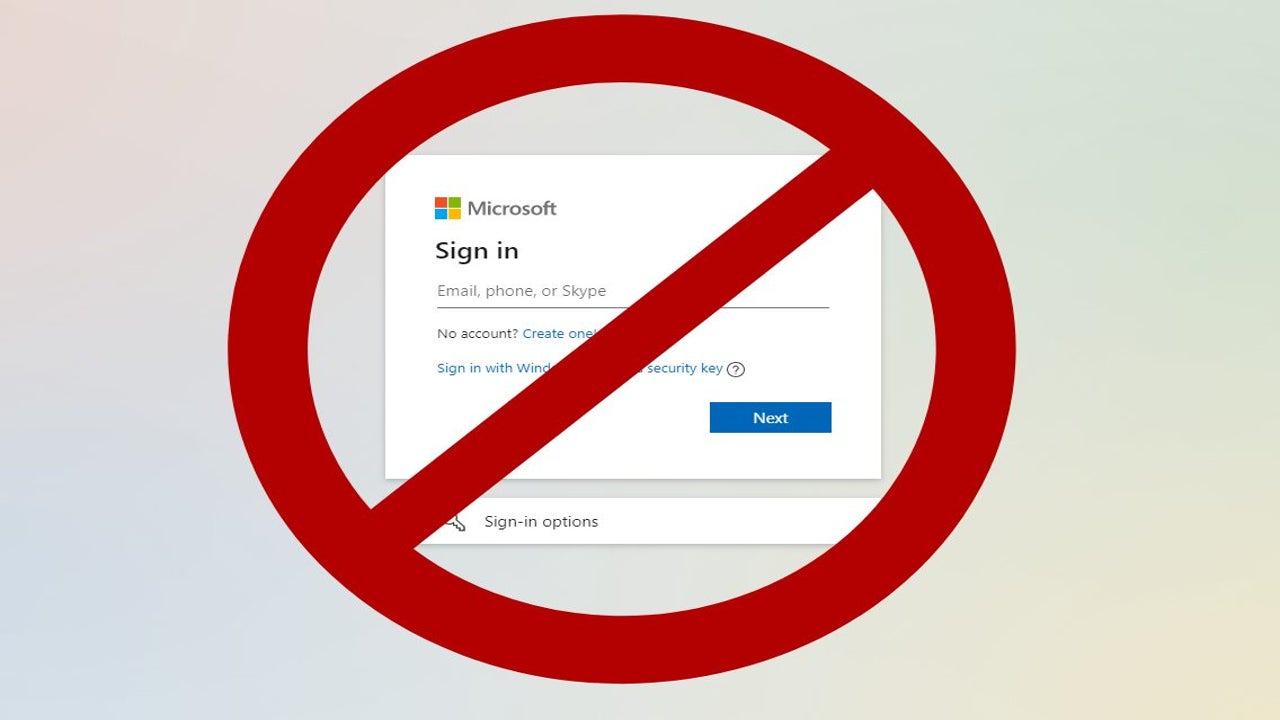
When Windows 11 OS launched in October 2021, it was a welcomed update. Most consumers view the latest operating system as a significant improvement from Windows 10. Although, not everyone was pleased to learn Microsoft wants you to install the software by using an internet connection and a Microsoft account.
While there are several benefits of installing the software with a Microsoft account — like better integration with the company’s cloud services, content synchronization between devices, and a secure install — you might still want to bypass opening a Microsoft account. If you’re uninterested in the enhanced features enabled by the Microsoft account, here’s what you can do to set up Windows 11 offline by using a local account.
Disconnect from the internet
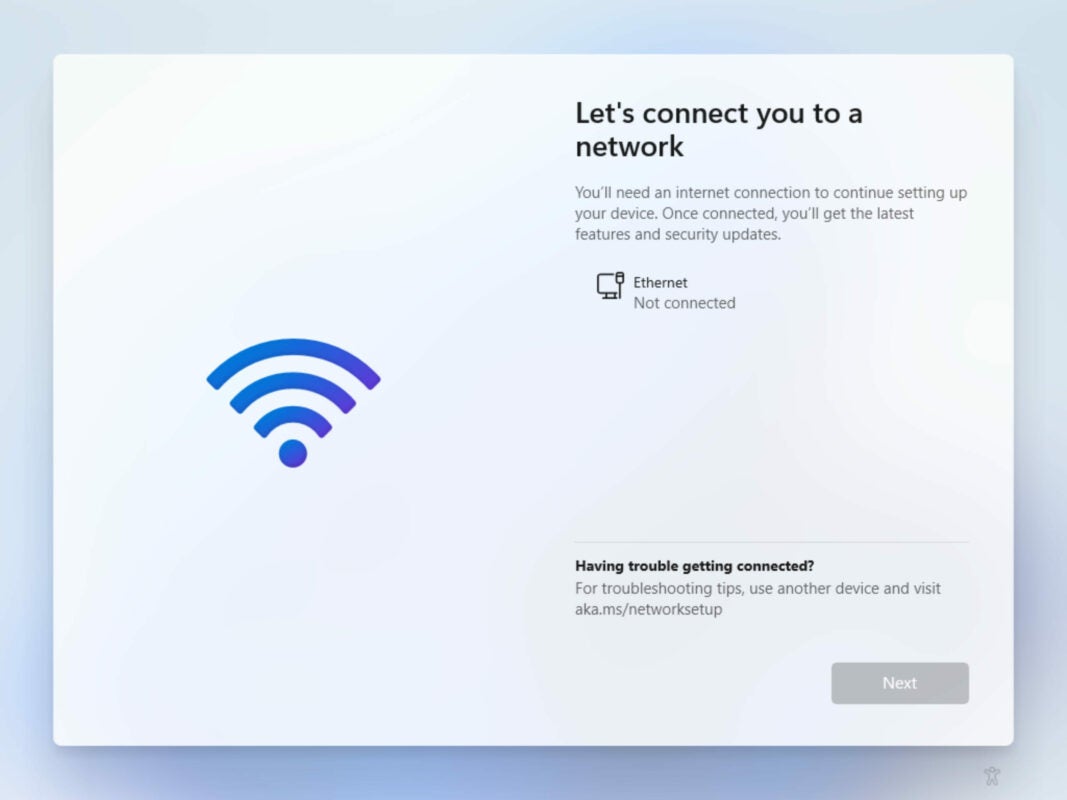
As you begin the setup process, Microsoft implies you need a Wi-Fi connection and a Microsoft account to proceed with the installation. This is new to Windows 11. In previous editions of the software, Microsoft strongly suggested creating an account, but you could work around the requirement by not connecting to the internet. This scenario isn’t much different for Windows 11. Nevertheless, Microsoft has made the process slightly more challenging. There are just a few extra steps for installing the software using an unconnected local account.
Creating a local account is more manageable with Windows 11 Pro than with the basic Home edition. Nonetheless, you can install the software without an internet connection, irrespective of which version of Windows 11 OS you use. If you proceed with the install while connected to a network, the program implies that you must create a Microsoft account. You can safely bypass this requirement by disconnecting from the internet or, if you can’t, entering a few basic commands in the Command Prompt.
Set up a local account
To establish a local account, verify your identity and confirm that you’re completely signed out of your Microsoft account if you have one. Ensure that you are disconnected from the internet, and do the following:
– Open the installation window.
– Type Shift+F10 on the installation wizard.
– Enter the command: OOBEBYPASSNRO
– After restart select I don’t have internet
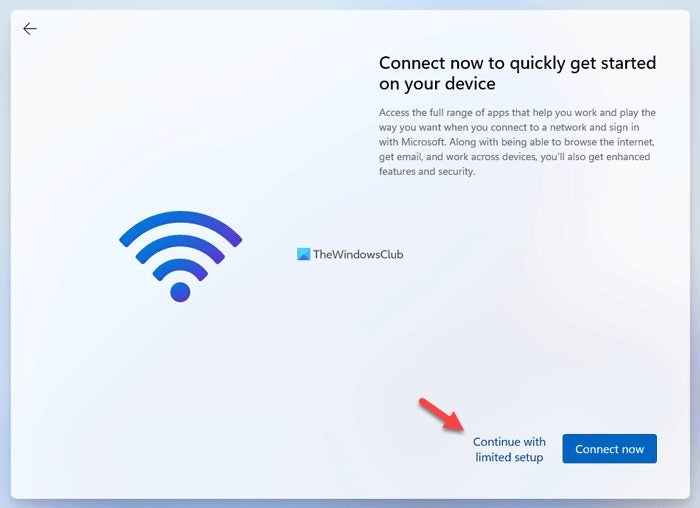
- Click the Continue with limited setup option
After you press Shift+F10 to open the Command Prompt and enter OOBEBYPASSNRO, your computer will automatically begin restarting before brining you back to the installation wizard. Beside the Next button at the bottom left, choose I don’t have the internet. You can then safely proceed by choosing Continue with limited setup instead of Connect now. Enter your details to proceed.
Install Windows 11
Now you’re ready to install Windows 11 with a local account without linking to any Microsoft products. The prompts ask you to enter a password and user name for a new local account. Establishing a password is optional, but creating one is strongly recommended. You’ll always sign in to Windows from this account.
Once you’ve entered a new user name and password, click Sign out and finish. Now, log back into your new local account from the lock screen. Installing Windows 11 from a local account generally requires you to be disconnected from an online source, but it is possible to proceed while connected.
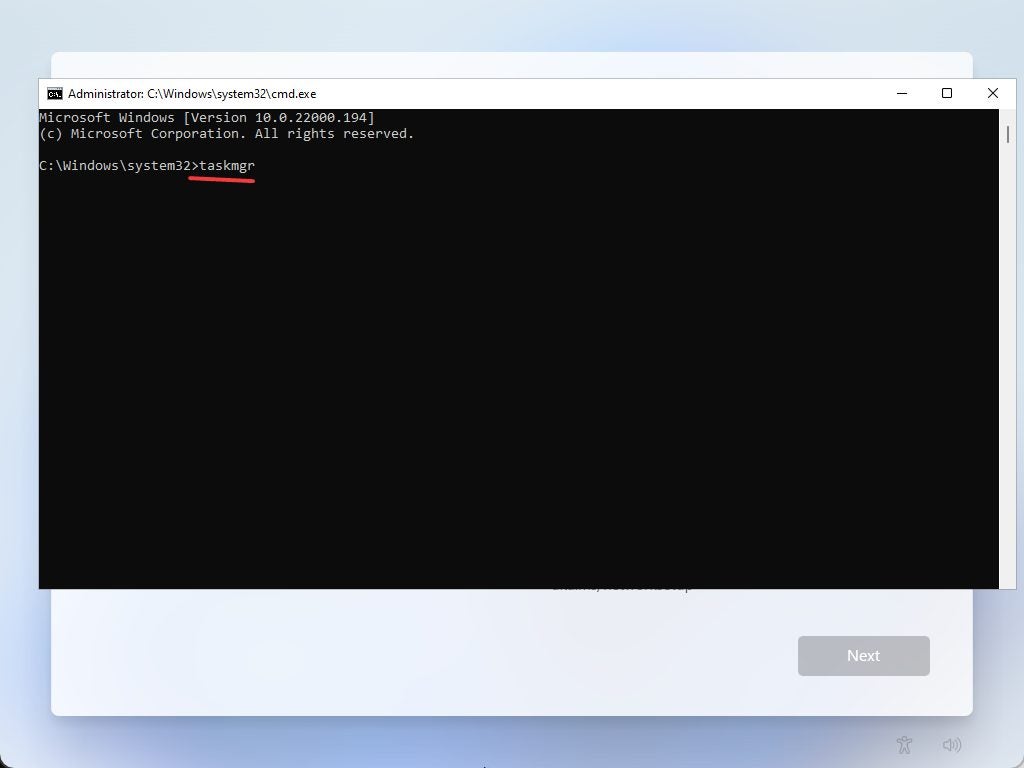
If you must link to a network, you have to close the Network Connection Flow Process running in the background. To do this, press Shift+F10. This opens the Command Prompt again where you enter the taskmgr command. After opening Task Manager, look for the Connection Flow process. Right click on Connection Flow and select End task. This lets you proceed with the install while connected.
Finally, to bypass Microsoft’s account requirements, type Shift+F10 and access Command Prompt once more. Enter: taskkill /F /IM oobenetworkconnectionflow.exe. This command also closes the Network Connection Flow Process if you haven’t already in the steps above. Finish the install by completing your local account information.
Installing Windows 11 OS without a Microsoft Account
When you install Windows 11 by using a local account, you can skip Microsoft’s account requirements. The local account remains disconnected from Microsoft’s servers, which means you may miss out on some of the perks associated with the company’s online arrangement. The upside to an offline install of Windows 11 is that it gives you more privacy since your PC is undetectable by private servers.
For more tips, read our article on how to install Windows 11 from a bootable drive.

You may also like
 News
NewsCall of Duty developers clarify how content for the game is generated
Read more
 News
NewsNioh 3 has a different approach to its bosses thanks to a highly acclaimed soulslike
Read more
 News
NewsA new Horizon has been announced, although we fear you won't like it
Read more
 News
NewsWWE 2K26 features new exciting match types
Read more
 News
NewsThe best-selling manga of 2026 so far has sold over 100 million units in its entire history
Read more
 News
NewsThis shooter set in World War II could have been directed by Quentin Tarantino
Read more