How To
The Best Settings for CCleaner

- December 29, 2017
- Updated: July 2, 2025 at 6:42 AM
Is your computer running slow? Want to optimize your PC and keep it junk free? CCleaner is a tool for you. This powerful system utility suite lets you remove temporary files, uninstall programs, control your startup processes, and find duplicate files, all from one user-friendly interface. This makes it very simple not only to spring clean your computer, but also to speed it up and make it run like new.

As with most Windows optimization and cleanup tools, the trick to using CCleaner most effectively is to choose the right settings. This might be overwhelming to new users, but don’t worry. In today’s article, we’ll help you easily use CCleaner and give your computer the boost it deserves. Here we go!
A Word of Caution
CCleaner is a very powerful tool that can make changes to your system’s startup and registry files. For that reason, it’s always recommended to back up your entire hard drive or set up a recovery point on Windows before making any changes.

Windows 10: How to create a System Restore
READ MORE
Step 1. Analyze Your Computer for Junk Files
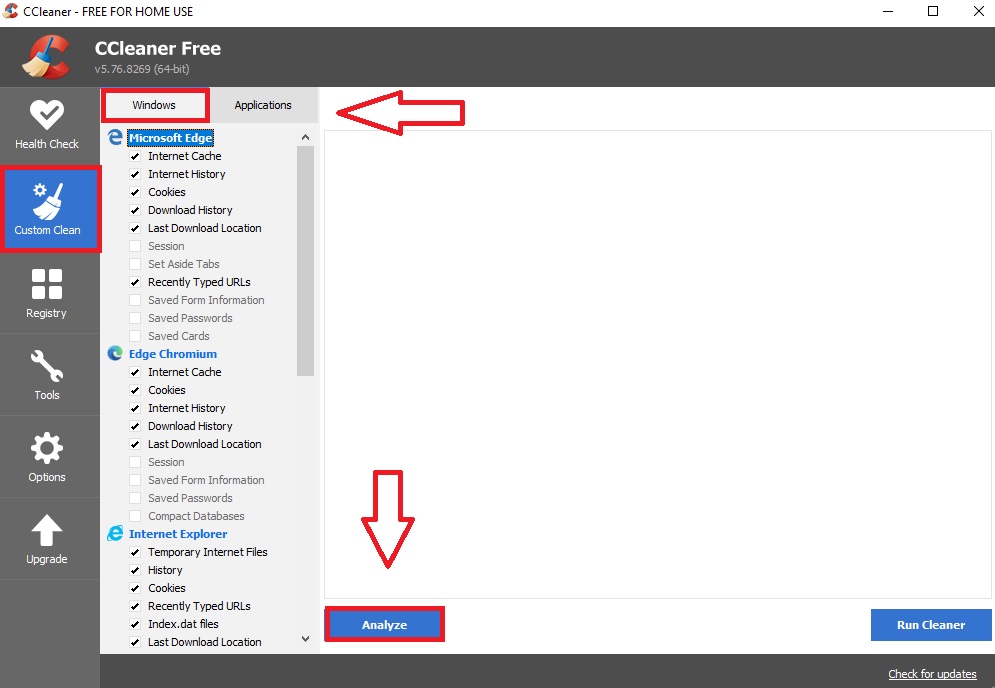
Let’s get started. Open CCleaner and click on the “Custom Clean” option that you can find on the lefthand menu. Once you’ve done this, select the “Windows” tab and check all the boxes you want CCleaner to inspect. Repeat this process for the “Applications” tab as well. After that, click the blue button “Analyze” and let the program check every nook and cranny of your computer.
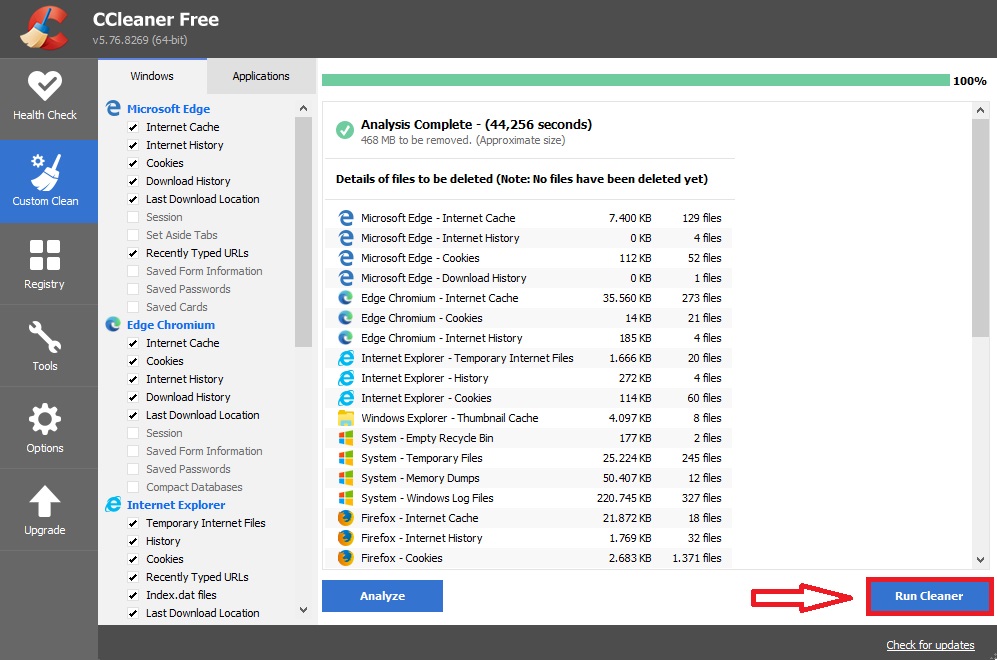
After a few seconds, CCleaner will show a list of all the files that can be removed from your computer and how much free space you can gain by deleting them. If there are files that you do not want to remove then go back and check different boxes. Once you’re happy with what is being deleted, click the button “Run cleaner”.
Step 2. Clean Your Registry
Broken or corrupt registry entries can slow down your system, make it freeze, or even crash. Fortunately, CCleaner can help to fix this by locating all these troublesome entries and assist you in getting rid of them. To perform a scan, first open CCleaner and click the “Registry” option followed by “Scan for issues”.
Once the scan is finished, review the results and deselect any that you don’t feel are actual issues. Now, simply click on “Review selected Issues” and it’ll give you an option to back up your registry. It’s highly recommended you carry out this step. Afterward, a dialogue will pop up that will run through each individual issue. You can either scroll them one by one or select “Fix all issues”.

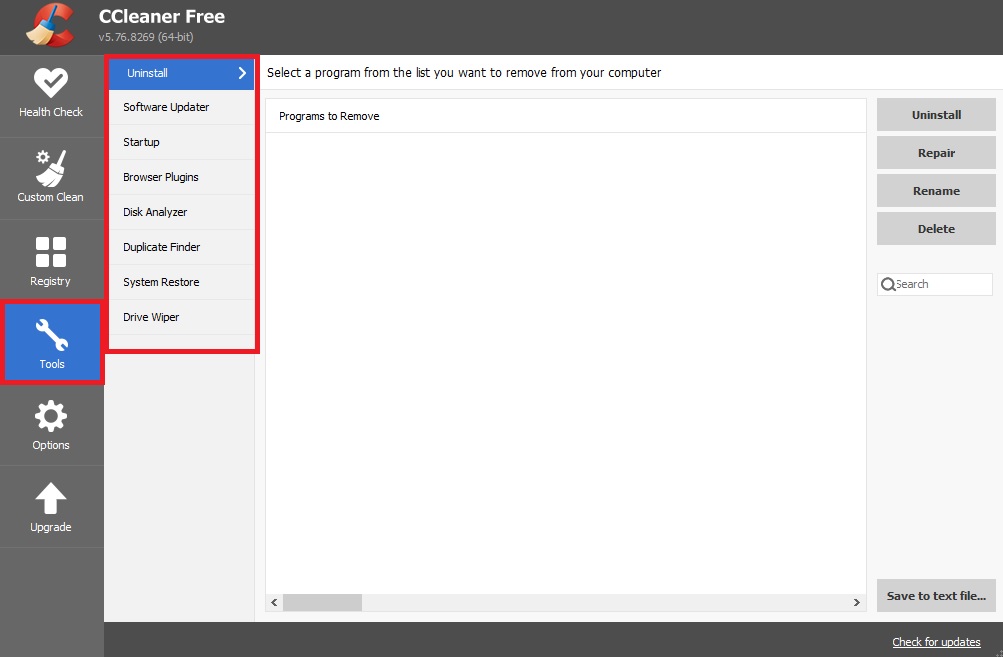
Step 3. Use the System Tools
CCleaner gives you easier access to your computer’s existing system tools. Here’s how to make the best use of them.
If you’re struggling for space, use the Uninstall tool to eliminate unneeded programs. If you still need more space, use the Duplicate Finder to search for duplicate files that can be deleted from your system.
If any of your programs or apps are crashing and giving you problems, try the Software updater tool. With just a few clicks you can locate any outdated software on your PC and be able to install the latest version.
The Browser Plugins disabler tool is especially useful, as it cleverly presents all your browser plugins in one simple interface. Handy if your internet browser is grinding to a halt.
If your startup process is slow, you’ll find the Startup tool convenient for stopping useless programs from using your computer’s resources upon booting Windows. You might be surprised by just how many non-essential programs start up when you boot your PC or laptop.
As for Drive Wiper, if you have any highly sensitive documents that you’ve recently deleted, this tool can be used to make sure they cannot be recovered. Make sure you’ve selected “Free Space Only”, otherwise you could end up completely wiping your PC. Increasing the “Security” setting will improve how well the data gets wiped, but can significantly increase the time it takes to complete.
Finally, with System Restore, you can achieve the same results by using Windows’s System Restore settings, so feel free to ignore this tool.
Step 4. Customize the Options Menu
There is very little to customize in the Options menu, but be sure to check out the settings to see if there are any options checked that you don’t want. Don’t forget to also check the “Advanced” section. We recommend the settings as shown below:
We hope our guide has helped you clean and speed up your computer. If you’ve never tried CCleaner, why don’t you give it a shot? You can download it easily from the link below.


Latest from Softonic Editorial Team
You may also like
 News
NewsThe new strategy from Universal that will help the survival of movie theaters
Read more
 News
NewsNetflix is preparing a series about the tumultuous life of Frida Kahlo
Read more
 News
NewsThe most iconic family series of the 2000s is back, and we can already see its trailer
Read more
 News
NewsThe most beloved and at the same time most hated character from Family Guy will have his own spin-off
Read more
 News
NewsNetflix confirms the sequel to K-pop Warriors by the original creative team
Read more
 News
NewsThe Yellowstone spin-off has been so well received that a second season has already been confirmed
Read more