Master the Art of Pre-Sets: Streamline Your Workflow in Lightroom and Photoshop
Use the presets to achieve amazing results in no time
- December 9, 2024
- Updated: December 11, 2024 at 10:41 AM
If you are a photographer or designer, you know that time is gold. Maintaining consistency in our work can be very difficult, especially if we have a large load of images waiting to be edited on the computer. Fortunately, both Photoshop and Lightroom can help us work faster thanks to presets. If you stay with us, we will teach you what a Preset is and how you can incorporate them into your workflow.
What are Presets?
In essence, a preset or predefined setting is a shortcut that automatically applies a set of predefined edits or effects to your images.
In Lightroom, they are settings you can save to adjust lighting, color, or contrast in a specific way. In Photoshop, they are known as Actions and are recorded sequences of steps that, with just a single click, can apply effects or resize an image.
Both are ideal for saving time and maintaining the same aesthetic with minimal complications. Additionally, they are so easy to use that you can experiment with different results without wasting too much time.
Learn to Create Presets in Photoshop and Lightroom
Next, we will see how we can access the Actions in Photoshop and also create one from scratch:
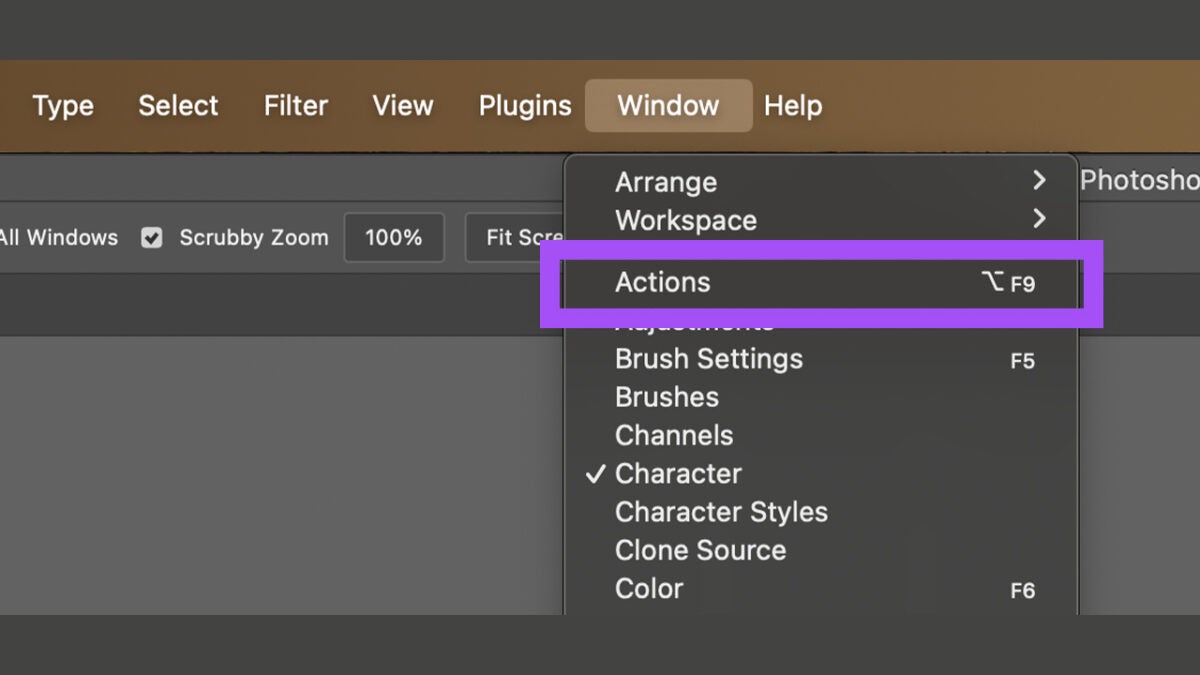
- Within Photoshop, go to Window and then select Actions. From here, you can see the list of actions that the program includes by default.
- To record an action, we first need to open a file. We can do this from our own project or from a blank document; choose the option that suits you best.
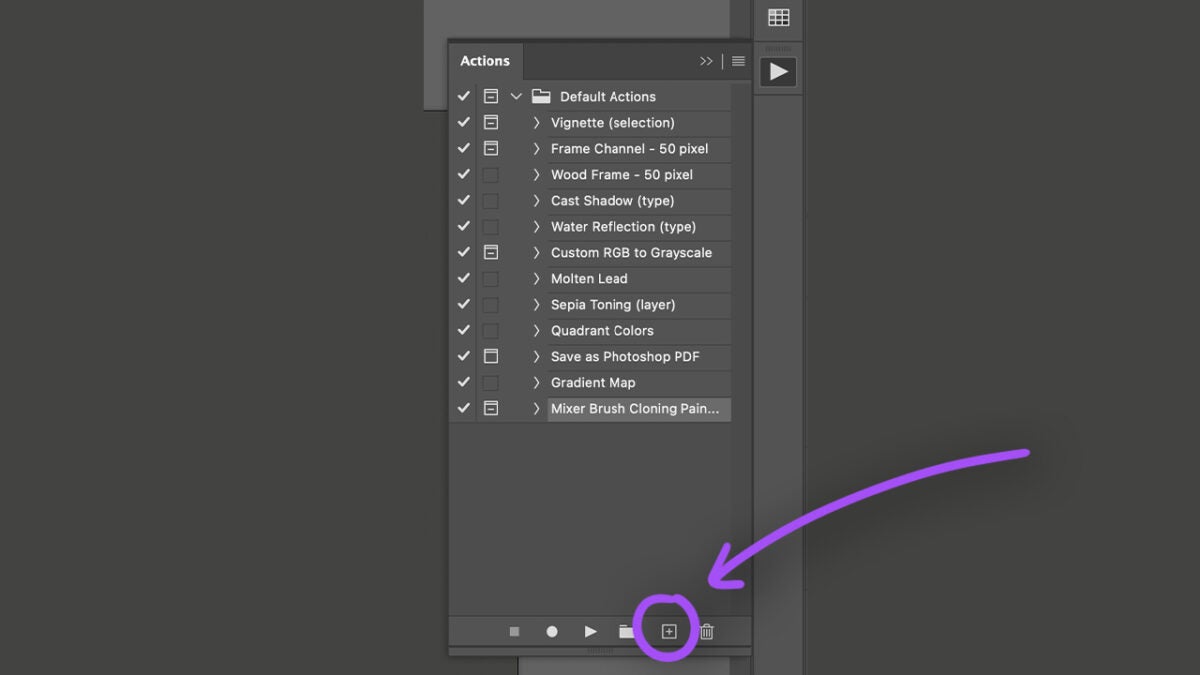
- From the Actions panel, click on the Create New Action button. A new menu will appear where you will need to enter the name of your action. Here, you can also assign a keyboard shortcut to quickly activate the action. Once you have everything ready, press Record.
- Perform all the steps you want your action to do. You can adjust the brightness and contrast, apply a filter, create layers… try different options. Remember that everything you do while the recording is active will be recorded in the action. To finish, click on the Stop Playing/Recording button.
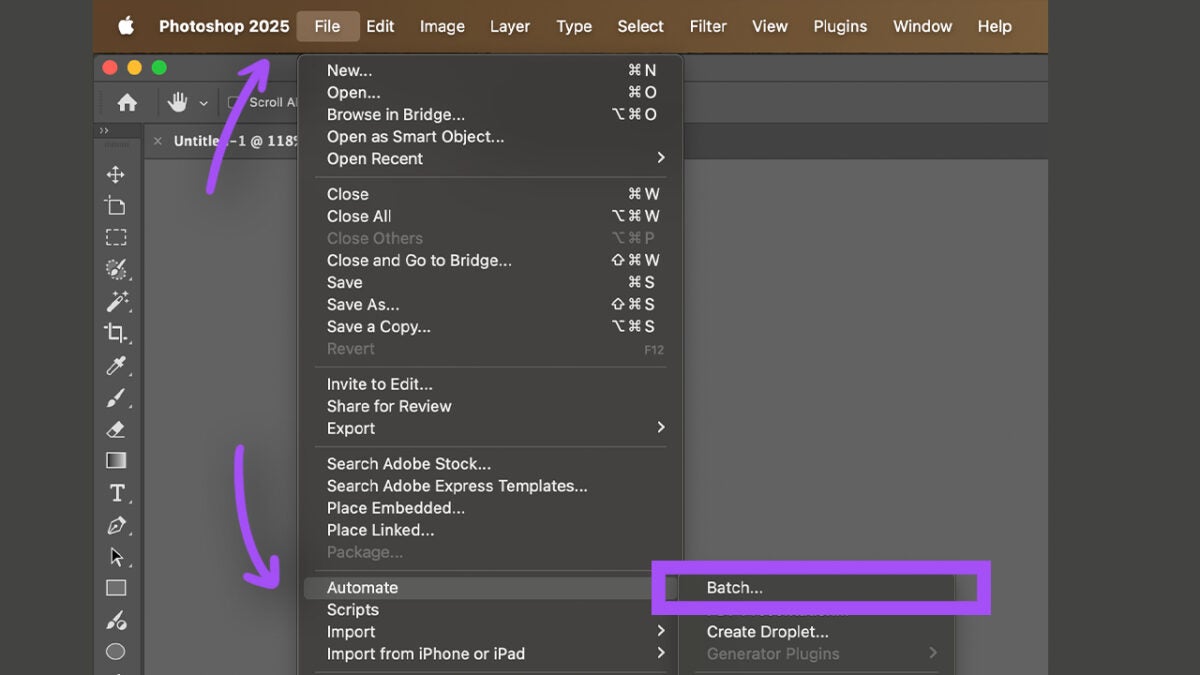
Photoshop actions can be applied in batch to a series of images at once, so you don’t have to edit them one by one. To do this, go to File, then Automate, and finally, Batch. From the Play section, select the action you want to apply. Next, choose the set of images to process from Choose.
You must keep in mind that not everything we do can be recorded. For example, if we use the Brush tool and paint a shape, that will not be recorded. The results will also depend on the type of project we are working on: the same effect will not look the same in an RGB file as in a CMYK one, for example.
Regarding Lightroom, you will see that the creation and application of presets differ slightly from what we have already seen in Photoshop:
- Open Lightroom and click on the Presets tool. Like Photoshop, Lightroom already includes an extensive series of predefined presets distributed in three main sections: Recommended, Premium, and Yours. In Recommended, we will see adjustments that Lightroom will recommend based on the photo you are editing thanks to Adobe Sensei technology. Within Yours, we will find adjustments that we have saved or created ourselves.
- Lightroom provides a preview of the presets to help you visualize how these adjustments would look applied to your photograph.
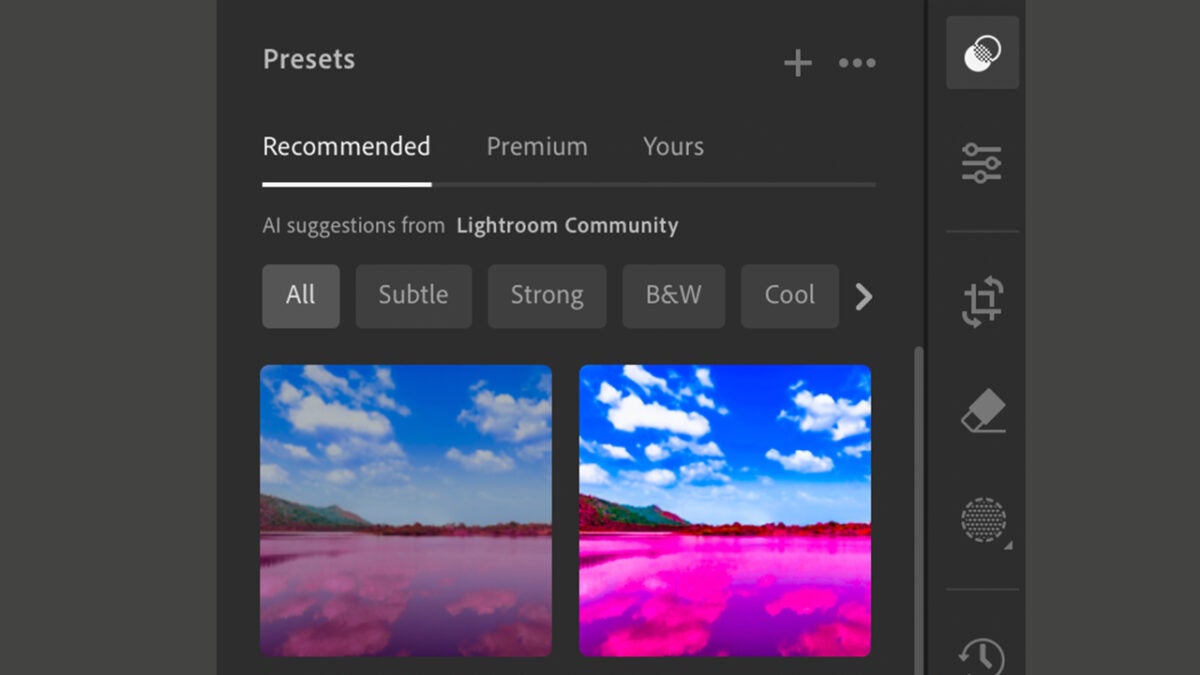
To create a preset from scratch, we will need to follow these steps:
- First, edit your photo as you want and need: adjust the brightness, colors, temperature, and curves. Everything you do will be saved as a preset.
- Within the Presets panel, select the symbol of the three horizontal dots and choose the Create Preset option. You can also press the + button that you will see just to the left.
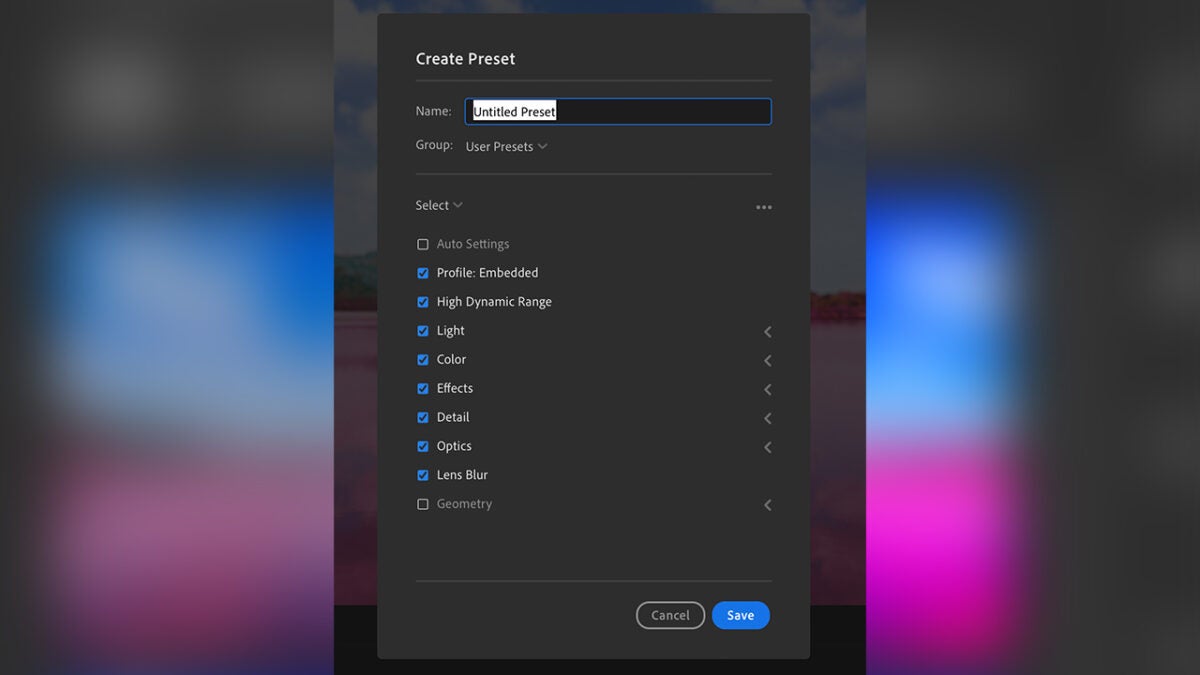
- A New Preset box will appear, and you will need to specify a name to designate it. Here, Lightroom will let you select which of your adjustments you want to save within your preset.
- To finish, select Save. You will find it in the Presets panel, under the Yours section, and in the User Presets folder.
Artist by vocation and technology lover. I have liked to tinker with all kinds of gadgets for as long as I can remember.
Latest from María López
You may also like

Is the universe of Spider-Man villains from Sony coming to an end? Everything seems to indicate that the nightmare is over
Read more

28 years later, he has a secret that very few know
Read more

YouTube opens the door to more users to try AI dubbing
Read more

One Hundred Years of Solitude comes to Netflix, but does it live up to expectations?
Read more

One of the most acclaimed horror directors of recent years will soon have a series on Prime Video
Read more

The most controversial superhero movie of the year arrives on streaming
Read more