Your Photo is yours: learn how to use Content Credentials, a unique feature from Adobe

- August 21, 2024
- Updated: July 1, 2025 at 11:02 PM
Currently, distinguishing between truth and falsehood has become more complex than ever. Although generative artificial intelligence has brought great advances in productivity, it has also managed to increase another problem: disinformation. The truth is that, to a greater or lesser extent, the vast majority of the content we consume on the Internet is manipulated.
To overcome this obstacle, a new technology has emerged, content credentials. Thanks to them, we can verify the origin of any audiovisual product. Is it a generation by AI? What program was used? And who was the sender? The answers to all these questions can be found in the credentials.
Next, we will explain what content credentials are and how they work within the Adobe universe.
What are content credentials?
Within Adobe, Content Credentials are essentially a feature designed to provide authenticity to digital content. The technology is based on the C2PA (Coalition for Content Provenance and Authenticity) protocol, supported by companies such as Adobe, Leica, Nikon, and Intel, among others.
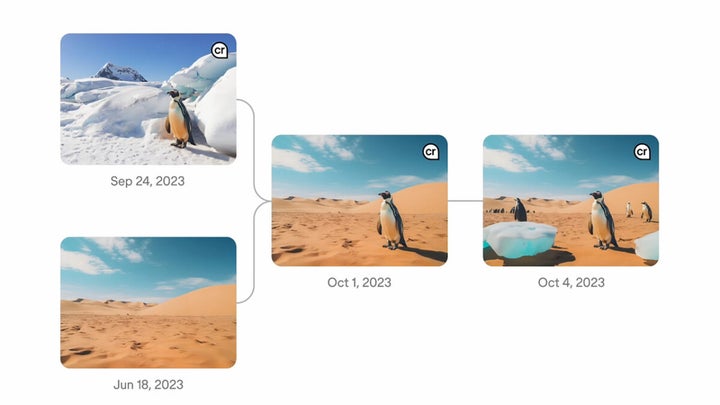
Thanks to content credentials, we can verify the origin of the digital files we see online. In the case of an image, credentials serve us to know if it was generated by artificial intelligence, when it was created, if it has been edited, and much more.
In addition, checking these credentials is very simple. We just have to click on the pin with the CR symbol located in the upper right corner of an image.
The main purpose of credentials is to protect and prevent manipulation to users through fake images and videos. A function that will be essential in an increasingly digitized future.
How can I use content credentials in Photoshop?
From Adobe programs, you can easily integrate content credentials into your files. Here’s how you can do it in Adobe Photoshop:
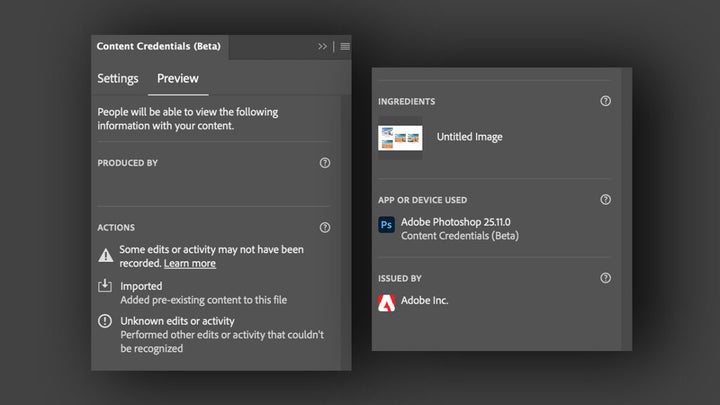
- With your project open in Photoshop, go to Window and then select Content Credentials (beta).
- A new panel named Content Credentials (beta) will appear. Here, click on Enable Content Credentials.
- Set what information you want to include in the Content Credential of your file. This includes:
- Producer (or author): Here will appear the name of the Adobe account used.
- Produced by: The program used to create the document will be displayed. In this case, it would be Adobe Photoshop.
- Edits and activities: Here you will see the editing actions you have performed.
- Assets: The assets used to create the image.
- Signed by: The organization responsible for issuing the Content Credential will be displayed.
Remember that everything you decide to include can be accessed by any user publicly. Now, we will see how we have to save our files so that they have their corresponding content credentials associated with them.
- Go to File > Export > Export as. A new panel will appear to configure the export.
- Within Content Credentials, we can decide how they will be included in the image, choosing between three options:
- Publish to Content Credentials cloud
- Attach to file
- Do not include them
How Adobe Firefly Content Credentials Work
Previously, we have talked about how we could include content credentials in our Photoshop projects. However, there are cases where Adobe applies these credentials automatically. This happens, for example, with Adobe Firefly generations.
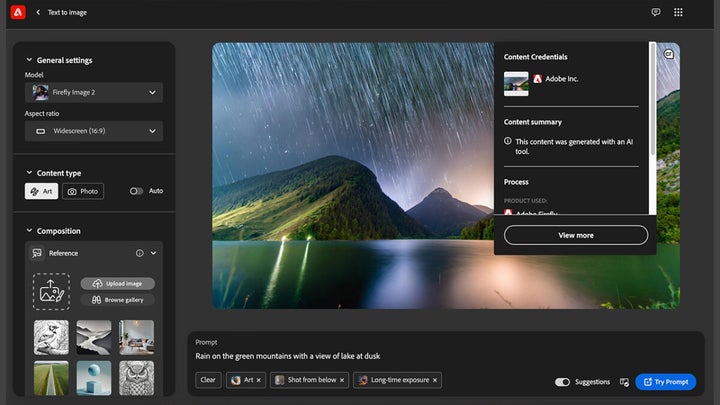
Here we refer to any asset that has been generated with the functions of Text to image, Generative Fill and Text to Vector Graphic. The information included is as follows:
- A thumbnail of the image (exclusive for images generated with Text to image from the Adobe Firefly website).
- Sender, which in this case is Adobe.
- Summary of the content, specifying that Adobe’s generative technology was used.
- Application that has been used. It can be Photoshop, Illustrator, Firefly…
- AI function used to generate the image.
- General editing actions. In the case of Firefly creations, only the Created or Other edits tags will be displayed.
On the other hand, in the credentials the assets you used to create your image will not be shown nor will it be mentioned if content with already included credentials has been used.
And in Adobe Premiere?
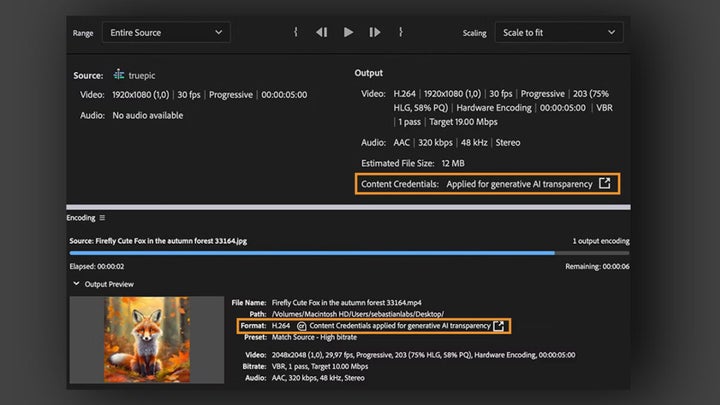
Credentials are not exclusive to images: they are also integrated into your videos created with Adobe Premiere. This way, credentials will be included in the exported sequences with content generated by Adobe’s AI.
This refers to any element created through Firefly, for example. This also includes AI generations made through Photoshop or Illustrator (such as those created with Generative Fill, for example).
To view the credentials, select a sequence that contains elements generated by Adobe AI. Then, click on File > Export > Media. The keyboard shortcut Ctrl/Cmd + M will also work. Now, a new panel will appear. In the Output section, you will see the applied content credentials.

Artist by vocation and technology lover. I have liked to tinker with all kinds of gadgets for as long as I can remember.
Latest from María López
You may also like
 News
NewsOne of the most successful movies of the year premieres on HBO Max
Read more
 News
NewsNaughty Dog is back at it: they are already crunching for their next game
Read more
 News
NewsThe new Tekken champion is Japanese and is 92 years old
Read more
 News
NewsPedro Almodovar returns with a new movie that is very Christmas-like
Read more
 News
NewsLarian Studios will hold an AMA to clarify their stance on AI early in the year
Read more
 News
NewsSteam is giving away the most unimaginable Christmas game until December 21
Read more