How To
How to: Create a reusable photo frame in Photoshop
- November 15, 2010
- Updated: July 2, 2025 at 9:08 AM
No matter for how long you’ve been using Photoshop, you can still find new tools and tricks in this fantastic piece of software everyday. For instance, I had never tried Smart Objects until recently, and I have already found a good way to make use of them: creating digital photo frames you can use over and over again. Here’s how to do it:
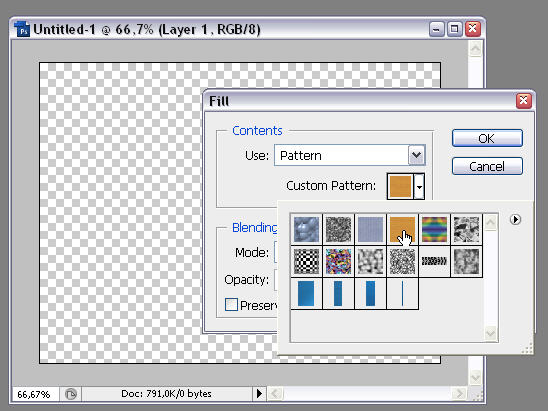
1. First of all, create a blank document. Then go to Edit > Fill, choose “Pattern” in the Use drop-down menu and and pick the Wood pattern already included in Photoshop.
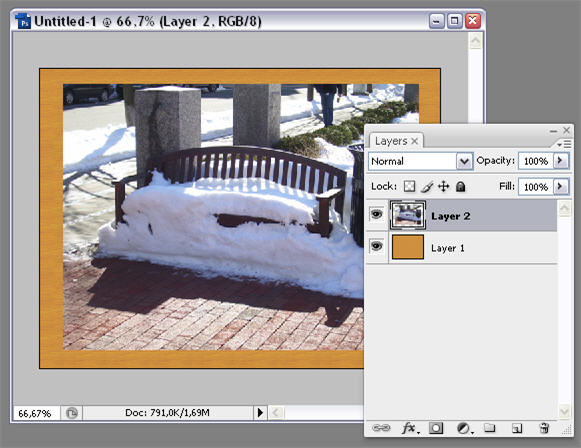
2. Now open the image you want to use in your frame and copy and paste it on the document you just created. You may have to resize it (with Ctrl+T) to make it fit the frame.
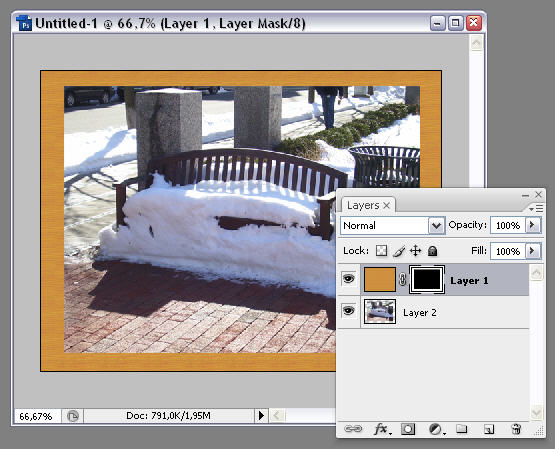
3. Drag and drop the image’s layer below the wooden texture, so that the image is under it – and so far, invisible. Then, while holding the Ctrl key, click the image layer thumbnail to select its content. Go to Select > Inverse to invert the selected area. You should now have something like this.

4. Click the Vector mask button in the Layers window (the gray square with a white circle on it) and Photoshop will transform the selected area into a mask, which means you can now see the image.
5. Time for some effects: make sure the frame layer is selected, click the Layer styles button in the Layer window (the fx icon) and choose “Bevel and Emboss”. Here are the settings I used, but you can try a different configuration if it works for you.


6. Now we’ll apply a light shadow effect to the image as well. Make sure the image’s layer is selected, go back to the Layer styles as before and choose “Inner Shadow”. Again, these are the values I set, but you can try your own.


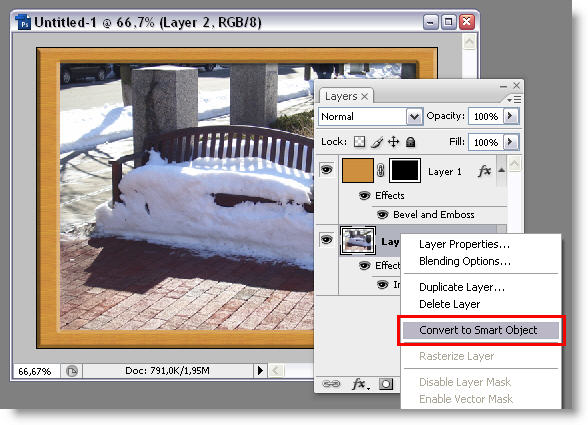
7. Here comes the fun part: Smart Objects! Right click the image layer and choose “Convert to Smart Object”.
8. From now on, you can replace the image in your frame with any other photo quickly and easily. Simply right click the image layer and select “Replace Contents”.

9. Photoshop will open up the file browsing window so that you can choose a new photo. You can resize it if necessary with Ctrl+T.
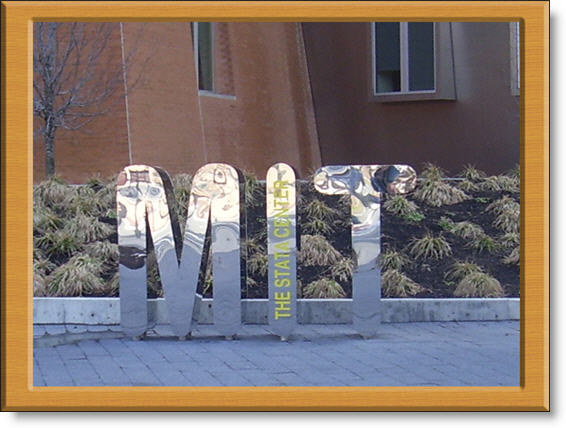
Just remember to always keep a copy of this Photoshop composition in PSD, so that you can come back to it at any time and apply the same wooden frame effect to any picture, with just one click.

You may also like
 News
NewsChatGPT achieves a 76% increase in its performance
Read more
 News
News'Clair Obscur: Expedition 33' cost a complete fortune, but it's wildly successful
Read more
 News
NewsHelldivers 2 is getting ready to receive its biggest update to date
Read more
 News
NewsThe Game Awards crowned the game of the year last night amid huge controversies
Read more
 News
NewsThe most shocking news from The Games Awards 2025
Read more
 News
NewsThe series returns where you will see Idris Elba like you have never seen him before
Read more