How To
How to Fix Poor Quality on Kinemaster in 3 Steps

- June 3, 2021
- Updated: October 4, 2024 at 8:45 PM
KineMaster on Android is pretty powerful. This app can do most things a fully-fledged computer program can, from removing the green screen to making animated intros.
We’re here to show you how you can increase the quality of your video in KineMaster.
Open KineMaster and access “Settings”

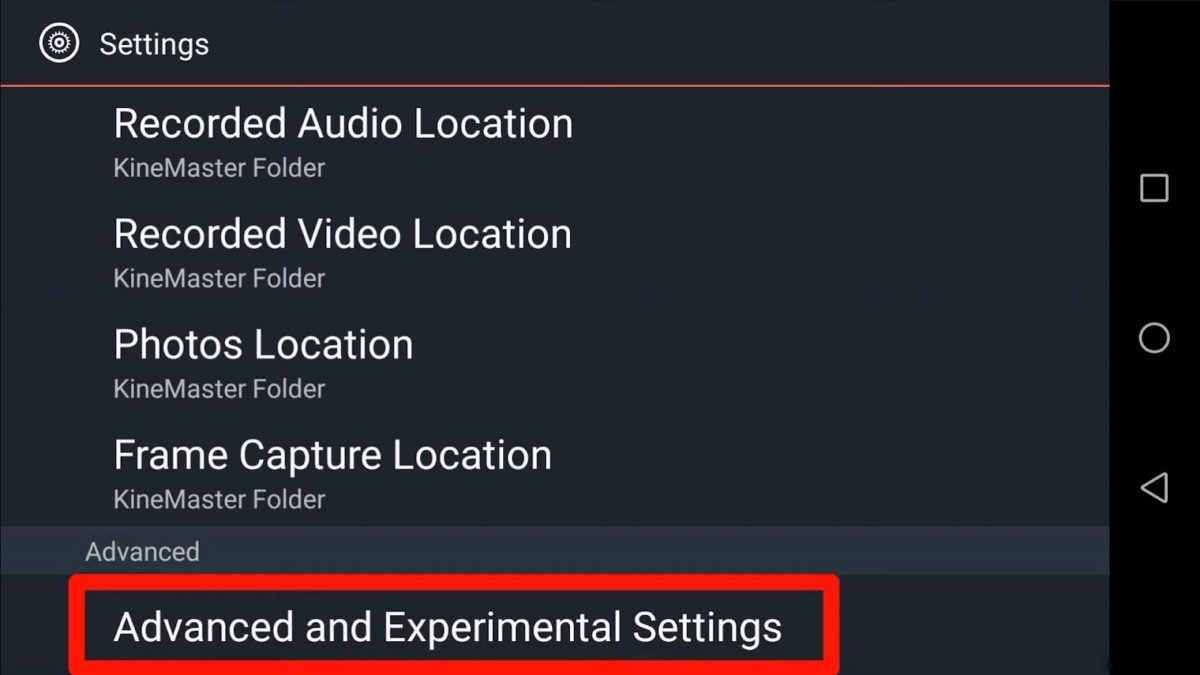
Access the program from your home screen or folder. Right on the first page, below the new project and “Store” icon, you’ll see the “Settings” button. Click it, scroll all the way down, and select the “Advanced and Experimental Settings” line.
Adjust the “Advanced and Experimental Settings”

Once you access this page, the phone will prompt you to agree that you need to:
– Ask for support to guide you
Or
– If you encounter problems, the video editor might become glitchy.
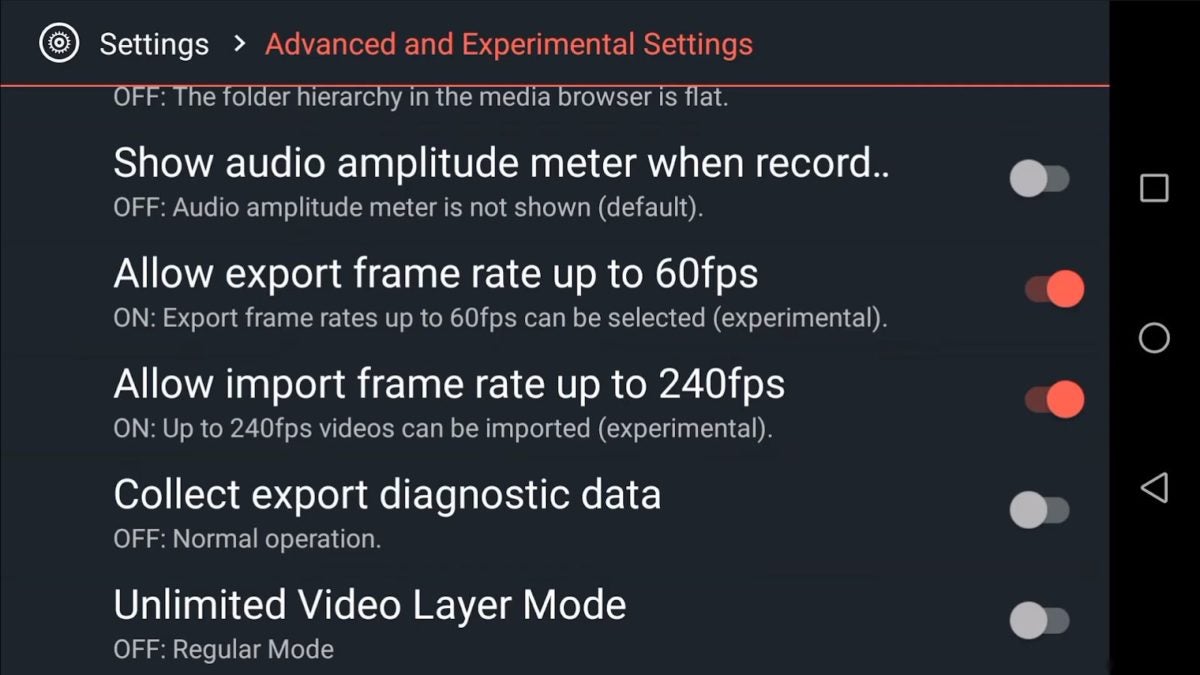
Agree to the warning and proceed. On the “Settings” screen, allow the following settings:
– Export frame rate up to 60fps
– Import frame rate up to 240 fps
Once you do, the program will change the settings to increase the video quality automatically.
Create a project and start editing

From here, you can go back to the project creation page, make a new one, import the media, and start editing. Once you finish, export the video, and it will be of much higher quality.
“We’ll fix it in post”
This has been an ongoing Hollywood meme when CGI came along. You’d technically be able to correct “anything” in post-production using computer technologies. Still, getting quality material isn’t something to compromise on. If you happen to have poor-quality material for some reason, some editing techniques can save you too.
Latest from Shaun M Jooste
You may also like

How to equalize music on AirPods
Read more

Google Gemini vs Apple Intelligence: Is there a winner?
Read more

Samsung Vs Apple: The Smartphone Battle Heats Up- And Other Compelling Stats You Can’t Miss
Read more

iOS 18.2 and ChatGPT: This is everything we can do
Read more

It's already Christmas in GTA Online: access new bonuses and gifts
Read more

Dune: Prophecy is renewed for a second season on Max
Read more