How To
How to: install a new operating system on VirtualBox
- January 9, 2009
- Updated: July 2, 2025 at 9:25 AM
Being a software reviewer means I’m always willing to test new apps, check out innovative web services or even have a look at the latest version of an operating system. If you’re anything like me – and don’t want to ruin your computer in six months with all those software experiments – you should use a virtual machine.
Virtual machines can run on your system as separate computers, with their own hard drive, operating system and file structure. Therefore you can test anything you like without compromising your actual system. It’s the perfect sandbox for beta versions, new operating systems or software apps you want to try out before installing them definitively on your PC.
A few months ago I wrote a post about the two most popular virtual machine solutions (VMware vs VirtualBox) but today I’m going to focus on the latter, and explain how to install and run a new operating system in VirtualBox with an ISO file. This may be the best way to take your first steps in Linux, for example.
The first step is obviously downloading the ISO file with the operating system you want to try out. There are many sources from which you can obtain them. You only need to be a bit patient because these image files are usually massive and can take a long time to complete downloading.
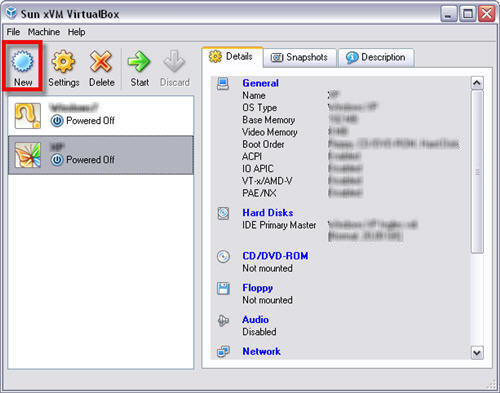
1. Once you’ve got the ISO image file of the OS you want to test, launch VirtualBox and click on New.
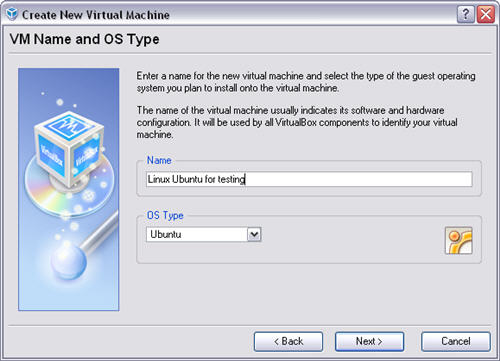
2. Give your VirtualBox machine a name and select the OS type.
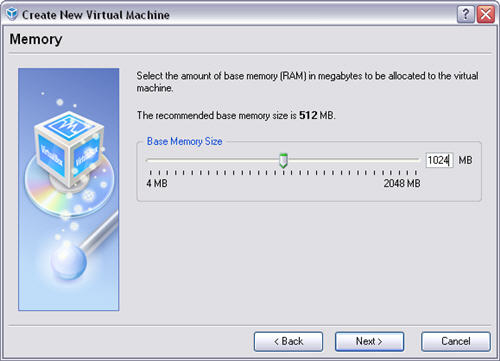
3. Assign a portion of your RAM memory to the virtual machine. The amount you decide to select depends on how much RAM you have and how much the virtual OS needs.
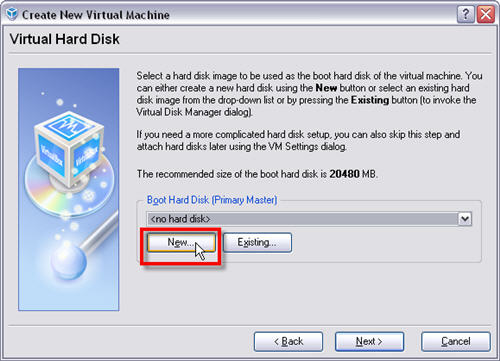
4. The next step requires you to select a hard drive for the virtual machine. As you won’t have any created yet, click on New.
5. Now we’re in the Virtual Disk Creation wizard. Select the type of disk you want – dynamically expanding or fixed size.
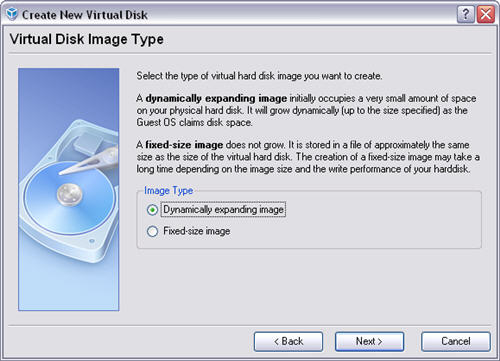
6. Select the size of the hard drive for the virtual machine. Again, this setting depends on your actual hardware components (i.e., the size of your hard drive) and the operating system’s requirements.

7. After creating the virtual disk, you’re back again to the previous wizard. Click on Next and you’ll be done.
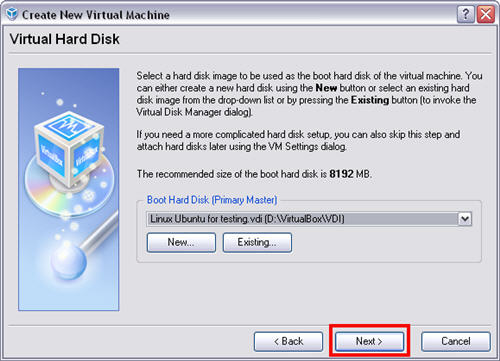
8. The newly created virtual machine now appears on the VirtualBox interface, but still needs some configuration. Right-click on it and select Settings.
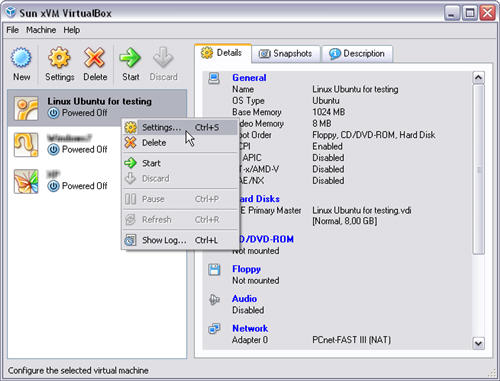
9. Select CD/DVD-ROM on the left-hand menu and enable the Mount CD/DVD Drive option. Then click on the ISO Image File option to select your ISO file.
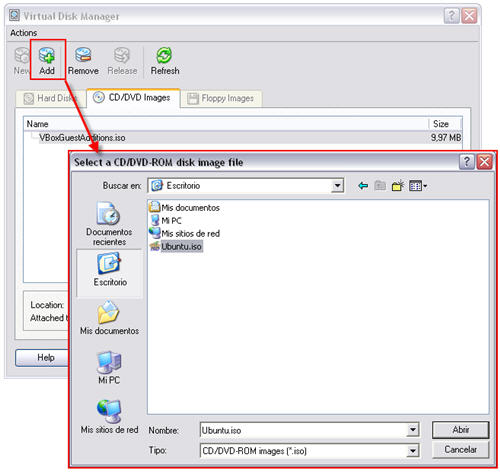
10. Finally, while still on the Settings window, select General on the left-hand menu and configure video memory according to the operating system’s requirements.
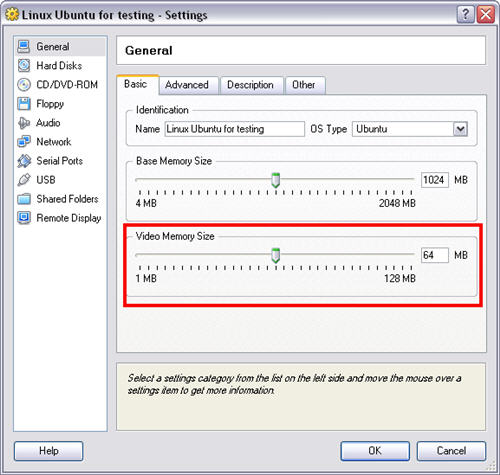
Your new virtual machine is ready to use!
You may also like
 News
NewsAfter two decades of waiting for it, this medieval game that fans kept asking for is back
Read more
 News
NewsWe do not lose faith in the adaptation of 'One-Punch Man'. The project is still going strong, although we will have to wait
Read more
 News
NewsKeke Palmer will star in the adaptation of this 1980s movie
Read more
 News
NewsIf you're a fan of Yellowstone, you can't miss this period series that just premiered on Netflix
Read more
 News
NewsThe surreal stories of Chuck Palahniuk will return to the big screen with this adaptation
Read more
 News
NewsThe director of 'Wuthering Heights' wants it to be the 'Titanic' of a new generation
Read more