How To
How to make your own Android applications
- January 20, 2011
- Updated: July 2, 2025 at 9:05 AM
Making an app for an Android phone is much, much easier than you’d think it would be. Thanks to Google’s user friendly, App Inventor, it’s possible to build Android software with little or no previous programming experience.
The App Inventor adopts a visual approach to development, and no coding is required in order to create with it. A basic understand of computer programming is recommended though, as you will encounter the world of logic, variables and definitions. You can survive without this, however, by following the various tutorials and reference material on Google’s App Inventor site.

How does App Inventor work?
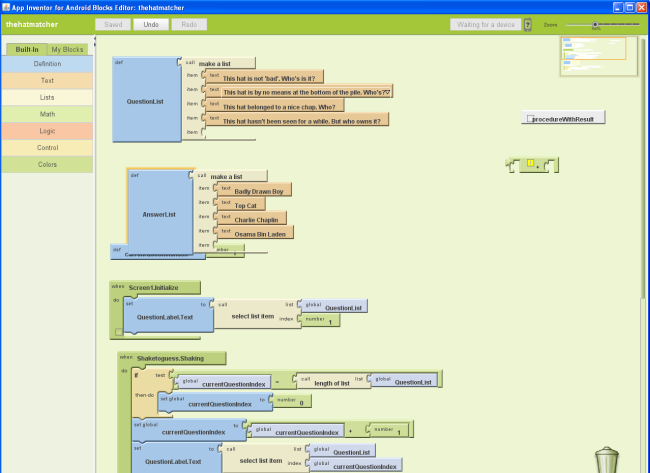
The app development system is divided into three key areas. First, you have the Designer, a browser-based tool where you design how you want the app to look, and add all the physical elements. Then there’s the Blocks Editor, which is used to define the behavior of the application and set its various functions.
You’ll also need Android device, which you’ll connect to your computer in order to test the app as you go. Don’t worry too much if you don’t have an Android phone, because it’s possible to use an emulator for testing.
I would strongly recommend trying out the App Inventor tutorials to get you started. But here is a quick overview of how the whole thing works:
Choose the components of your app using the Designer
Once you’ve downloaded and installed the setup package, you’re ready to start development of your program on the App Inventor web site. Creating a new project will open the Designer, where you need to select the various components that will make up your app.
Components can include anything from buttons and images to video, speech recognition and motion sensors. All the components are divided into categories, to make them easier to find. To add a component to your app, you simply drag it into the Viewer, which represents a rough preview of how the app will look.

You can rename components in the Components section to make them easier to manage, add images and video using the Media section, and adjust the various attributes of each component in the Properties section.
Piece everything together using the Blocks Editor
The Blocks Editor (for which you’ll need Java 6 installed) loads in a new window. This is the part of the App Inventor where you define the behavior of the app. You define functions by piecing together definitions, variables, lists, controls, logic, math and more, using a puzzle piece-style system.
The Blocks Editor contains built-in commands, split into different categories. It also has a ‘My Blocks’ tab, where you’ll find commands and definitions pertaining to the various components you added in the Designer.

As I said earlier, figuring out how to program functions using the Blocks Editor can take some time if you’re new to programming. However, with a bit of trial and error and some help from the excellent App Inventor user guide, you’ll soon be getting more adventurous with your apps.
Test the app on a device
Testing is a key part of the development process. You can easily test your app on an Android phone by hooking up the device to your computer and clicking the Connect button in the Blocks Editor. A fully working version of your app as it stands will be displayed allowing you to test the graphics, the various components and the overall functions of the app.
Package the app
Once you’ve tested your app and are completely satisfied, there are three different ways you can build the app. You can choose to show a barcode, which you can then shoot with your phone’s camera to download the app.
Alternatively, you can download the app to your computer, which generates an .apk file that can be later transferred to a device. The other packaging option is to send the app to the connected phone, which will install it directly on the device.
Publishing
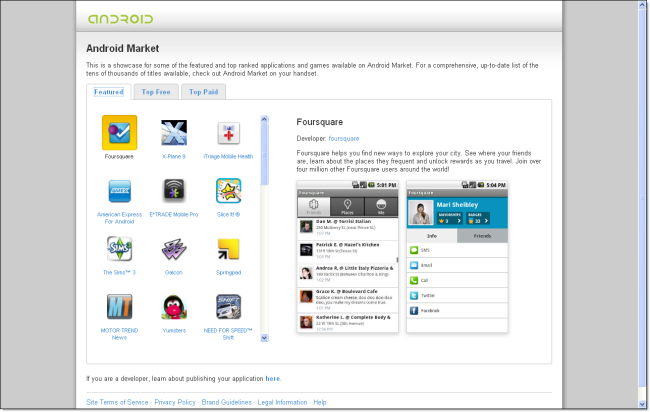
If you’ve made an application that you feel is worthy of publishing on the Android Market, there are a number of considerations you need to take into account before doing so, such as adding end user license agreements, adding support for Android Market Licensing and creating an icon for your app.
For more details on this, and on the process of compiling, signing and publishing your app, go check out the Preparing to Publish section of the Android Developers site.

You may also like
 News
NewsThe best thing that could happen to GTA 6 was that it got delayed, or so says the creator of The Elder Scrolls 6
Read more
 News
News'M3GAN 2.0' has failed so much that it has even canceled the release of its spin-off
Read more
 News
NewsMelania Trump stars in her own documentary, and we already have its trailer. Yes, really
Read more
 News
NewsIs Twitter coming back? Elon Musk tries to stop it
Read more
 News
News'Avatar: The Way of Water' has flopped with critics, receiving the worst rating of the entire saga
Read more
 News
NewsPark Chan-Wook has invited the most famous CEOs in the world to watch his latest movie
Read more