Most current mobile phones integrate cameras that would overshadow the most cutting-edge devices from 10 years ago. The truth is, unless you’re a professional photographer, it doesn’t make much sense to spend thousands of euros if you’re looking for a good camera.
Think about it this way: it’s pointless to have the latest iPhone on the market if you’re not able to fully harness its potential. However, with the right combination of techniques and a few small tricks, you can capture incredible photos and videos on any phone, regardless of its price.
Clean your camera lenses
I’m sure when you read the title, you might have thought, “Really?” And yes, really: when was the last time you cleaned the lenses of your phone? In fact, think about the last time you cleaned your phone in general. Sometimes, when taking photos, they may appear blurry and lacking definition. Before blaming the phone, make sure the lenses are clean and free from dirt.
To clean them effectively, it’s not enough to rub them against your shirt or pants. Use a microfiber cloth, as it won’t leave any residue on the lenses. These cloths are the ones we often find for cleaning glasses, for example. If you want to go the extra mile, use a cleaning product specifically designed for glass and electronic devices (isopropyl alcohol will also work).

Take RAW photos
When taking photos, they are typically saved in the JPEG or PNG format. However, there is another format that not many people are familiar with: RAW. This format helps preserve all the details and information of a photograph, including colors, brightness, sharpness, and more. Shooting in RAW will significantly enhance the quality of the photo and make editing tasks easier.
However, there are several drawbacks to consider. Firstly, RAW photos will be much larger in file size compared to JPEG, for example. It’s also possible that some phones may not allow shooting in this format. Fortunately, most modern Android phones support RAW without any issues. As for iPhones, you can capture photos in ProRAW (Apple’s version of RAW), but it’s only available from iPhone 12 Pro onwards (and with iOS 14.3 or later).
Adjusts focus and exposure
As you may know, when you tap on a point within the camera app, the lens automatically focuses on that area. This simple gesture already ensures a much sharper image by focusing on the desired area. However, this can sometimes result in another drawback. When focusing, the exposure of the photograph adjusts to that specific area and neglects the overall image.
In these cases, it’s always best to manually manipulate the focus and exposure. And for that, lighting is key. If you don’t have good lighting, adjusting the exposure will help overcome this problem. When we talk about exposure, we refer to the amount of light that enters the camera sensor. Too much light can result in overexposed images, while too little light can make them too dark.
Although every phone has its own set of options, on an Android device, you can access manual settings as follows:
- Open the Camera app and tap on a point on the screen.
- A slider will appear next to the focus circle. Drag the sun icon to adjust the exposure.

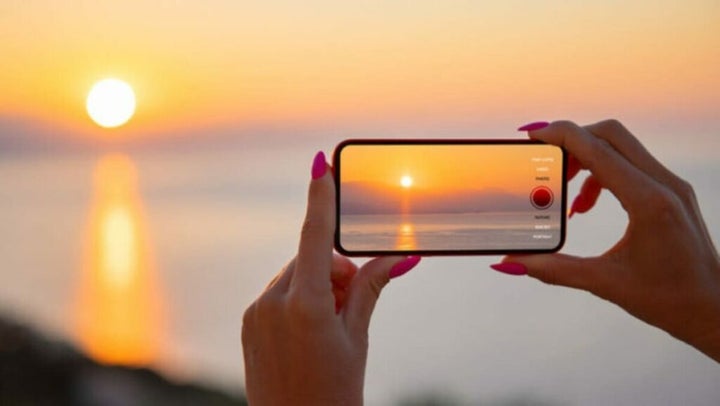
Sunlight will be your best friend
As we mentioned before, lighting is essential for good photography. While exposure and the use of flash can help in specific moments or for certain effects, they can never replace good lighting. That’s why using natural light will always be your best ally.
Naturally, sunlight and the overall environment change throughout the day. With this in mind, it’s crucial to seize the opportune moment. If you want to take outdoor photos, take advantage of the following hours:
- The Golden Hour: This occurs roughly 30 minutes before sunset and after sunrise. The warm tones of the sunset and sunrise will add a special touch to your photographs.
- Midday: If you want to capture landscapes or animals, this is the ideal time. Between 12:00 PM and 4:00 PM, the sun is at its highest point.
- The Blue Hour: Widely known as twilight, it occurs between 20 and 30 minutes after sunset and before sunrise. Unlike the Golden Hour, it produces interesting cool tones.
Play with composition
When taking a photo, define the focal point. Who or what is the main subject? Whatever it may be, make it the most important element in the image. Experiment and change angles to add dynamism or transform how the snapshot is perceived. A good composition will make your photos much more interesting and appealing.
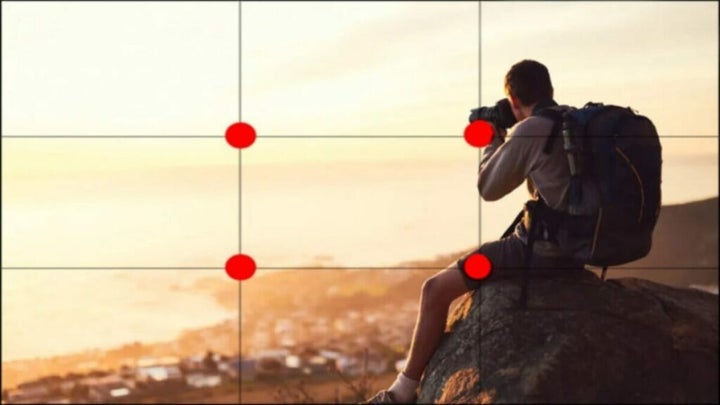
Fortunately, our phones provide a little help with composition: the grid. And as if that weren’t enough, it also helps us apply the Rule of Thirds.
The Rule of Thirds is one of the most basic principles in photography and also one of the easiest to apply. The grid in our Camera app is perfect for executing it. Here’s how it works: the intersections formed by the crossing lines are the strong points. Placing what we want to emphasize in these points will always result in a good photo.
Do not touch the zoom
Despite the capabilities of today’s phones, they lack good optical zoom and instead offer digital zoom. Both serve the same purpose, which is to magnify an area of a photograph without physically getting closer.
However, there are several differences: firstly, optical zoom uses optical lenses to zoom in or out of the image. On the other hand, digital zoom processes the image within the device itself. The result is similar to cropping a portion of a photograph and enlarging it, to put it simply.
The use of digital zoom comes with a drawback: it decreases the quality of the image. That’s why photos taken with digital zoom often appear pixelated and blurry. To avoid this, try to get as close as possible to what you want to photograph. You can always crop and enlarge the desired area when editing your images later on.
Use a good editing application
Editing programs and applications can work true miracles. Even if our phone has its limitations, we can always enhance our photos a bit more through editing.
If you want to apply advanced effects or make significant adjustments, a computer program will always offer more options and capabilities. On mobile devices, photos are usually edited in JPEG format, which results in a significant loss of quality. However, editing on a mobile device is much faster and more immediate.
Regardless, there are plenty of interesting applications available for both Android and iPhone:
Some of the links added in the article are part of affiliate campaigns and may represent benefits for Softonic.