How To
How to Unlock Microsoft Excel in 3 Steps
- May 31, 2021
- Updated: July 2, 2025 at 4:05 AM

Microsoft Excel is a giant in the industry when it comes to storing, manipulating, and presenting data on your Windows or Mac computer. There may be some cases where the data you are working with is confidential, such as financials, password logs, personal details, and more.
As such you may need to apply more security by locking Excel spreadsheets that contain sensitive information. However once the spreadsheet has been protected, how do you unlock it when you need to work on the file? Let’s look at how you can unlock a Microsoft Excel protected worksheet.
Open the Spreadsheet

First off, you will need to open the spreadsheet that you need to work on. You can do this by double-clicking on the file on your computer, or by opening the file directly from Excel.
Unprotect Sheet
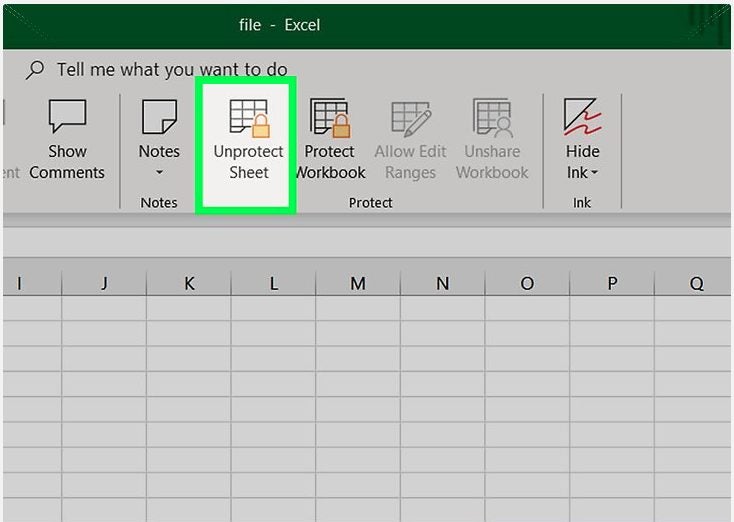
Protected worksheets display a padlock icon next to the tab name in the bottom control panel of Excel. Right-click on the sheet with the padlock to open the context menu with further options. Similarly, if certain cells or ranges of data have been locked they will also show a padlock when hovering over the cells.
In the context menu that appears in the top ribbon of Excel, click on ‘Unprotect Sheet’. If no password was set the file will open automatically. If there was a password set for added protection, move to the next step.
Insert Password
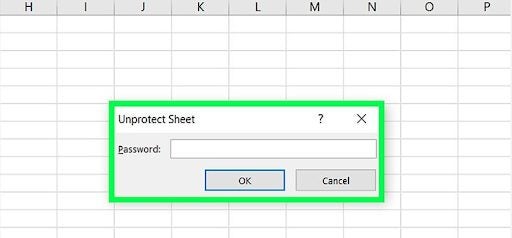
If the worksheet is protected with a password, a window will pop up asking you to input the password. Type in the password and click on ‘Ok’. If the password is correct, the protected worksheet will open.
Be aware that users can protect whole worksheets or even just certain cells or ranges of data within a spreadsheet, but the method of unlocking remains the same.
Keep Sensitive Information Safe, Secure, and Well Protected in Excel
Microsoft Excel makes it easy to keep your confidential information protected by providing options to lock worksheets with passwords. Unlocking is a simple process if you have the right permissions or password on hand.
Microsoft Excel Tips – Top 4
More tipsLatest from Shaun M Jooste
You may also like
 News
NewsAdobe has just acquired Semrush, the leading brand visibility platform
Read more
 News
NewsHe came to solve all our problems with AI, but in the end, it could be the biggest problem of all
Read more
 News
NewsWorking from home? Find out what you need to know to keep your devices safe
Read more
 News
NewsThe new Coca-Cola ad made with AI: Genius or a joke?
Read more
 News
NewsOne of the best science fiction sagas in history will finally have a new series on Amazon
Read more
 News
NewsWe have Benoit Blanc for a while, but he will only have Daniel Craig's face
Read more