How To
Use Snagit to transform screenshots into videos within 5 easy steps
- June 14, 2022
- Updated: July 2, 2025 at 3:39 AM
When you’re trying to demonstrate a particular process, function, or utility to someone who has no previous experience with it, the best way to do so is by using visual aids. If you have to do this on a daily basis like we choose to do with our how-to guides, much like the one you’re reading, you need a proper screen recorder and media management tool. Surprisingly, Snagit can help in that regard.
In the tutorial below, we’ll show you how to use screenshots you’ve taken with Snagit to create a compelling and informative video.
Select your images
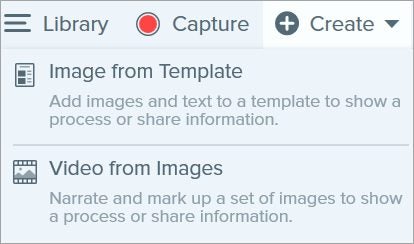
Head to your library or tray where all your images are stored, and then Ctrl-click on all of the images you want to use in your video. If you’re using a Mac, you’ll need to Command-click. Next, you need to hit Create, and then choose Video from Images from the drop-down menu. Click Create Video from Images to confirm this step.
Organize images
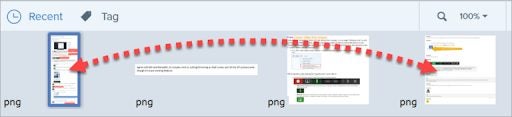
Once you’ve confirmed your selection of images in the previous step, you’ll see the Recording toolbar appear. You’re essentially recording a video composed of the images you’ve selected, so don’t be alarmed by the recorder’s sudden appearance. You’ll also see an interface where you can drag images around to reorder them within the tray.
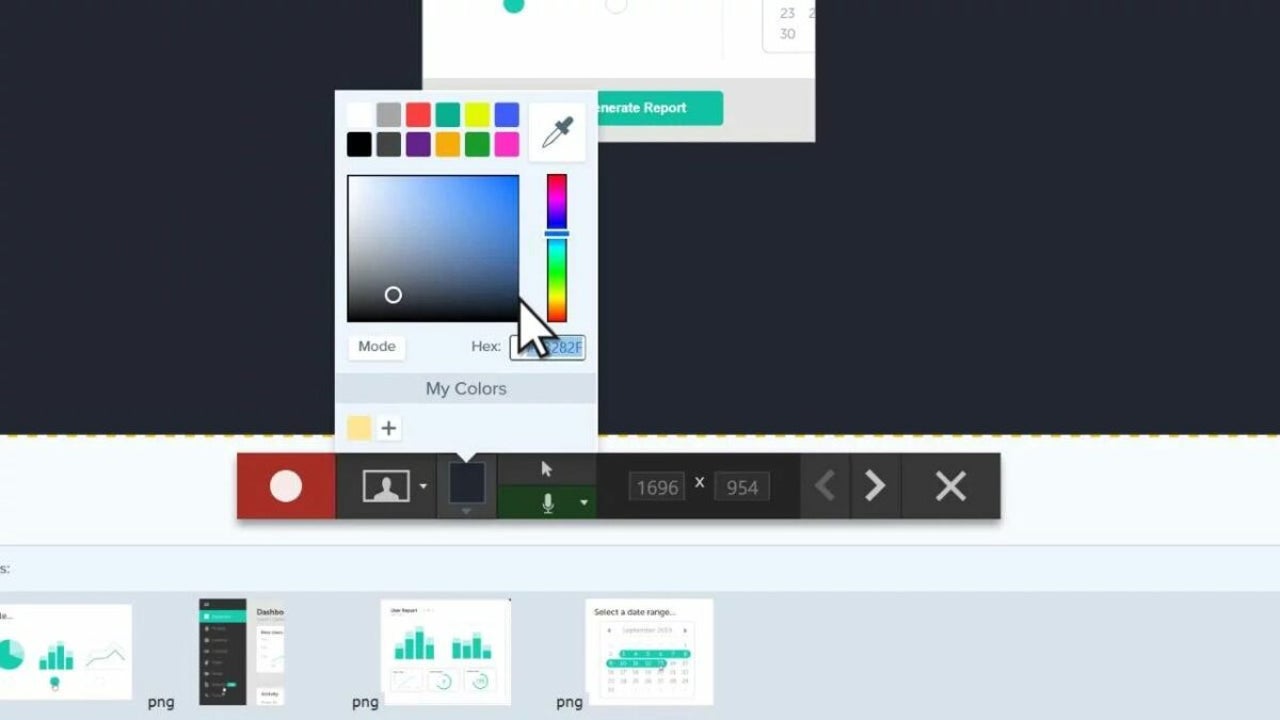
Change settings
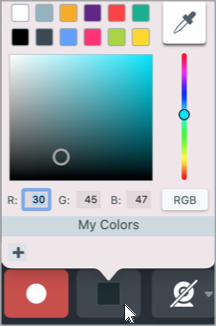
Now, you’ll need to head to the Recording toolbar and select the recording options. From here, you can change the color of the resultant video’s background, among other options.
Pro tip: If you want to increase the contrast of the video, use dark or light colors such as dark blues, pure black, or stark white instead of colours like red or green.
You can also choose whether or not to record the movement of your cursor during the video. Another option is whether to record audio from your PC’s built-in microphone or a third-party external input device such as a microphone connected via USB.
The last options you’ll want to review in this interface all revolve around the actual visual recording. Here, you’ll be able to choose to display the feed from a connected or buit-in webcam during your recording, and whether you want the webcam footage to display as picture-in-picture. If you choose to display your webcam feed this way, you’ll also need to confirm where the picture-in-picture display should appear. You can do this by dragging the sample display to the desired space and then dragging one corner to alter the display’s size.
The recording phase
Once you’ve finalized all the necessary settings, you’re ready to begin recording. All you need to do to initiate a recording is press the red record button picture above. Alternatively, you can also hit Shift+F9 on Windows systems or Control+Shift+Space if you’re using a Mac.
Recording speed
While you’re recording, you have full control over the speed at which the images will change during the video. This is helpful if you’re trying to create a visual asset to use during a speech or presentation. All you need to do is hit either of the arrows pictured above to cycle forward or backwards between your selected images.
Pausing
You can also pause the recording at any time by simply hitting the pause button, also pictured above. Alternatively, you can press Shift+F9 again to pause your recording on Windows, or Control+Shift+Space if you’re using a Mac.
Quick Style banner
There are a few additional features you can use to create a more compelling or demonstrative video. All of these features appear under the Quick Style banner in the toolbar. From here, you can add arrows to specifically direct viewers’ attention to a particular portion of the frame, or you can highlight various parts of the resultant video by encircling them or placing them within a frame. You can also add a whole host of other annotations to increase the visual impact your video has and ensure that viewers focus on what you deem to be the most important parts of the video.
Top tip: Add Quick Styles to your Favorites collection before you begin a recording. This way, you’ll have all your favorite annotations at your fingertips during a recording.
Adjust zoom
If you’re using Snagit within Windows, you can alter the zoom factor or the dimension of the current image if you deem it necessary. Unfortunately, you cannot do this on Mac.
Finish recording
Once you’re happy with your initial recording, you can press the Stop button to cease and save your progress. Alternatively, you can hit Shift+F10 on Windows or Control+Shift+V if you’re using a Mac.
When you’re done, your newly recorded MP4 video will appear in your tray.

Latest from Russell Kidson
You may also like
 News
NewsIf your company has hired a spy from North Korea, this is what you should do according to cybersecurity experts
Read more
 News
NewsIt was announced twelve years ago, but the filming of the movie based on one of Ubisoft's most controversial franchises has just been completed
Read more
 News
NewsSplinter Cell has an upcoming series on Netflix, but if you can't wait, we have some novels to recommend to you
Read more
 News
NewsSilent Hill f has not officially been released yet and it already has a mod to remove the most distinctive feature of the franchise
Read more
 News
NewsIf you like Pixar and you like farming games, a game made specifically for you has been presented at the Tokyo Game Show
Read more
 News
NewsDisney+ raises the price of its subscription again after a bitter controversy that shook the entire US
Read more