News
Effortless Inbox Management: 5 Essential Tips to Clean Up Your Gmail and Stay Organized

- April 11, 2023
- Updated: July 2, 2025 at 2:33 AM
As a good Gmail user, you have probably noticed that there are two types of people: those who keep every millimeter of their inbox organized and those who accumulate emails without a tomorrow. If you belong to the second group but want to improve, don’t worry: today, we are going to show you 5 tips to organize your Gmail inbox like a pro.
Thanks to these 5 tips, managing your email will be less tedious and will also help you save a lot of time. In an increasingly digitized world, having a well-organized inbox has become more and more a necessity, regardless of whether it is for personal or professional use. So don’t go away, let’s start with the first tip:
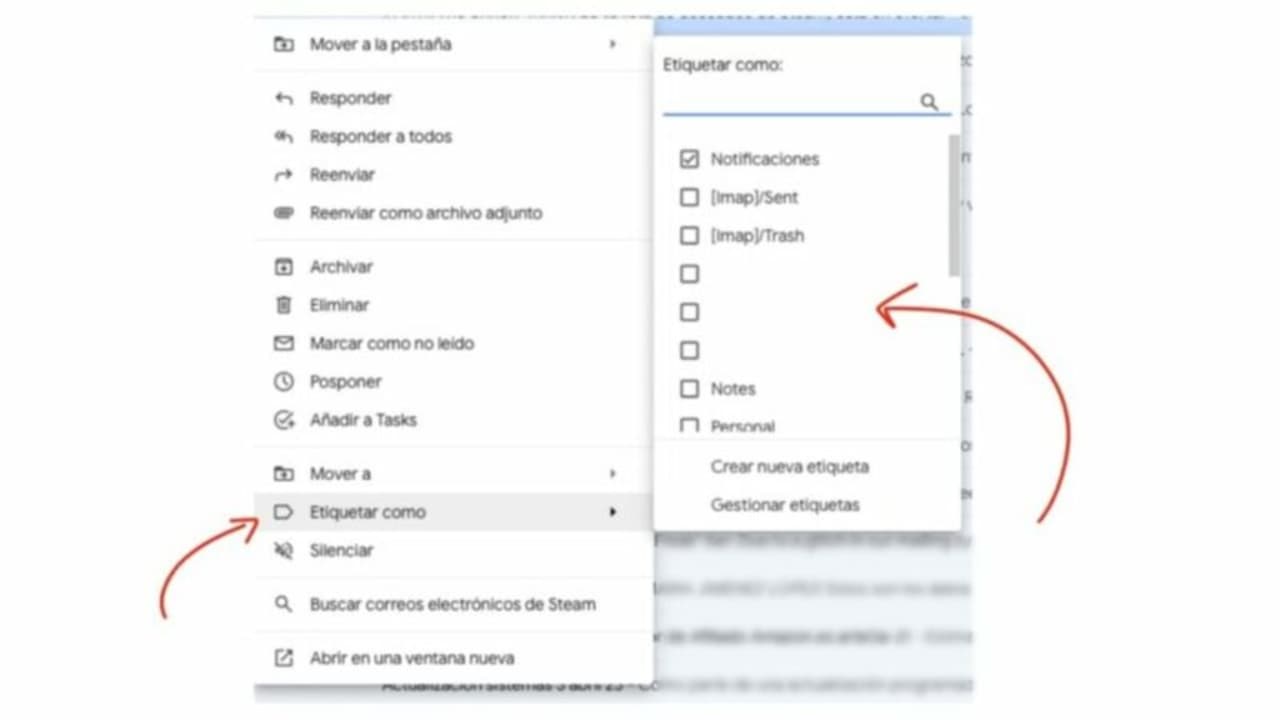
Label the emails
This is the first thing to keep in mind. Properly labeling your emails will help you find them easily. In addition, you can give more than one label to emails which makes it even more useful. If you don’t know how to tag emails, follow these steps:
- Go to Gmail and select an email you want to label.
- Right-click on that email and look for the Label As option.
- Once inside, you can choose from existing labels or create a new one from scratch.
And in case you didn’t know, you can also use hashtags to organize them. These work in a similar way to tags and serve the same purpose: to optimize searches in your inbox. You can add as many hashtags as you want, so keep that in mind in case you want to organize your emails this way.
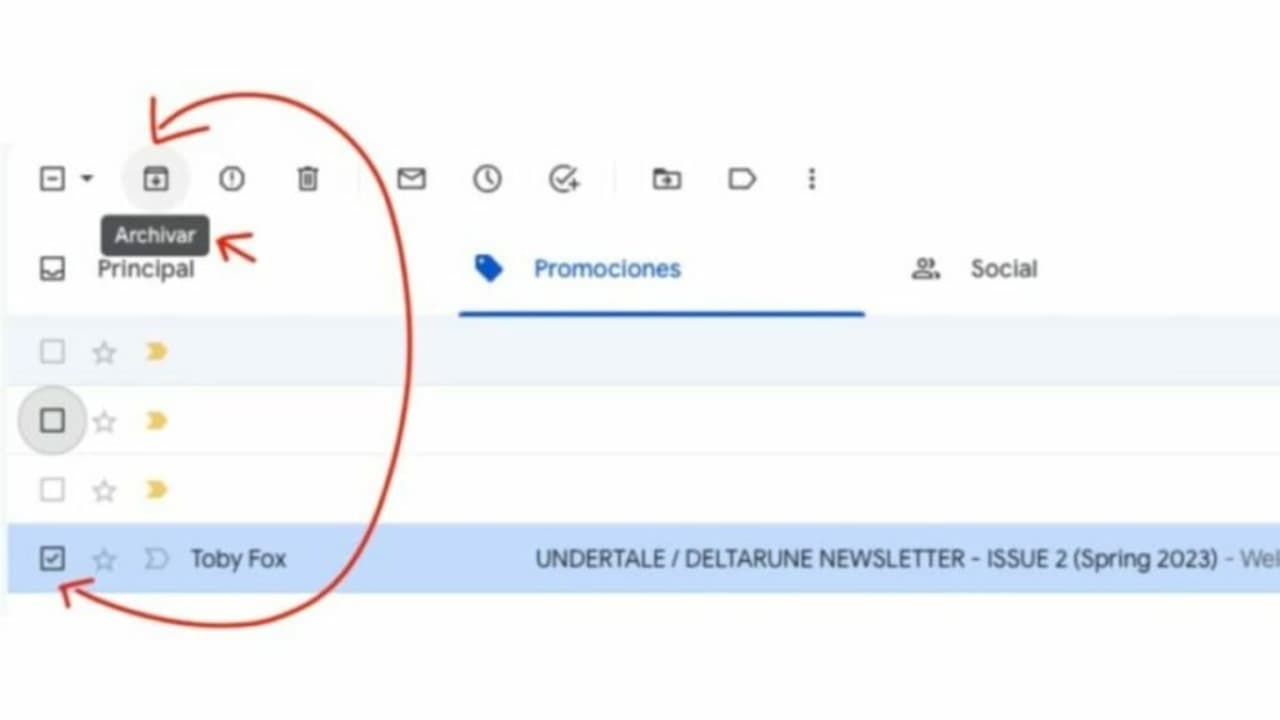
Archive whenever you can
A very good way to organize your Gmail is to archive the emails you don’t need. This is a very useful option in case you do not want to delete them in case you need them in the future. Basically, Google offers free of charge to all its users 15 GB of storage distributed across the entire Workspace suite (Gmail, Google Drive, Google Sheets, etc.). To archive you just have to:
- Go to your Gmail account and locate the emails you want to archive.
- Now, select the small square you will see at the top of the email, right next to the star symbol.
- Go to the top and look for the second icon starting from the left, as shown in the screenshot. This option will allow you to archive the email. In addition, you will not have to do it one by one, as you can select several at once.
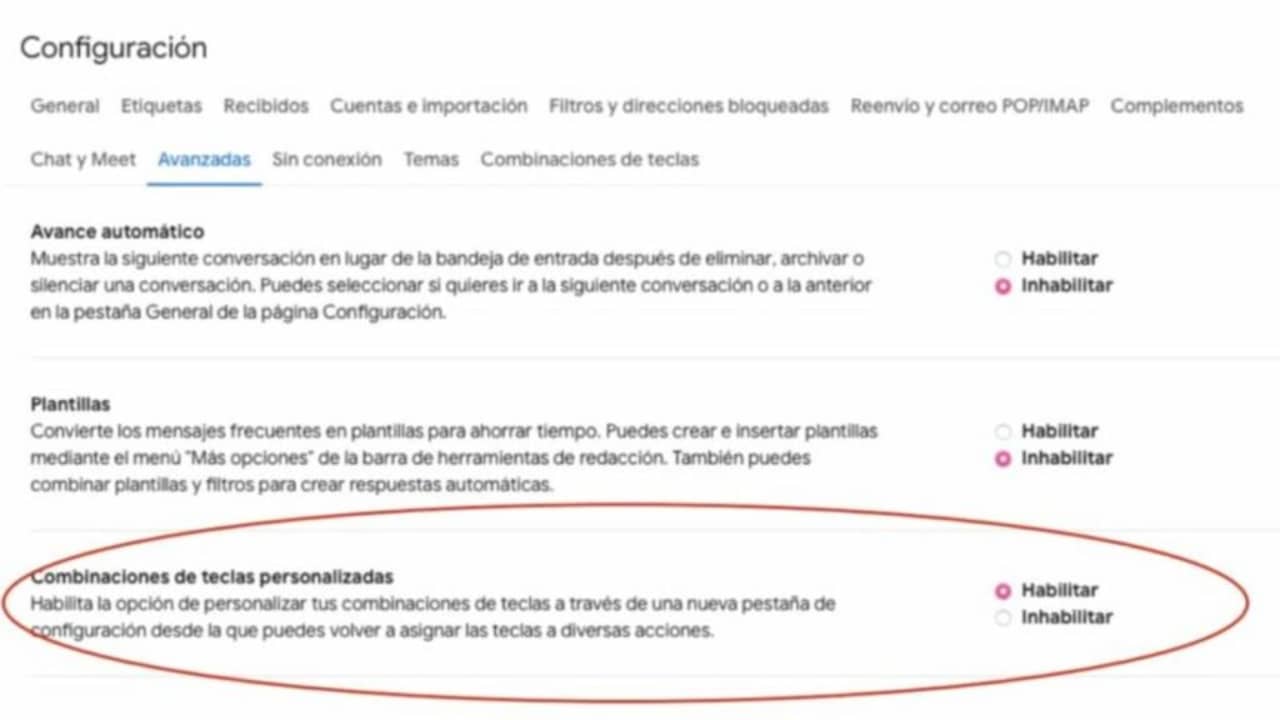
Do not underestimate shortcuts
While many still prefer to use the mouse the old-fashioned way, keyboard shortcuts are there to help you and optimize your time. Gmail has a series of shortcuts that once you get used to using them, you won’t want to use anything else. However, you will have to enable them first:
- Go to Gmail from your PC and select Settings (located at the top right). Then select View all settings.
- Click Advanced and look for the Keyboard shortcuts section.
- Select Enable shortcuts.
- Finally, click Save changes.
Well, that’s it: you can now use keyboard shortcuts in Gmail. Here are a few that will be very useful:
- Send mail: ⌘/Ctrl + Enter
- Insert a link: ⌘/Ctrl + k
- Spelling suggestions: ⌘/Ctrl + m
- Next message in an open conversation: n
- Previous message in an open conversation: p
- Make words bold: ⌘/Ctrl + b
- Italicize words: ⌘/Ctrl + i
- Delete formatting: ⌘/Ctrl + \
- Remove mail: #
- Mark as spam: !
- Forward: f
- Mark as read: Shift+i
- Mark as unread: Shift + u
- Archive: e
- Go to inbox: g+i
Create a second Gmail account
One of the main reasons that makes our email impossible to manage is that we receive both personal and work emails in the same place. If you want to separate your personal and professional life, it is best to consider having different Gmail accounts for each.
In addition, you can combine two different Gmail accounts to have everything in one place. If you want to add an additional Gmail account, just follow these steps:
- Click on Settings and then, in the top menu, look for the Forwarding and POP/IMAP mail option.
- Click on the Add a forwarding address option, type in your alternative address and click Next.
- Now, you will see a pop-up window where you will have to click on Continue. Afterwards, you will have to validate the process through the confirmation email that will have been sent to the alternative account.
Some of the links added in the article are part of affiliate campaigns and may represent benefits for Softonic.
Image base: Freepik

Artist by vocation and technology lover. I have liked to tinker with all kinds of gadgets for as long as I can remember.
Latest from María López
- Color Theory and AI: How To Create Perfect Palettes Every Time
- Adobe Premiere Pro: Using Generative Extend to create custom ambient audio and room tone
- One-Touch Landscapes: Enhancing Skies, Subjects, and Backgrounds with Scene Enhance on Mobile
- The 15-Minute Project Setup: Building and Using Custom Project Templates in Premiere Pro
You may also like
 News
News1 in 3 Android apps have serious API leakage issues, according to a recent study
Read more
 News
NewsThe rise of fake captchas: a new weapon for cybercriminals
Read more
 News
NewsGoogle disables the 100 results per page feature and leaves users stunned
Read more
 News
NewsThe second season hasn't even premiered yet, and Disney+ has already renewed this superhero series for a third one
Read more
 News
NewsIs Hollow Knight: Silksong too difficult? Its creators defend that it is not
Read more
 News
NewsMicrosoft teams up with ASUS to launch ROG Xbox Ally and compete with Steam Deck
Read more