Article
Try Google’s Android mobile OS on your PC
- July 30, 2008
- Updated: July 2, 2025 at 9:28 AM
 With all the hype surrounding the iPhone and the fact that its AppStore seems to be doing so well, it’s easy to forget that there’s another new mobile Operating System in town. Android is Google’s version of a next generation mobile OS, and while it’s not actually available on any mobile handsets at the moment, you can still try it out yourself for free.
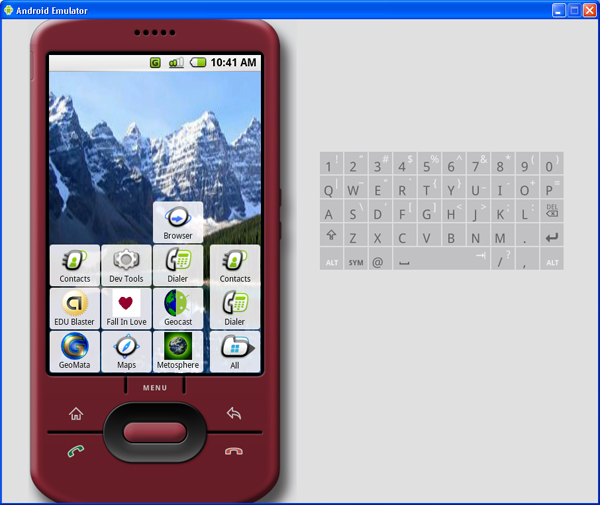
The Android emulator allows you to do almost everything you would do on a real device running the OS. You can have a peek at the operating system environment, test out the default applications and install new ones, simulate phone calls and access the Web. Here is a guide to running and installing the Android emulator, courtesy of our friends at OnSoftware Spain.
1. Download the SDK
The first step is to download the emulator, which is included as part of the Android SDK. You can download it from Softonic, or from the official development page on Google.
2. Unpack the Archive
Once downloaded, unpack the Zip file into a folder somewhere on your hard drive, such as: “C:\Program Files\Android SDK”. Open the folder and you’ll see that it contains a whole bunch of files and folders. What we’re interested in at the moment is the file “emulator.exe”, which you’ll find in the “Tools” folder. Open this by double-clicking on it.
3. Running the emulator
After opening the emulator you’ll be able to play around with its various built-in features. You can surf the Web using the Browser, try out the phone functionality using the Dialer, or check out the cool Maps feature. There are a few other applications installed on there by default, so have a play around with them yourself.
4. Installing software
Unfortunately, installing applications on the Android emulator is quite a long-winded affair. It’s not that difficult, but it does involve tweaking a Windows system setting and working with the Windows terminal.

You first need to add the format for Android programs – .apk – as a variable in your Windows environment. Head to the Windows Control Panel, double-click the System icon and highlight the Advanced tab. Now click the Environment Variables button and click ‘New’. In the ‘Variable name’ field type “PATH”, and in the ‘Variable value’ field enter the route to the place you unpacked the SDK (in this case C:\Program Files\Android SDK). Confirm the changes.

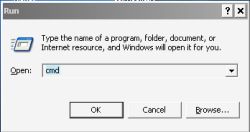
Now let’s install some software. Make sure the emulator is running (see above) and enter the Windows terminal by pressing Windows+R. Type “cmd” to launch the command prompt. Now you’ll need to get to the “Tools” folder, which you can do by entering:

cd..
cd..
cd Program Files
cd Android SDK
cd Tools
Now move the Android application you want to install (it should be an “.apk” file) to the ‘Tools’ folder within your Android SDK folder. To install the app into the emulator we need to enter another command into the Windows terminal.
adb install programname.apk
(where programname is the name of the application you wish to install). Go back to the Android emulator and you should be able to launch the program by clicking on its icon. Have a look at the Go to Android site for some top software to try out.

You may also like
 News
NewsThe best time travel movie you don't know arrives today on Netflix
Read more
 News
NewsAfter two decades of waiting for it, this medieval game that fans kept asking for is back
Read more
 News
NewsWe do not lose faith in the adaptation of 'One-Punch Man'. The project is still going strong, although we will have to wait
Read more
 News
NewsKeke Palmer will star in the adaptation of this 1980s movie
Read more
 News
NewsIf you're a fan of Yellowstone, you can't miss this period series that just premiered on Netflix
Read more
 News
NewsThe surreal stories of Chuck Palahniuk will return to the big screen with this adaptation
Read more