How To
How to split up a large file with WinRAR

- November 29, 2022
- Updated: July 2, 2025 at 3:18 AM

There are so many reasons that WinRAR is regarded as one of the best file compression tools to have at your disposal. One of those reasons is that you can use one to split up large files into several smaller ones. This is particularly useful if you intend to distribute files and want to make them easier for a recipient to download.
It’s so easy to use WinRAR to split up big files that it only takes three simple steps. So sit back and relax as we compress the three easy steps of decompressing large files.
Splitting up large files with WinRAR
Before you can make use of the exceptional compression and decompression power, you need to download WinRAR. As with all software that we review, we have a handy link that will take you directly to the download page. Once you’re on the download page, all you need to do is choose a version of WinRAR compatible with your operating system and click download.
The installation process is criminally easy and only requires you to accept an end-user license agreement and select an installation location on your device’s hard drive. WinRAR is a premium software, but you do have a limited time-free testing period within which you can use the software and decide if you want to buy it outright. With that little bit of administration handled, let’s get into the three simple steps of using WinRAR to decompress large files.
Location, location, location

The first step to splitting up large files with WinRAR once you’ve downloaded the utility is to locate the file you’d like to split. Once you’ve located your file, right-click on it and select Open With, and then choose WinRAR from the list of associated apps. In WinRAR, head up to the toolbar and hit Add to add the file to a new archive. You could also select Add to Archive from the right-click context menu as a shortcut.
Compress

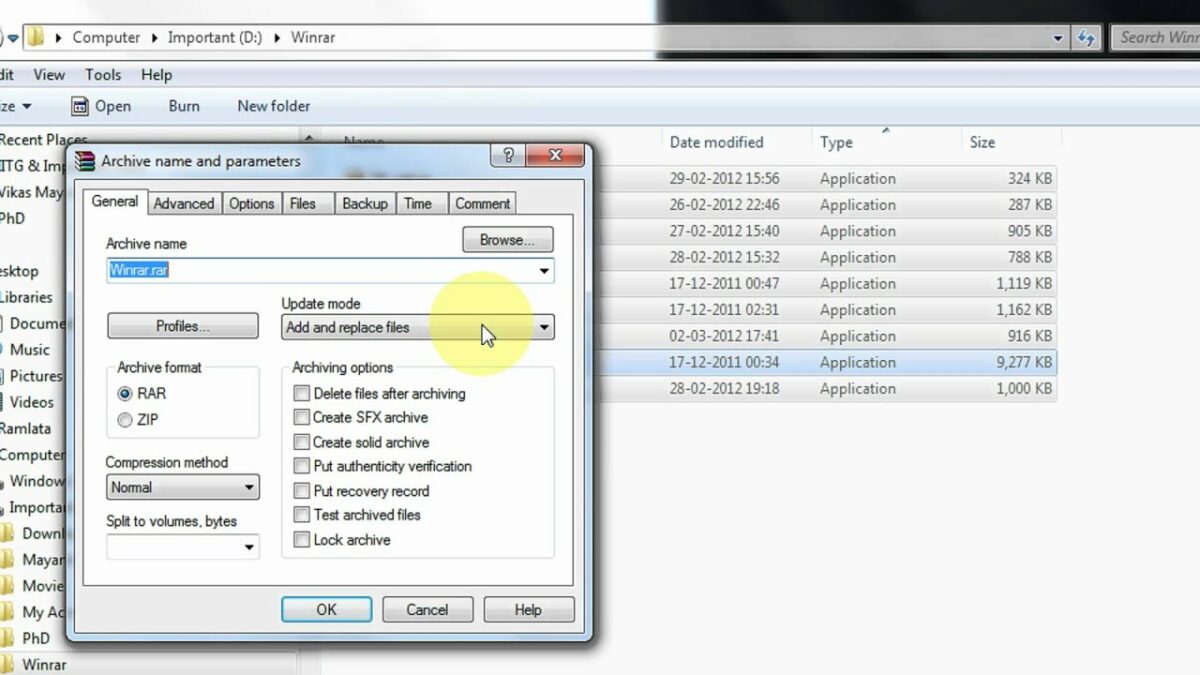
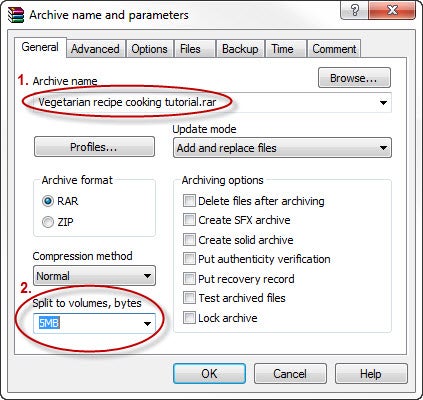
You should now see an archive name and parameters interface. This is where you’ll be able to choose how small to make each file and define any other parameters you’d like to apply to the archive.
First, rename your archive. If you don’t want to choose another name, you’ll see WinRAR has already suggested a name for the new archive.
Next, head to Archive format and choose whether you’d like the new archive to be saved as a .rar, .rar4, or .zip.
Lastly, you’ll need to head to Split to volumes, size, and then define how large to make each individual smaller file. You can also select a volume from the drop-down list. Once you’ve set the necessary parameters, click OK, and your folder will be split up and filed in the newly-defined archive.
Extract

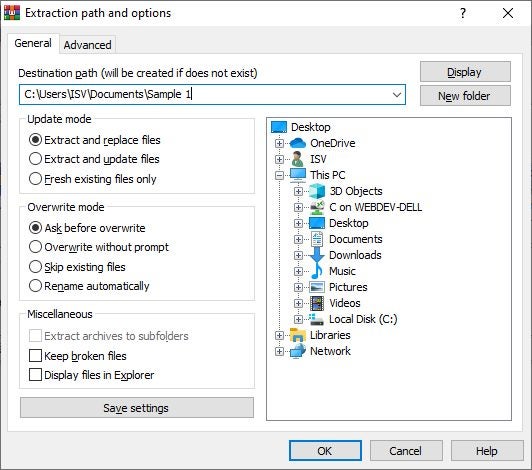
This last step will take place on your target device. All you need to do is extract the compressed file as you usually would, and you’ll see that the original file has been split into smaller files for easier transmission.
Pro tip: If you intend for the new archive to be functional on computers that don’t have WinRAR installed, save your archive as .zip. While .rar can only be opened and extracted by WinRAR, .zip can be extracted by any archive tool, such as 7zip, a free alternative to WinRAR.
Get the most out of file compression
Even though WinRAR is a premium software and you need to pay for access to advanced features like splitting files by volume, this is still one of the best file compression utilities in use. In fact, WinRAR has been one of the most popular utilities for file compression and decompression since before the glory days of Windows XP. Sadly though, WinRAR no longer carries support for devices running on the now outdated Windows XP OS.
On the brighter side, though, WinRAR has recently undergone a rather extensive update that has resulted in the utility performing better than before on Windows 11. This update is also one of many that the utility has undergone since 2019, when a 20-year-old WinRAR vulnerability was identified that could give third-party threat actors complete control over a victim’s computer.
To get the most out of this file compression program, check some of our other guides:
Latest from Russell Kidson
You may also like
 News
NewsVince Gilligan's new series has shattered all viewing records on Apple TV
Read more
 News
NewsStar Citizen is one of the great space video games and its origin is a B-movie
Read more
 News
NewsFallout 4 receives a huge new expansion, although it is not brought to us by Bethesda
Read more
 News
NewsThe Teenage Mutant Ninja Turtles will receive a new live-action movie, although not without some buts
Read more
 News
NewsDragon's Dogma 2 is one of the most divisive games in recent years, it has reached a tremendous sales milestone
Read more
 News
NewsBrendan Fraser is delighted to make a sequel to this movie 20 years later
Read more
