How To
How IFTTT works and its top features: part 2
- February 16, 2018
- Updated: July 2, 2025 at 6:39 AM
Earlier we told you all about IFTTT, so now it’s time for the second part of our guide: how IFTTT works. Have your paper and pencil at the ready – or save this post in your favorites, another nice option – and take a few minutes. Here comes the good stuff.
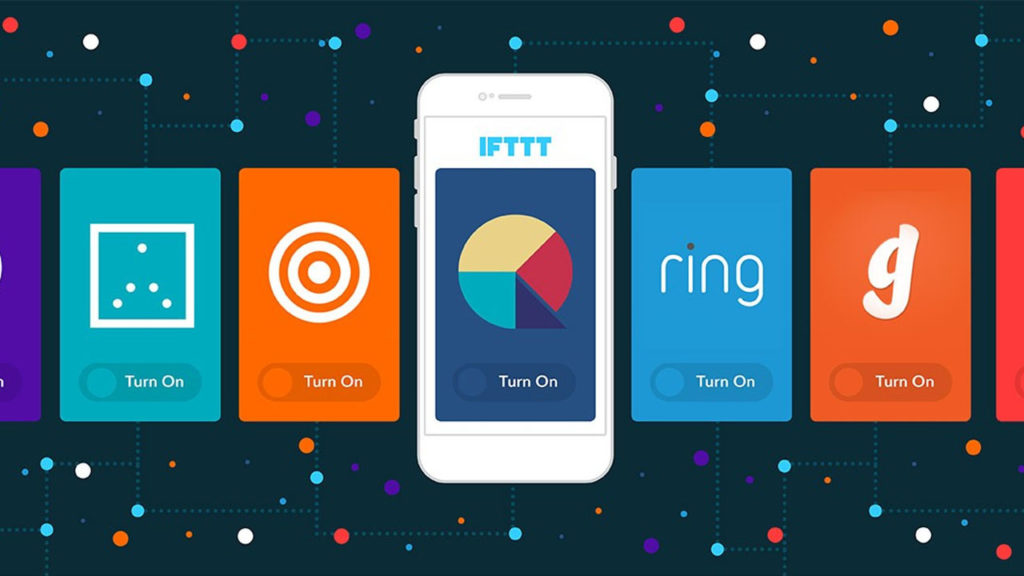
All about IFTTT
Read Part 1How to create applets
As we mentioned in the first part of this guide, what’s important about IFTTT is its functions and applets, i.e., the linking mechanisms created between different services. Is it hard to do? Not at all: in fact, you can do it in a matter of seconds.
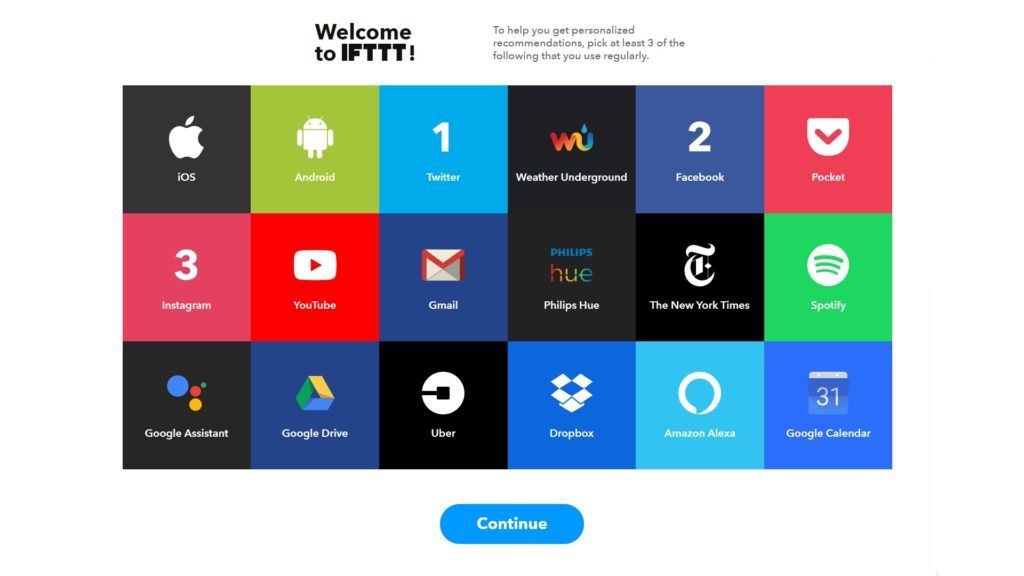
First of all, open an account with IFTTT. There are three ways to do this: with an exclusive username, logging in with your Google account or getting access through Facebook. You call the shots, of course. Once this is done, a welcome screen will pop up where you can choose three platforms you regularly use. We’ve opted for Twitter, Facebook and Instagram, the three most popular social networks in the world at the moment.
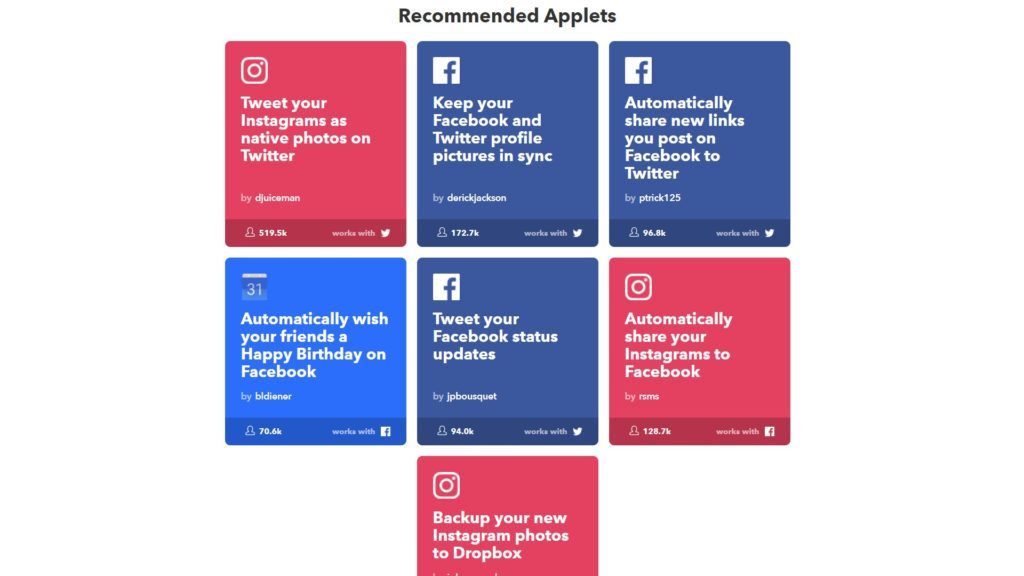
Once you’ve chosen the networks, IFTTT will bring you back to a screen where you can choose the most recommended applets for these apps. For example, the first one that appears in our recommendations is great: “Tweet your Instagrams as native photos on Twitter.” With this applet, every image on the first social network will be published on the second as a full image and not a link (which is common). Click on it and simply toggle the Off button to On. No tricks here.
If you click on the top where it says search, you can look for all the applets that are already created by the community. This way, you can streamline your processes and also discover new applets that are very original. However, can you create a function from scratch? The answer is yes.
To do this, we have to go to creation mode, which is nothing more than adding /create to the end of the main URL (here you’ve got direct access). From here, the following screen will show up:
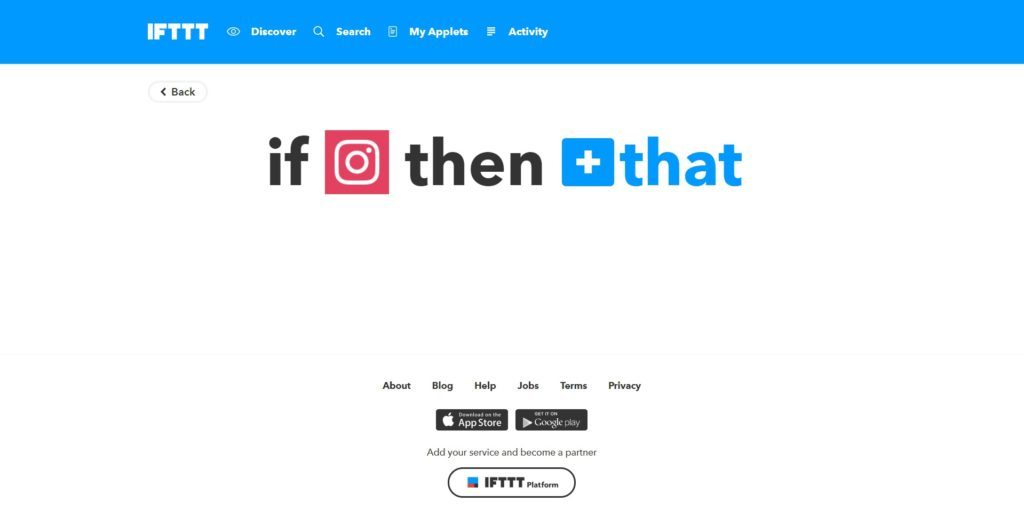
As you can see, everything is pretty intuitive. In the first section, we put the service where this will occur and the second where that will. So, if we wanted to recreate the previous example, we would only have to select Instagram for the first and Twitter for the second.
We should mention that every time you click on a specific social network, it will show you applets already associated with it. Returning to our example, when we first chose Instagram, it will take us directly to this function on a long list. This also happens with the second platform involved, though with more personalization options (you can add how the tweet looks, the link placement, etc.)
Once this is done, click create and don’t forget to switch the button to ON so it works perfectly. In fact, we encourage you to publish a test image on Instagram to see it post directly to Twitter as a native photo.

Journalist specialized in videogames and technology. Almost two decades dedicated to it.
Latest from Nacho Requena Molina
You may also like
 News
NewsEven the Louvre Failed at Cybersecurity — Here’s How You Can Do Better
Read more
 News
NewsAI has been responsible for 50,000 layoffs in 2025: what can we expect in 2026?
Read more
 News
NewsValve will stop producing one of its most popular models of Steam Deck
Read more
 News
NewsA Korean thriller that promises to take over this Christmas arrives on Netflix unexpectedly
Read more
 News
NewsThis Transformers game will disappear from Steam at the end of the year, but you can buy it at a ridiculous price before that happens
Read more
 News
NewsOne of the great directors in the history of cinema has passed away
Read more