How To
How to create a backup system image with Windows 10

- May 17, 2018
- Updated: July 2, 2025 at 6:29 AM

We’re all taught about the importance of a daily routine (brushing and flossing) for dental hygiene. But how much thought have you given to your “backup hygiene”? Backing up your PC gives you a safety net, keeping your data secure even when your computer fails.
When asked “How often do you back up all of the data on your computer?”, 26.3% of people said they back up data once a year, according to Backblaze, a provider of cloud backup and storage services. Another 21.2% have never backed up their systems. In over a decade of conducting their survey, there has actually been an increase in the number of people who say they only back up on an annual basis.
The first step to safeguarding your computer’s data is creating a backup system image. We’ll show you how to do this in Windows 10.
How to create a backup system image with Windows 10
Why a backup plan is essential
Perhaps the availability of cloud-based storage services has led people to think they don’t need to bother with backing up their Windows systems – but they should. Having a good backup plan is essential to avert disaster. Apart from protecting ourselves from hardware or software problems that inevitably arise, having a full backup is part of your security system, too.
For instance, there’s a growing prevalence of ransomware that locks down users’ files. Thieves demand money in return for giving back access to your data, but research suggests that in most cases, giving money never results in regaining access. The best course of action? Have a backup of your system image at the ready, and do a fresh re-install of the Windows OS, your applications, and files from a point in time from before your system was infected.
What is a system image?
There are a number of terms used to describe the process of backing up computers. While a “full backup” sounds like it would save everything, it’s not the same as a system image. A full backup contains all the data in files and folders that are selected to be backed up.
A system image is a copy of the whole disk drive, including all the settings, programs and files needed to run Windows. As such, it requires more storage space and takes longer to conduct than a backup of documents and pictures, for example. Another difference: With a system image, you can’t pick and choose individual files and programs to back up; you copy everything at one sitting.
Because of the time and storage space requirements, a system image might be best done on an annual or semi-annual basis for a typical home user. Creating a system image would be done in addition to regular backups of frequently used files (pictures, documents, videos, and music) should be done separately on at least a monthly or weekly basis.
Steps to create a backup system image
Before starting, decide where you are going to store your system image. Although it is still possible to do a backup to recordable DVDs, it’s more convenient to store to a local hard disk drive or remote cloud storage. Our recommendation: a hard drive you have in hand is easier to use. If you are trying to restore a whole Windows system from a cloud storage service, remember that you are downloading data over the internet. Data transfer speeds could lengthen the amount of time required to get back up and running.
Step 1: Open the Settings window from the Start menu.

Step 2: Search for Backup settings.
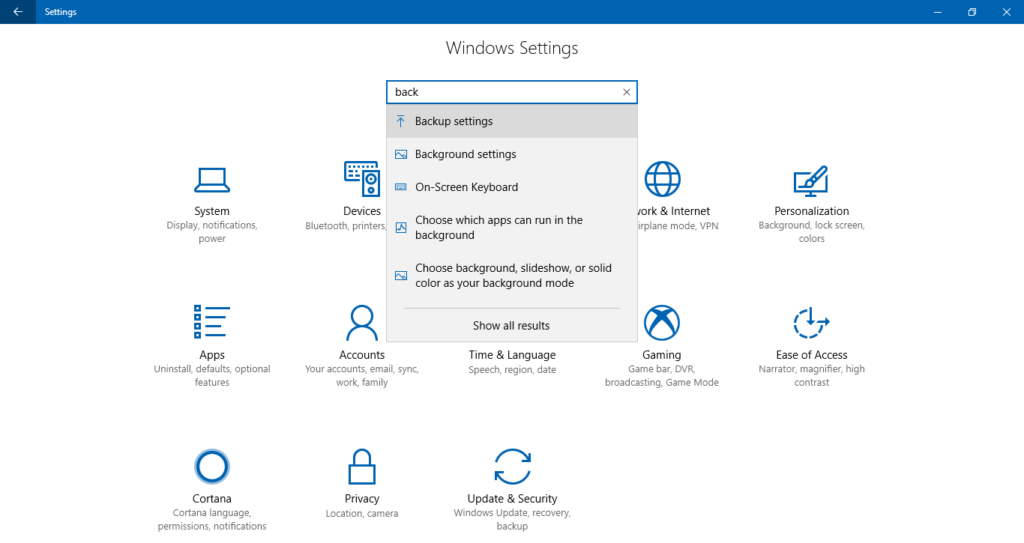
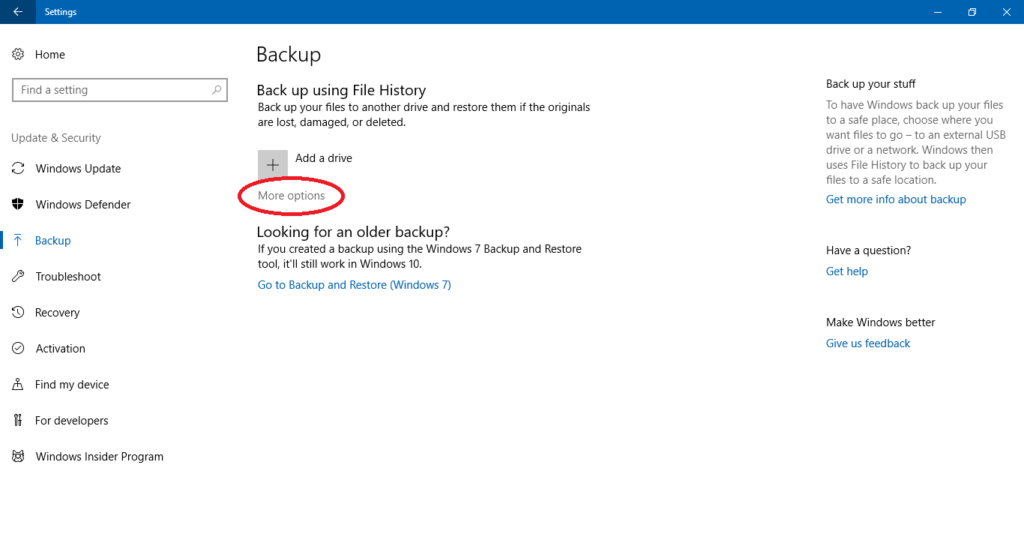
Step 3: Navigate to More options and click.
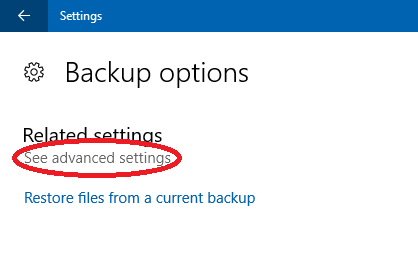
Step 4: Next, click on See advanced settings.
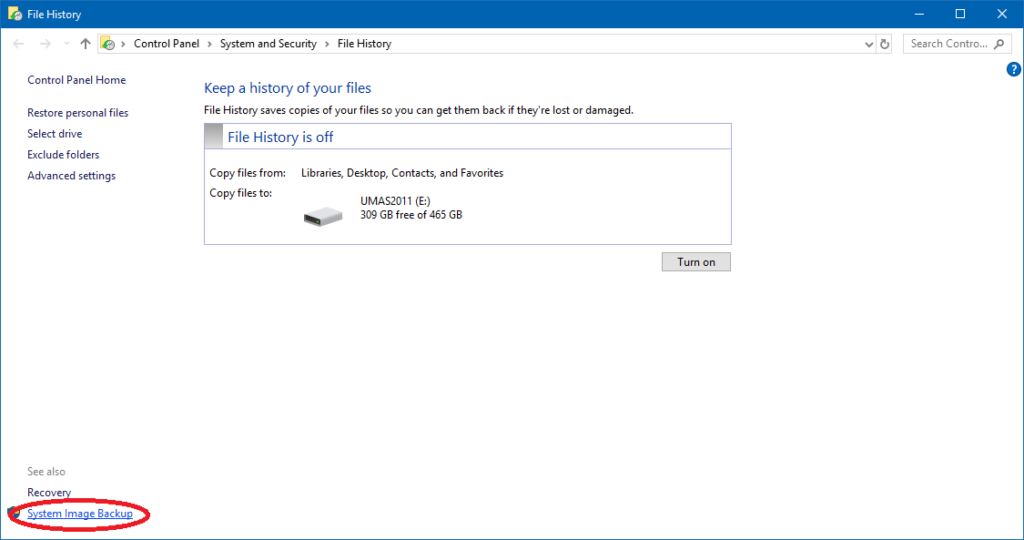
Step 5: Select System Image Backup from the bottom left of the window.
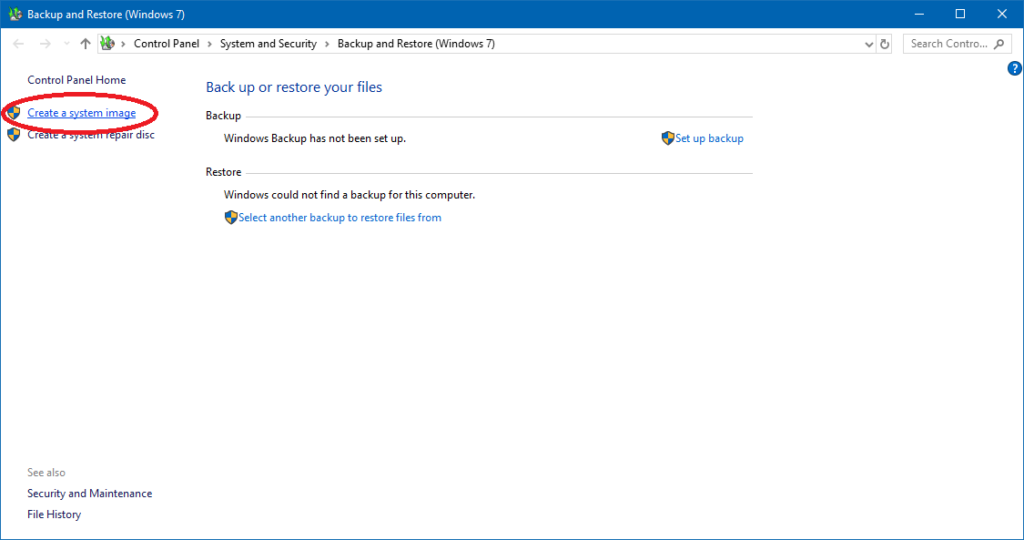
Step 6: Click on Create system image from the left panel.
Step 7: Your PC will scan for drives or disks to save the image to.
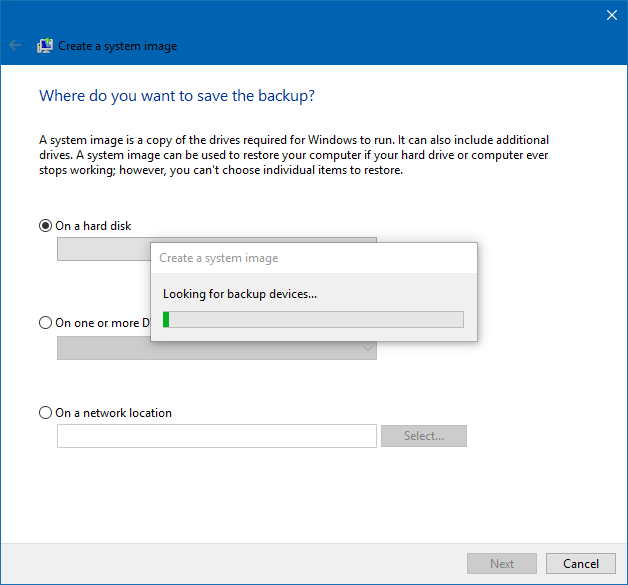
Step 8: Be sure to select the drive you wish to save the system image to from the drop-down menu, then click Next.
Given the relative affordability of high capacity hard drives, it’s convenient to have a drive dedicated to only storing your system image.
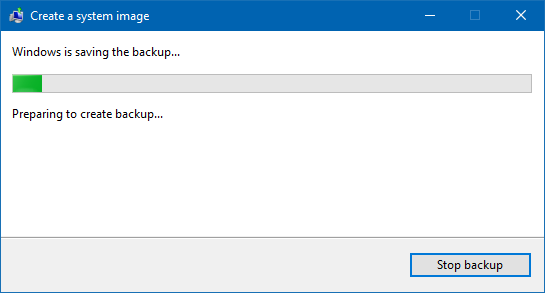
Step 9: Your computer will begin the backup.
Be patient! Be sure not to turn off your PC or unplug the external drive you are using or else you will interrupt the backup process. Don’t be surprised if the procedure lasts 30 minutes or more – how long depends on the amount of data stored on the source drive. Eventually, you will have the system image backup you need for peace of mind. And remember, set your calendar and make a backup on a regular basis.
You may also like
 News
NewsChatGPT Wrapped: a year-end review of how we use AI
Read more
 News
NewsWhat if there were a solution for the sale of Warner that satisfied both Netflix and Paramount?
Read more
 News
NewsThe director of Fallout: New Vegas is not a fan of how Dungeons & Dragons is represented in Stranger Things
Read more
 News
NewsSigourney Weaver believes that this cult science fiction movie did not succeed because they tried to make it for all audiences
Read more
 News
NewsSteven Spielberg thought that John Williams was laughing at him when he heard the most iconic melody in the history of cinema for the first time
Read more
 News
NewsSony presents a patent to change video games in real time… and that is concerning
Read more